本节内容,来自Metal for OpenGL Developers(Presentation Slides (PDF))
关联阅读:
- WWDC2019_Bringing OpenGL Apps to Metal
- Migrating OpenGL Code to Metal
- Mixing Metal and OpenGL Rendering in a View
Thank you. My name is Dan Omachi, I'm an engineer in Apple's Metal Ecosystem Team. Now my main role on that team is to help developers learn Metal and have a great experience using it. But prior to this I worked on Apple's OpenGL and OpenGL ES frameworks for many years. And even before joining Apple I worked on a couple of other OpenGL implementations. So I'm really proud of what we've accomplished with OpenGL over the past years, but I'm also really excited about the direction Metal's taking us. Today my colleague Sukanya Sudugu and I are going to give you a brief introduction to Metal and provide some guidance about how you can easily port your OpenGL apps over.
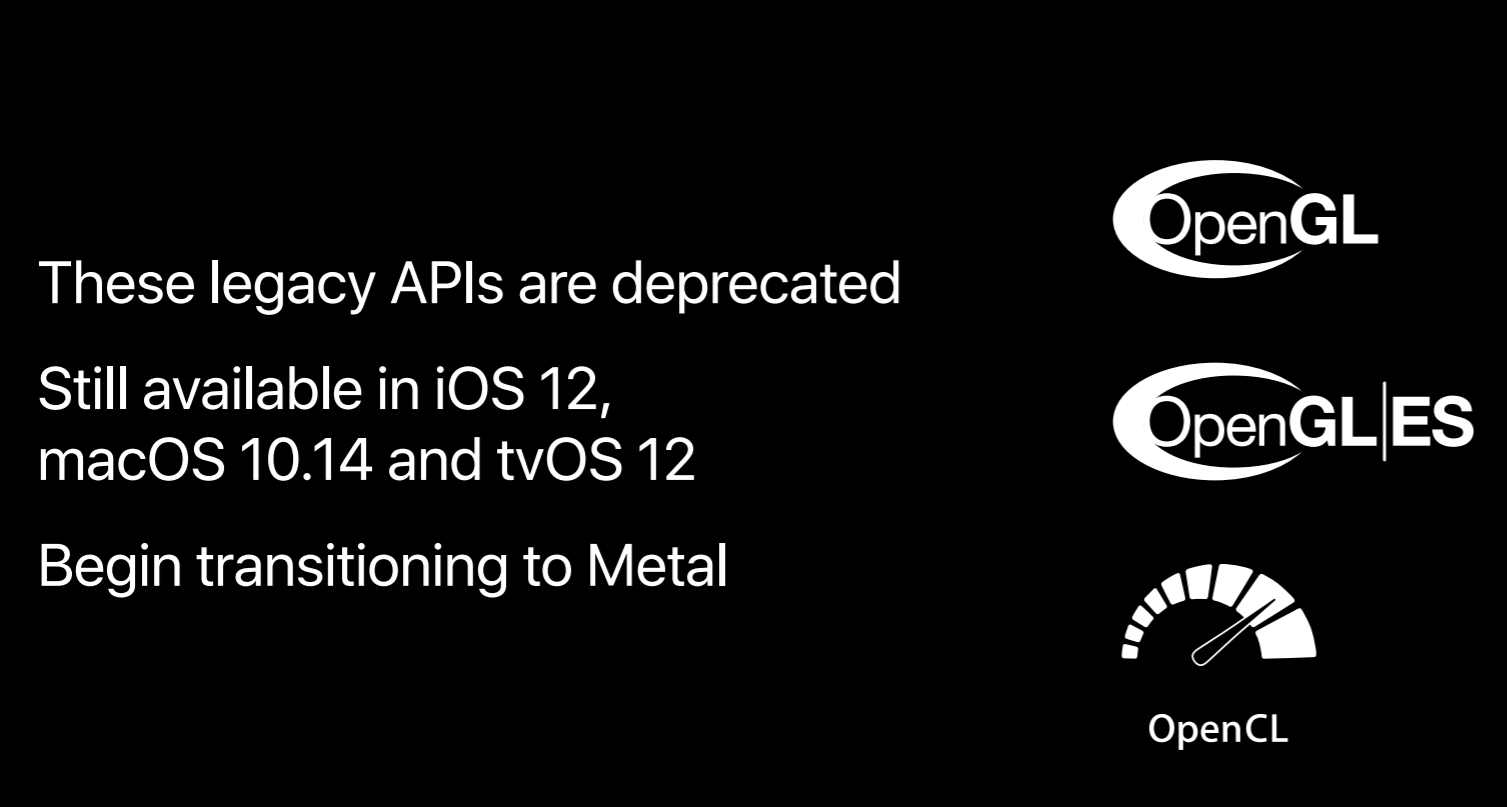
Now this is particularly important this year because as announced in yesterday's state of the union OpenGL, openGL ES and OpenCL are deprecated. Now existing and soon-to-be launched apps can still use OpenGL ES on tvOS and iOS12 and OpenGL and OpenCL on macOS 10.14 Mojave and this will remain so for some time. However, new projects should target Metal from their inception. So if you're not already familiar with Metal, then it's time to get started.
Before you rip out all of your OpenGL code and start porting it all to Metal you've got a few options to consider. Apple offers several high-level frameworks that do rendering, different kinds of rendering, SpriteKit for 2D games, SceneKit for some 3D, Core Image for great effects. Also, each of the major third-party game engines already use Metal as their primary renderer. But you may decide that these approaches just aren't for you and the path forward is to do it yourself in Metal, that's what we'll talk about today.

So let's start out with Metal design and some fundamental concepts.

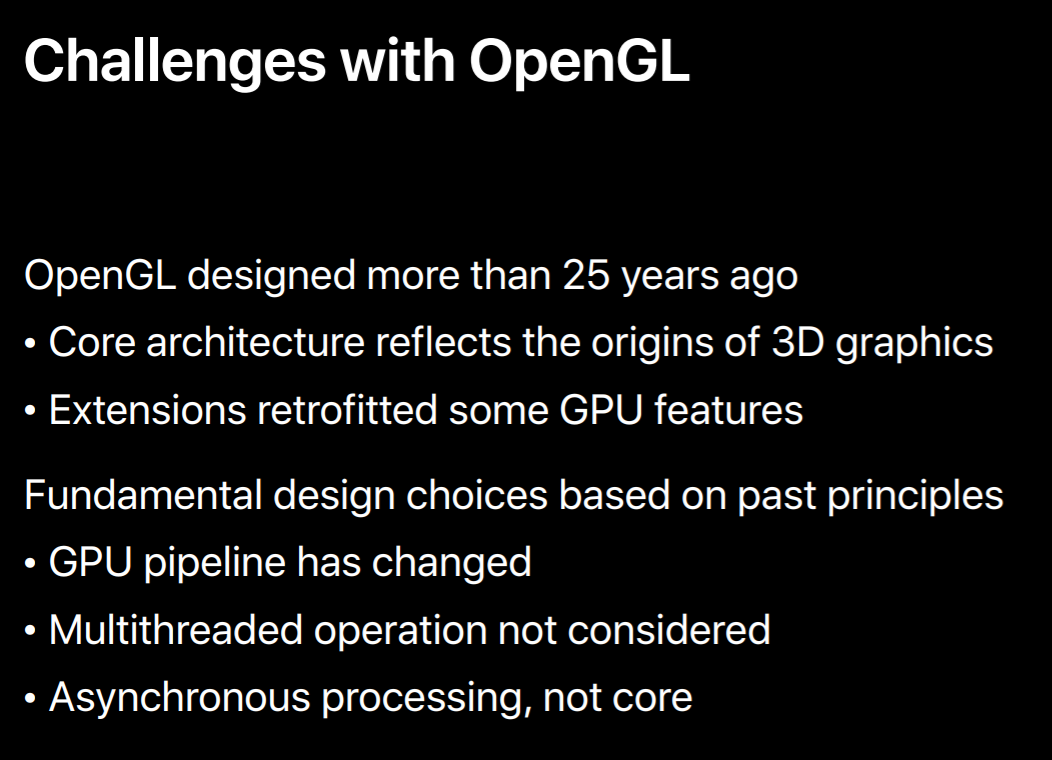
So OpenGL was originally designed 25 years ago and its core reflects the origins of hardware accelerated 3D graphics. So updates with new versions and extensions have really served us well by exposing new GPU features and performance techniques. However, there are still some fundamental design choices that no longer apply to current hardware. The OpenGL pipeline was originally an entirely fixed function and although today OpenGL supports a programmable pipeline it doesn't neatly match that of modern GPUs. Also, asynchronous processing is not a core feature of the API, there are a number of features which allude to the fact that the GPU works in parallel with your app but much of this is implicit. And 25 years ago only the most expensive workstations and servers had multiple cores. So designing an efficient multithreading model wasn't a priority.
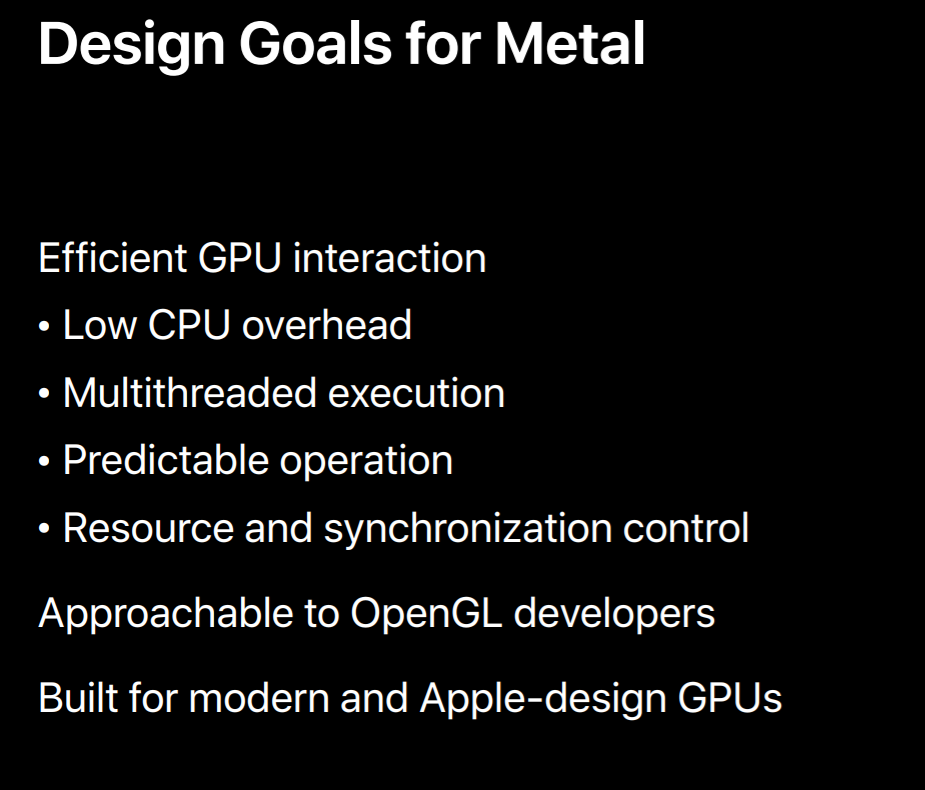
So back in 2014, it was clear to us that a new application interface for the GPU was necessary. Obviously, we needed an interface that could efficiently harness the GPU's power. To do that the app needed the CPU out of the way so the GPU could do its thing. But when an app needs the CPU for rendering it needs to be able to use all of the CPU, including its multiple cores. If the interface needed to be predictable to prevent developers from falling into hidden pitfalls in the API every call should have an obvious consequence and few operations should be performed implicitly. Part of this predictability would be the need to control where resources were placed and if and when synchronization was necessary. Now Apple had a few other requirements. We wanted this interface to be approachable, it needed to have the right balance between low-level control and clear usage because the easier it is for you to understand something the more effectively and efficiently you can use it. And of course, we designed Metal to map well to all modern GPUs. In particular, we knew that hardware coming down the pipeline needed software that could push it. This included the Apple designed GPU of the A11 bionic.
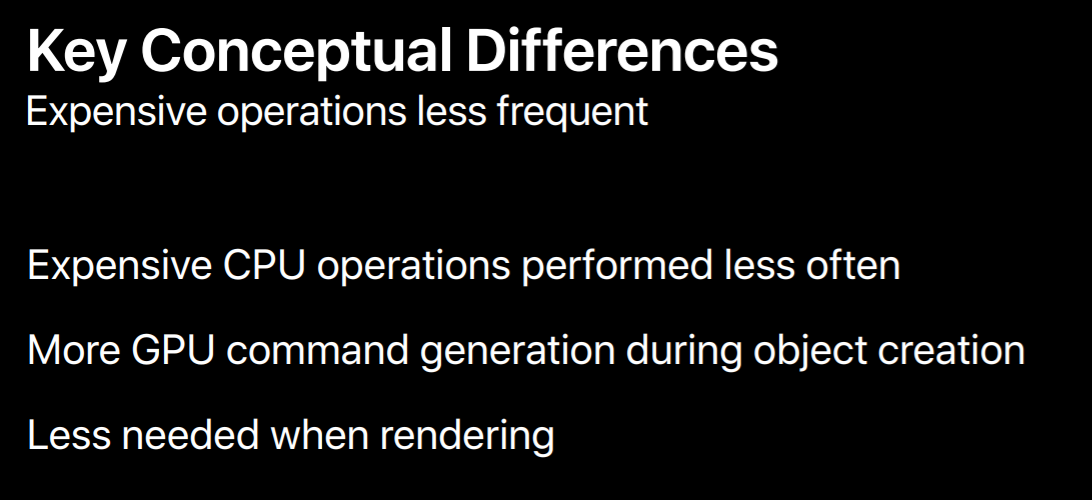
So how is Metal different than OpenGL? Well you perform the most expensive operations less often. Objects are designed in such a way that API state can be translated and prepackaged into GPU commands at creation. This way, there's much less cost to use them later on when actually rendering.
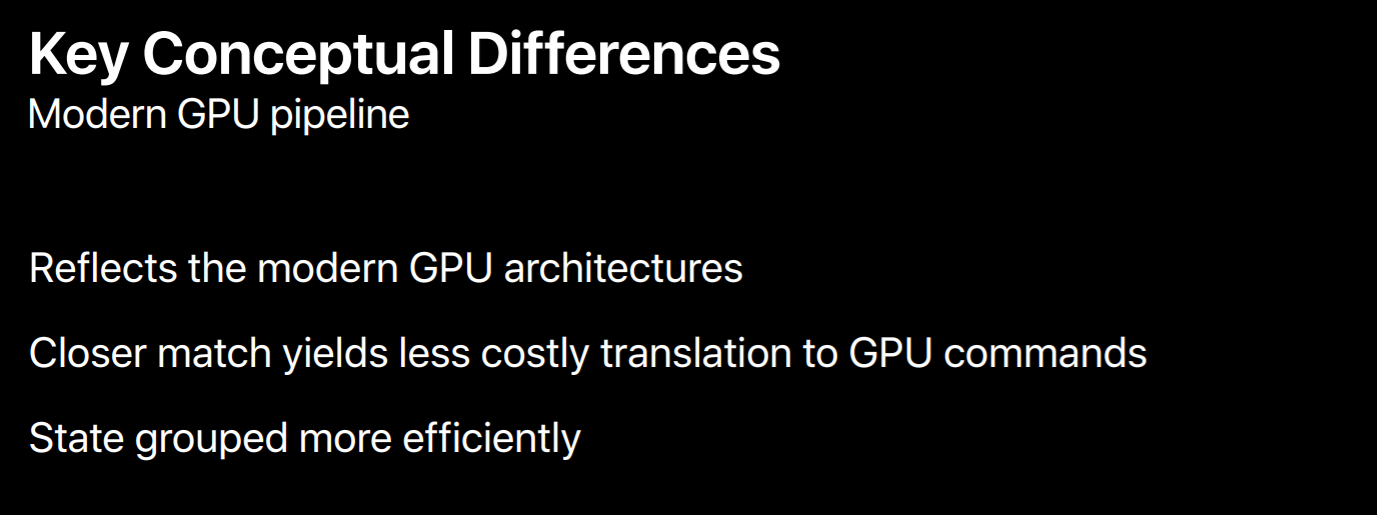
The graphics pipeline with Vertex and fragment shaders also reflects the modern GPU. So it's less costly to translate the API's configuration to GP commands. This doesn't mean the pipeline is entirely different or requires some whole new way of thinking. The main difference in Metal is that the grouping of the pipeline stages into objects is more efficient, not that the pipeline itself is changed.
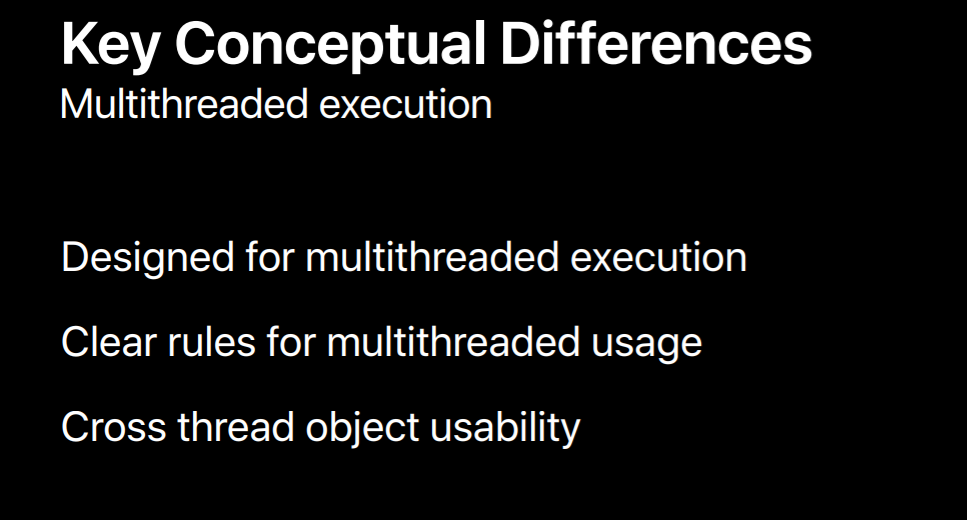
Metal also has a clear model for multithreaded execution. There are a number of different ways for applications to drive the GPU from different threads, but for each there are explicit but unconstraining rules to do this. Additionally, the most commonly used objects like textures, buffers and shaders can safely and efficiently be used across threads. Metal does not need to perform any expensive internal logging operations to prevent these objects from getting into some invalid state.
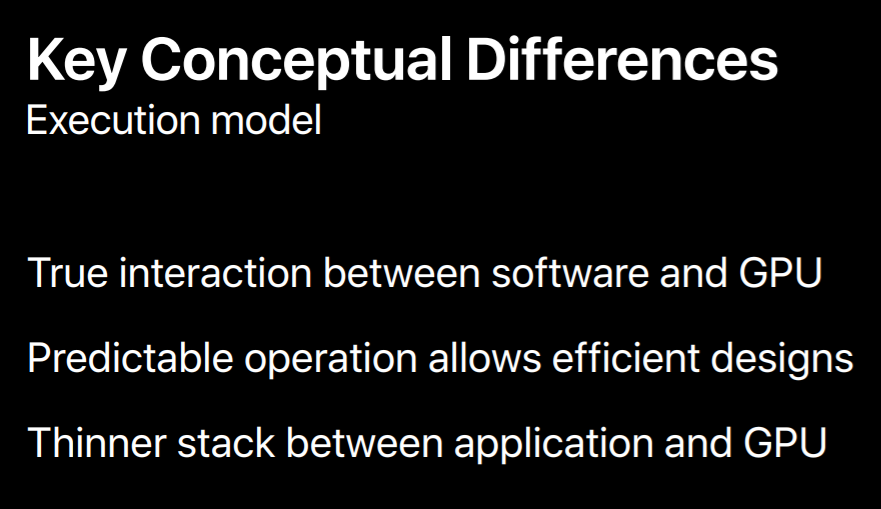
Finally, the execution model reflects what really goes on between software and the GPU. Many of the implicit operations performed by OpenGL are explicitly performed by an application using Metal. This allows you to make intelligent decisions as to when and how your app uses the GPU. It also means there's less software between your application and the GPU. Most Metal calls go directly to the GPU driver and that driver also needs to do less processing to translate from API calls to GPU commands.
So let's dive in and see how this works. All GL calls are performed on an OpenGL context. The context does a ton of things, it tracks API state, it manages OpenGL objects and other memory, and translates and submits GPU commands.
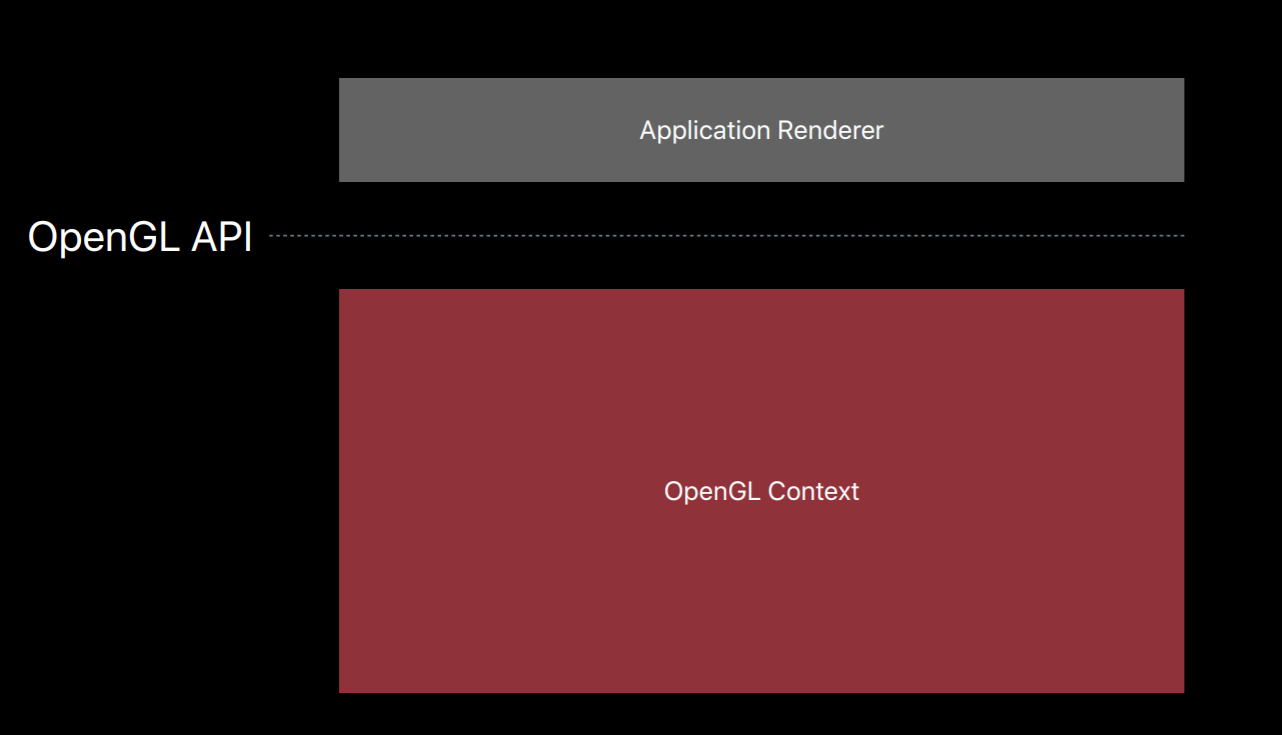
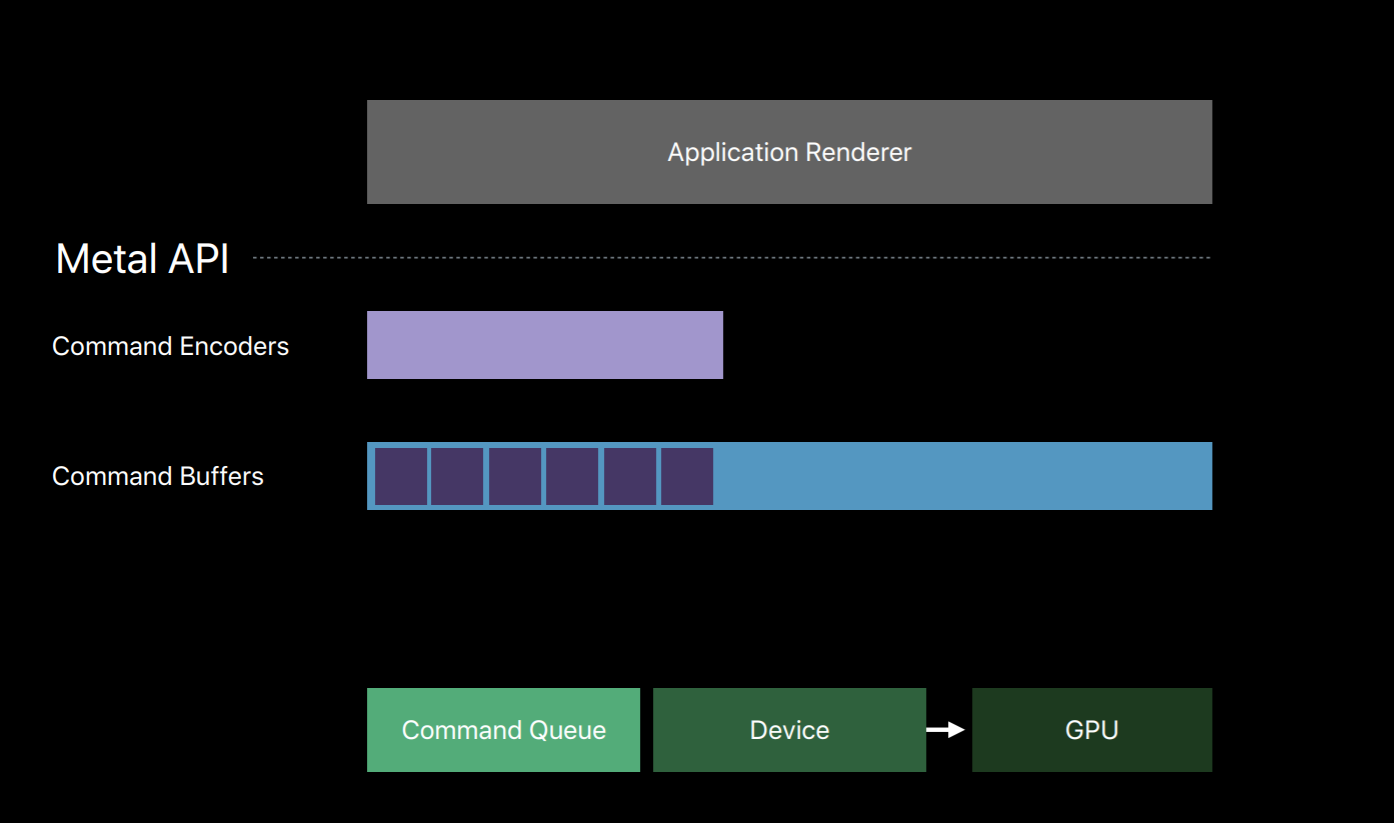
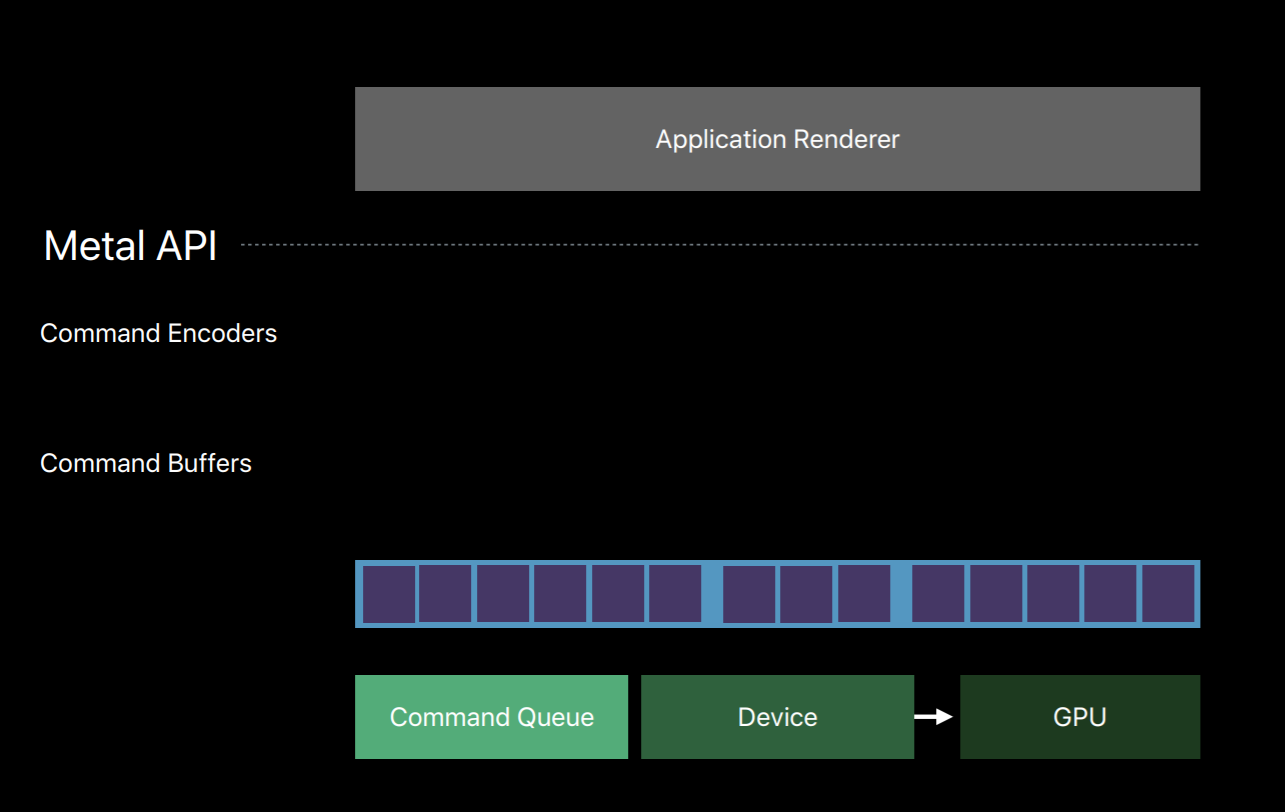
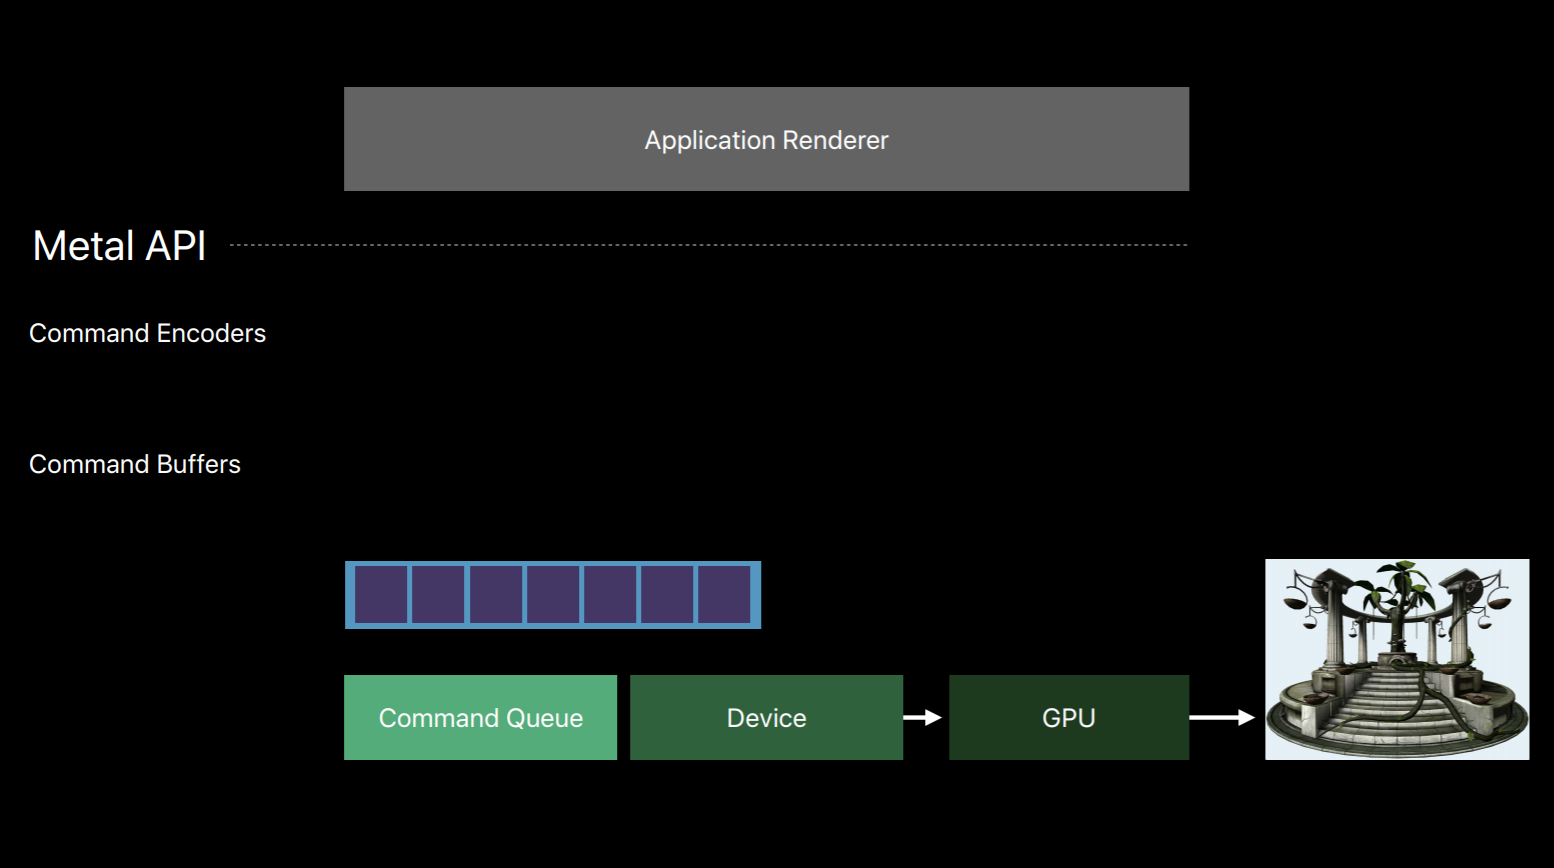
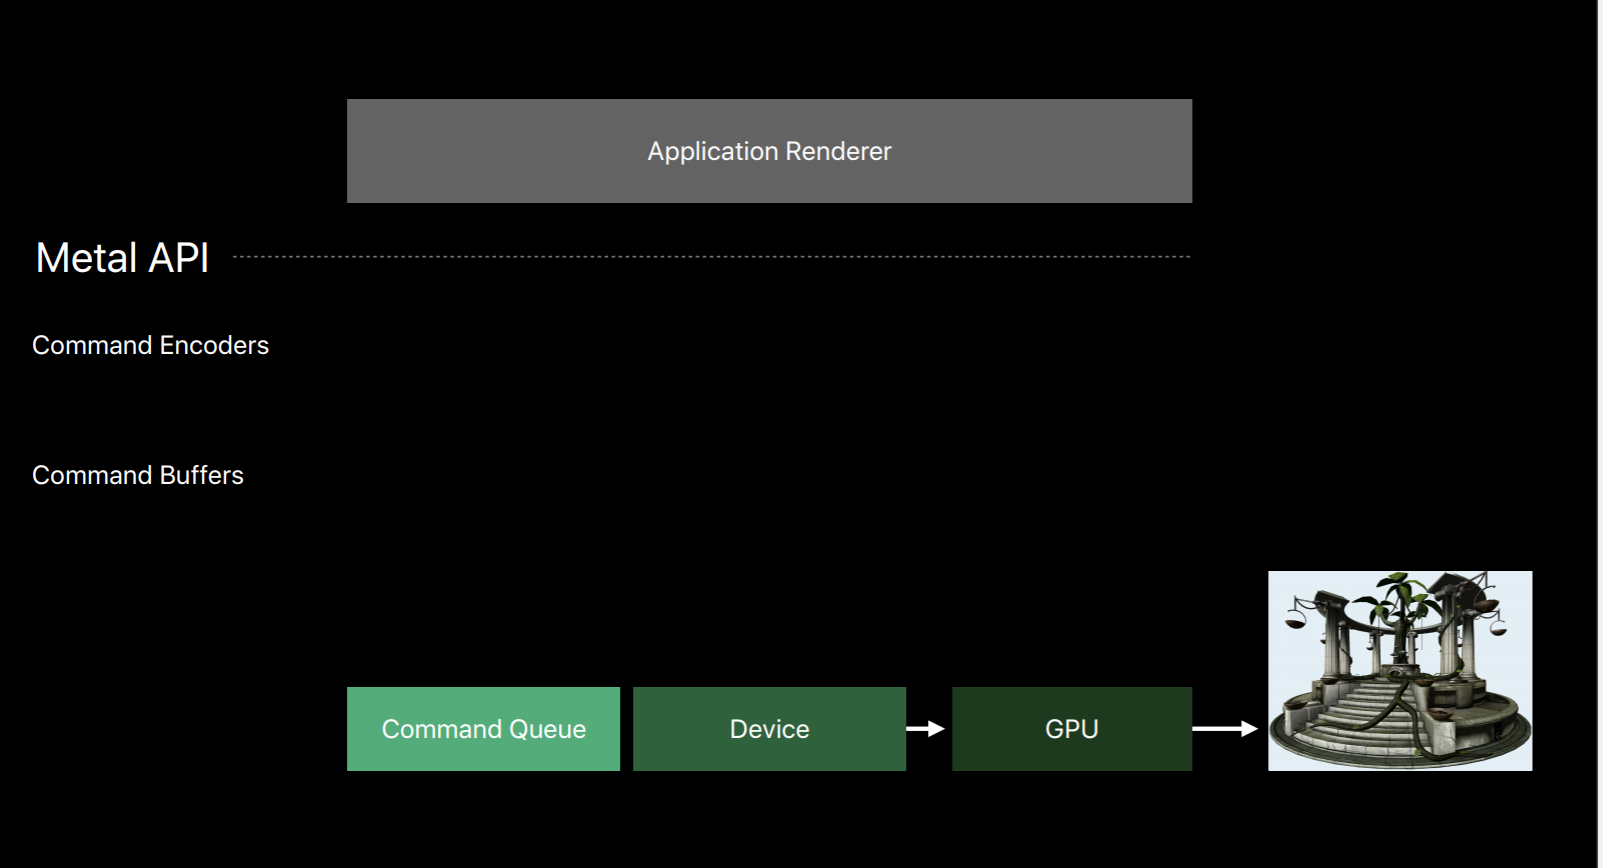
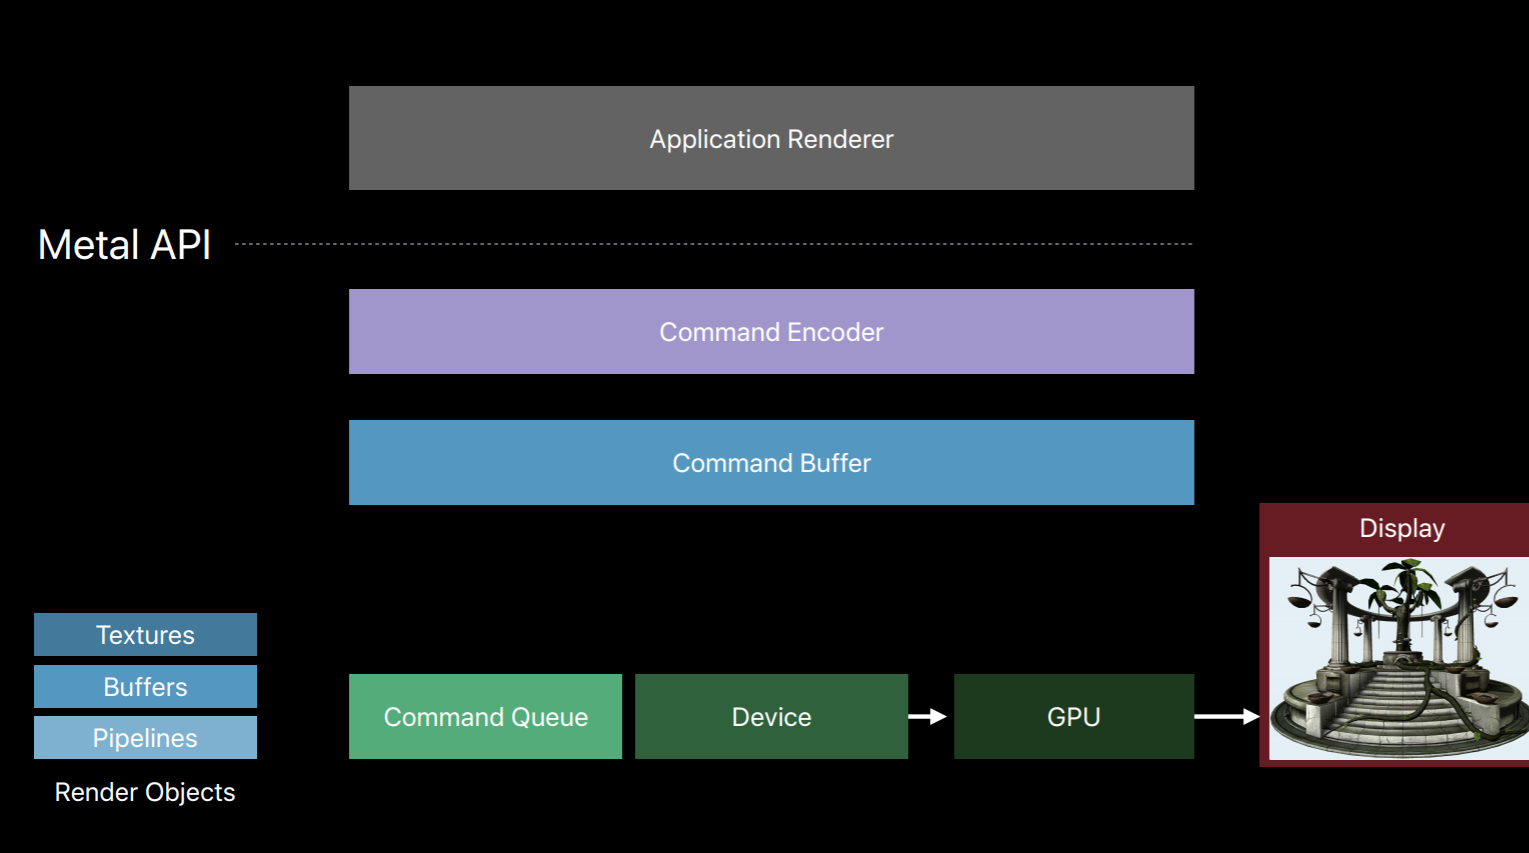
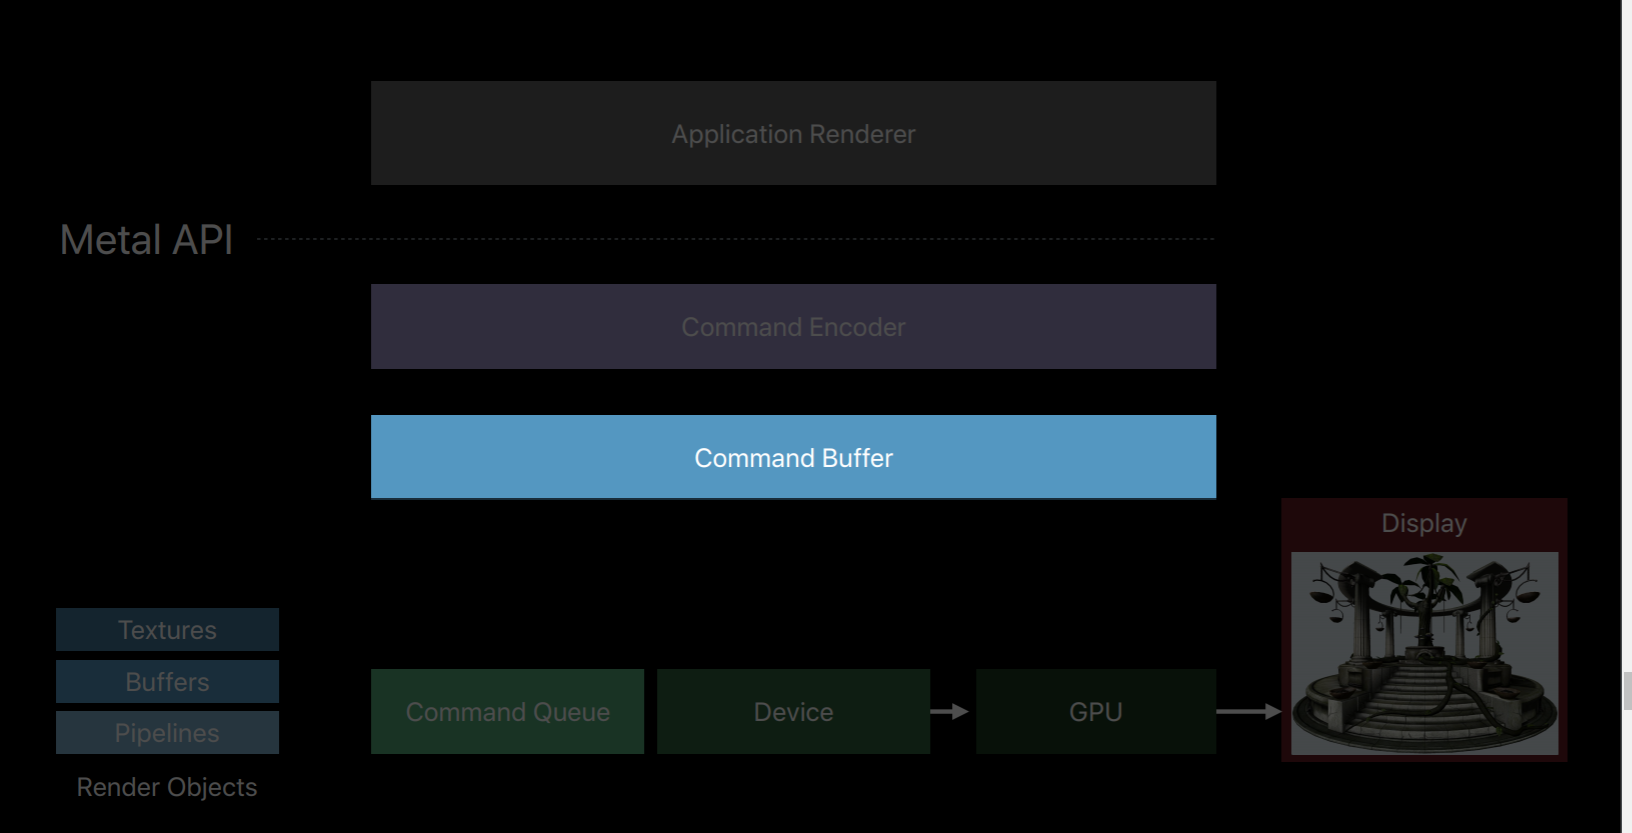
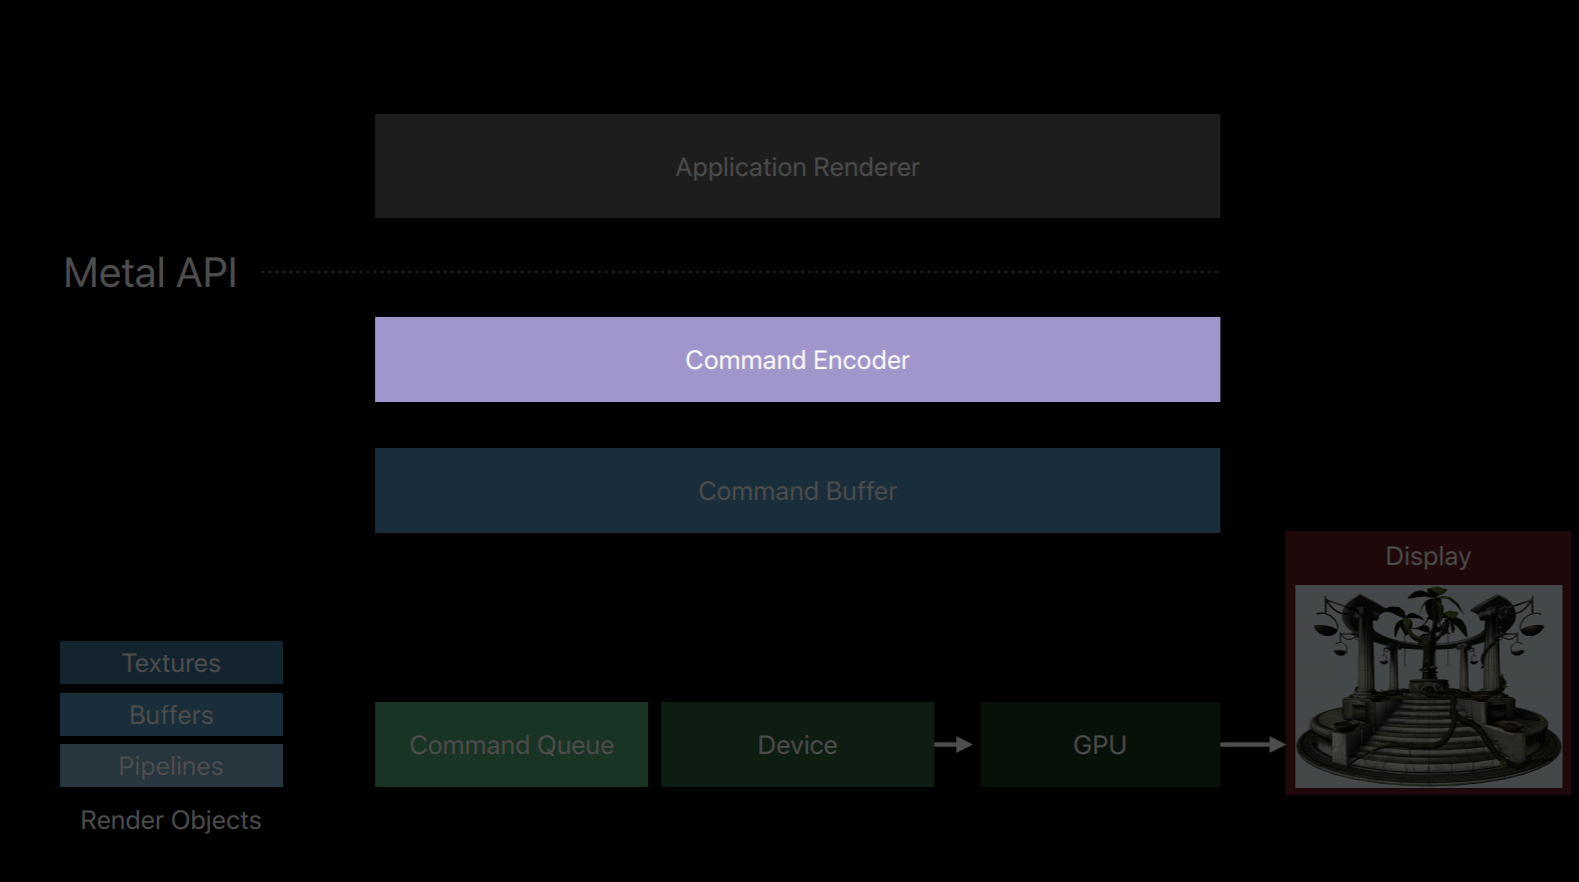
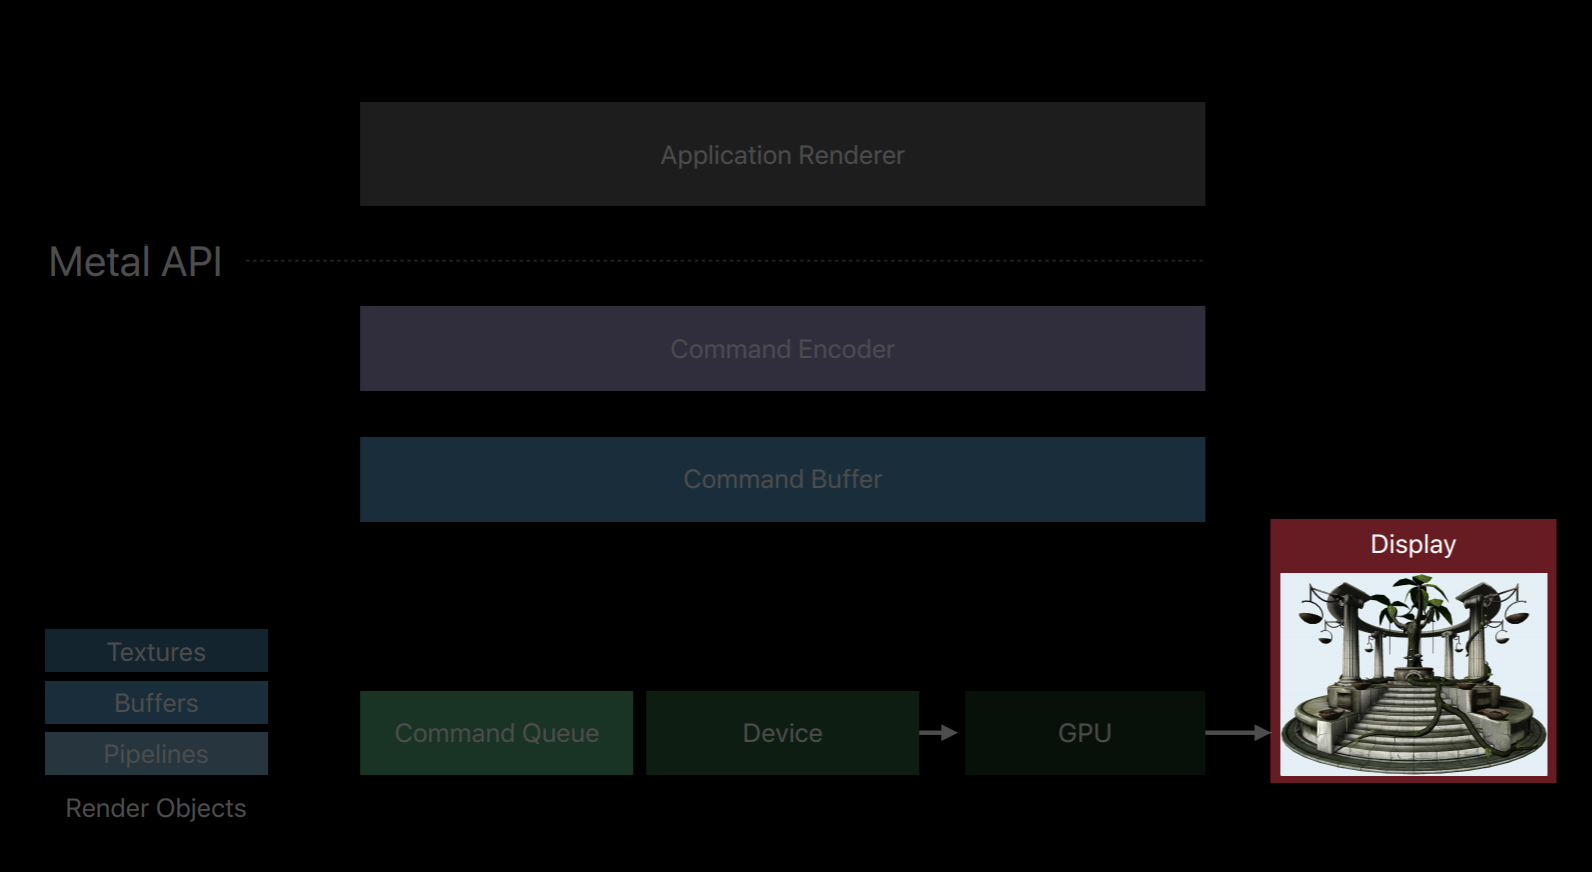
Metal splits all of these jobs of an OpenGL context into a number of smaller objects.The first object that creates is a Metal device which is an abstract representation of a physical GPU. The device creates objects such as textures, buffers and pipeline objects which contain shaders. It also creates a key object called a Metal command queue.

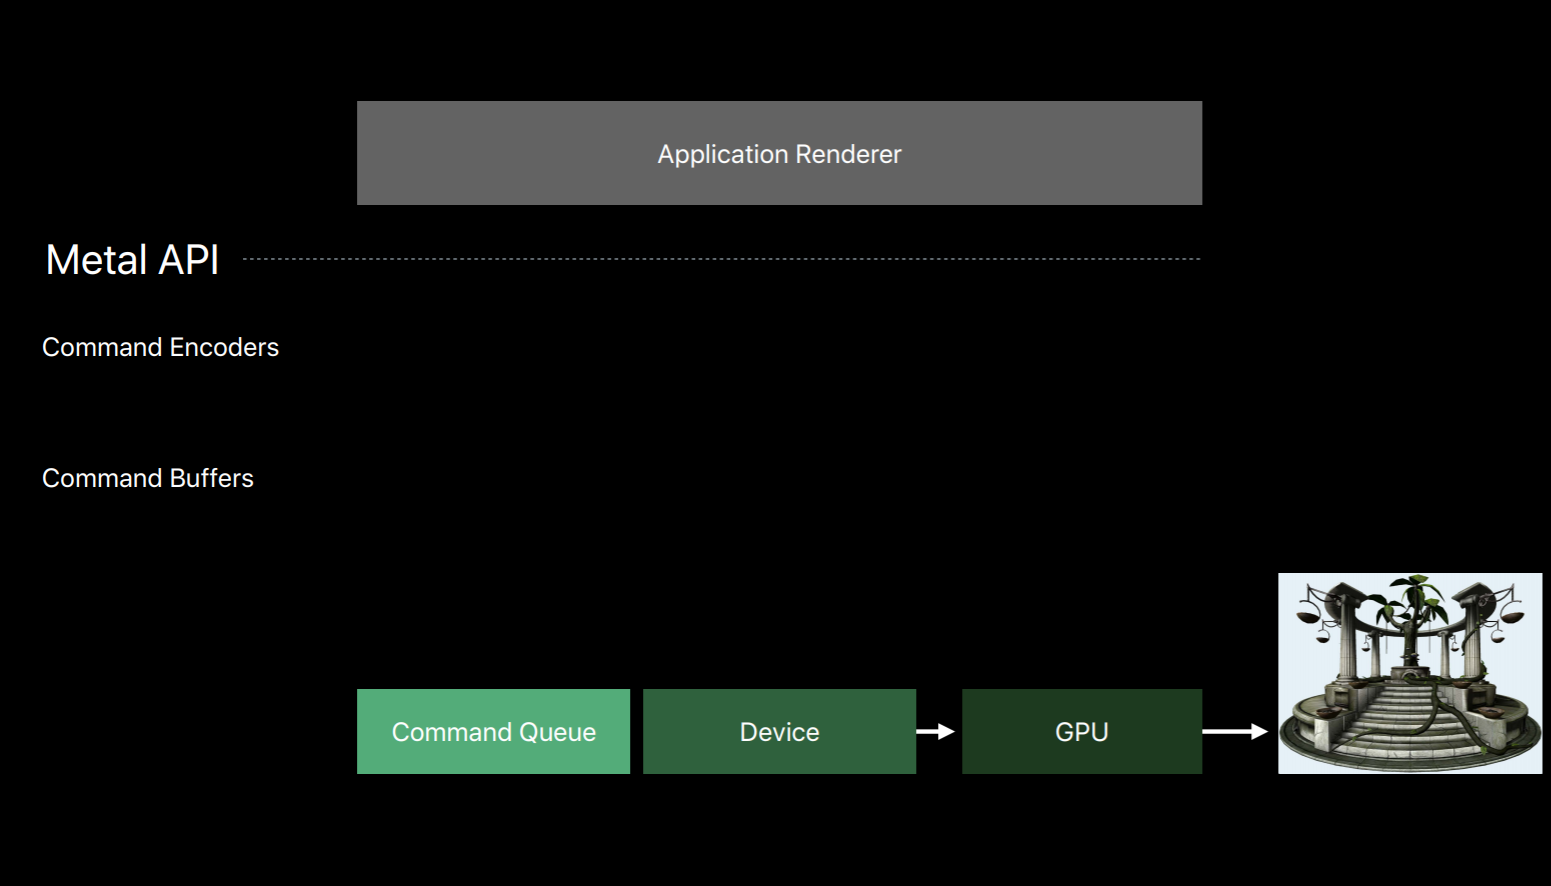
The command queue really only has one job, to create a sequence of command buffers. Here we've created one command buffer and a command buffer is simply a list of GPU commands that your app will fill and send to the GPU for execution. Typically your app will create a single command buffer per frame, however, there are some situations where it makes sense to create two or three in a frame. But an app doesn't write these commands directly to the command buffer, instead it creates a Metal command encoder. The command encoder translates API calls into GPU instructions and writes them to the command buffer. After a series of commands have been encoded your app will end encoding and release the encoder object. There are actually a couple different kind of encoders and your app can create new encoders from the command buffer to encode more commands. Now it's important to note that up until now on this diagram the GPU hasn't done any work. Metal has created objects and encoded commands all with the CPU. It's only after your app has finished encoding commands and committed the command buffer that the GPU begins to work and executes those commands.
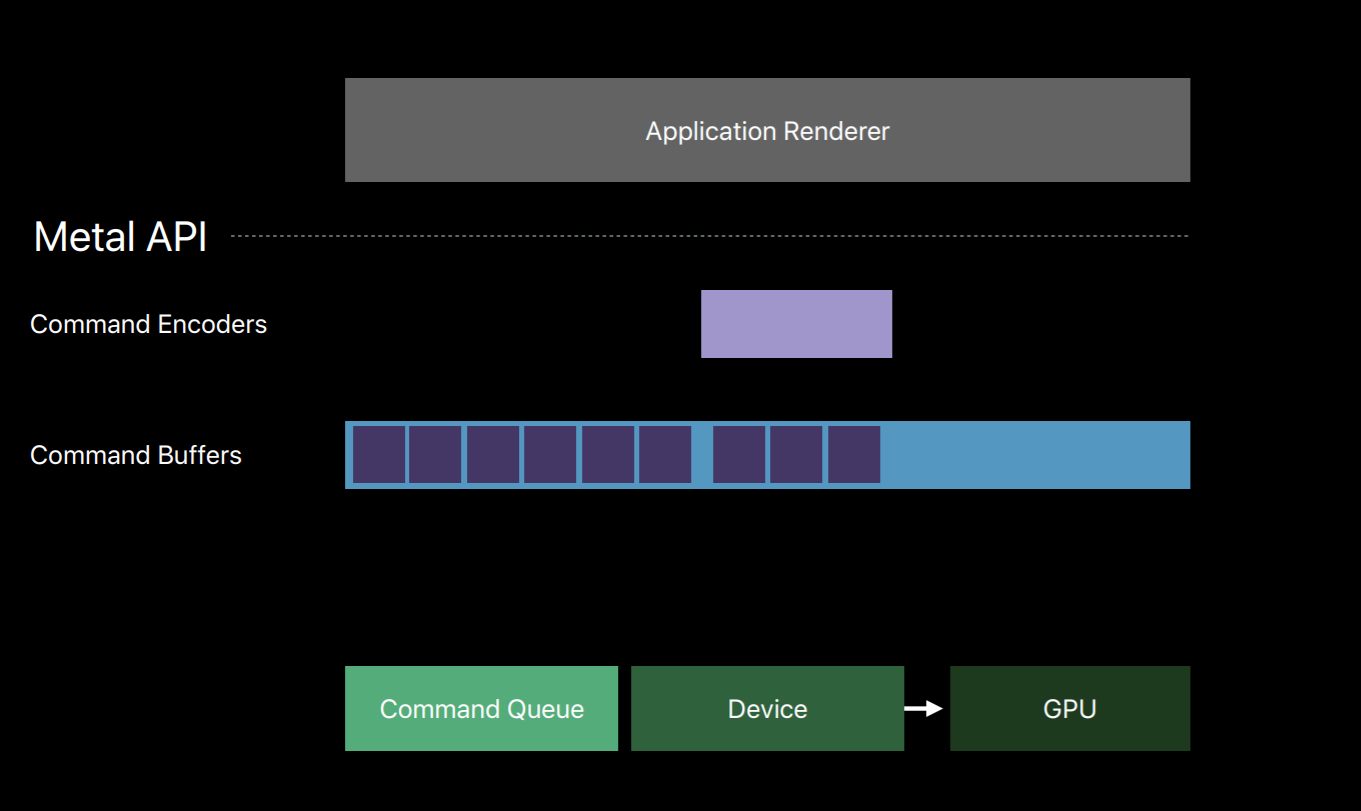
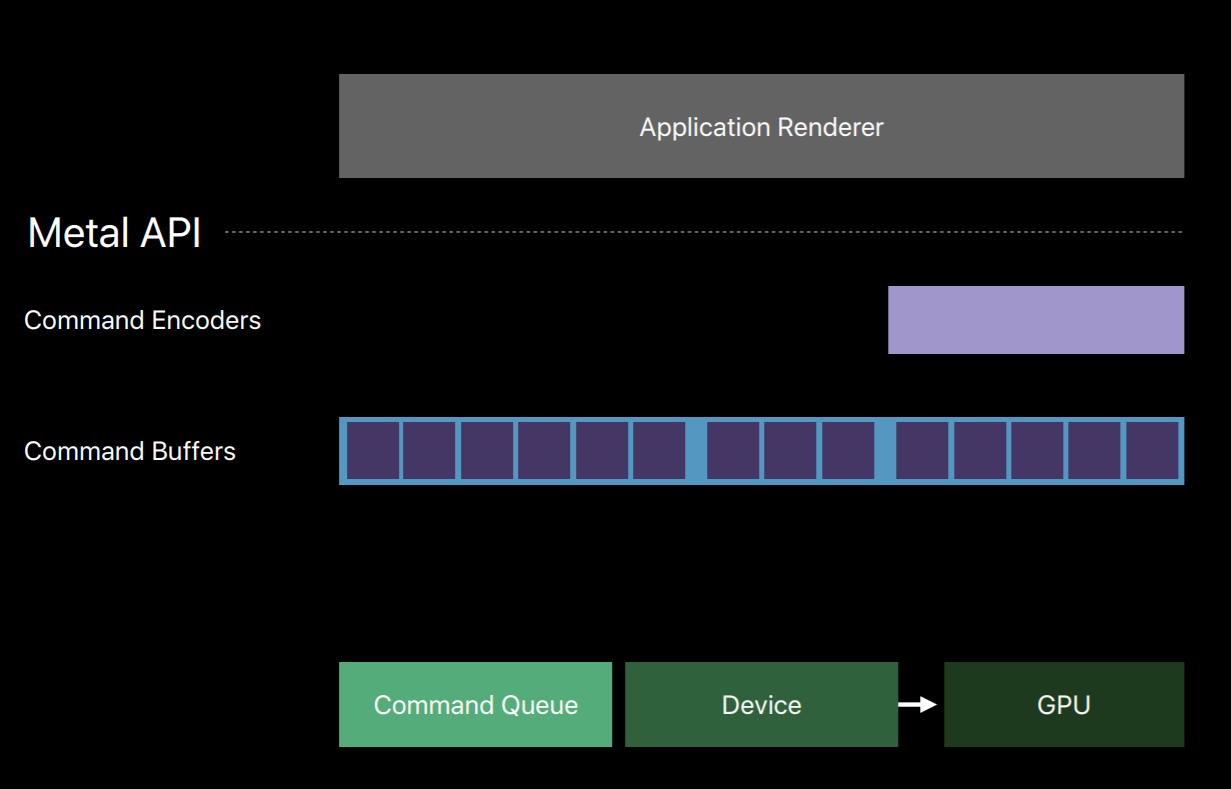
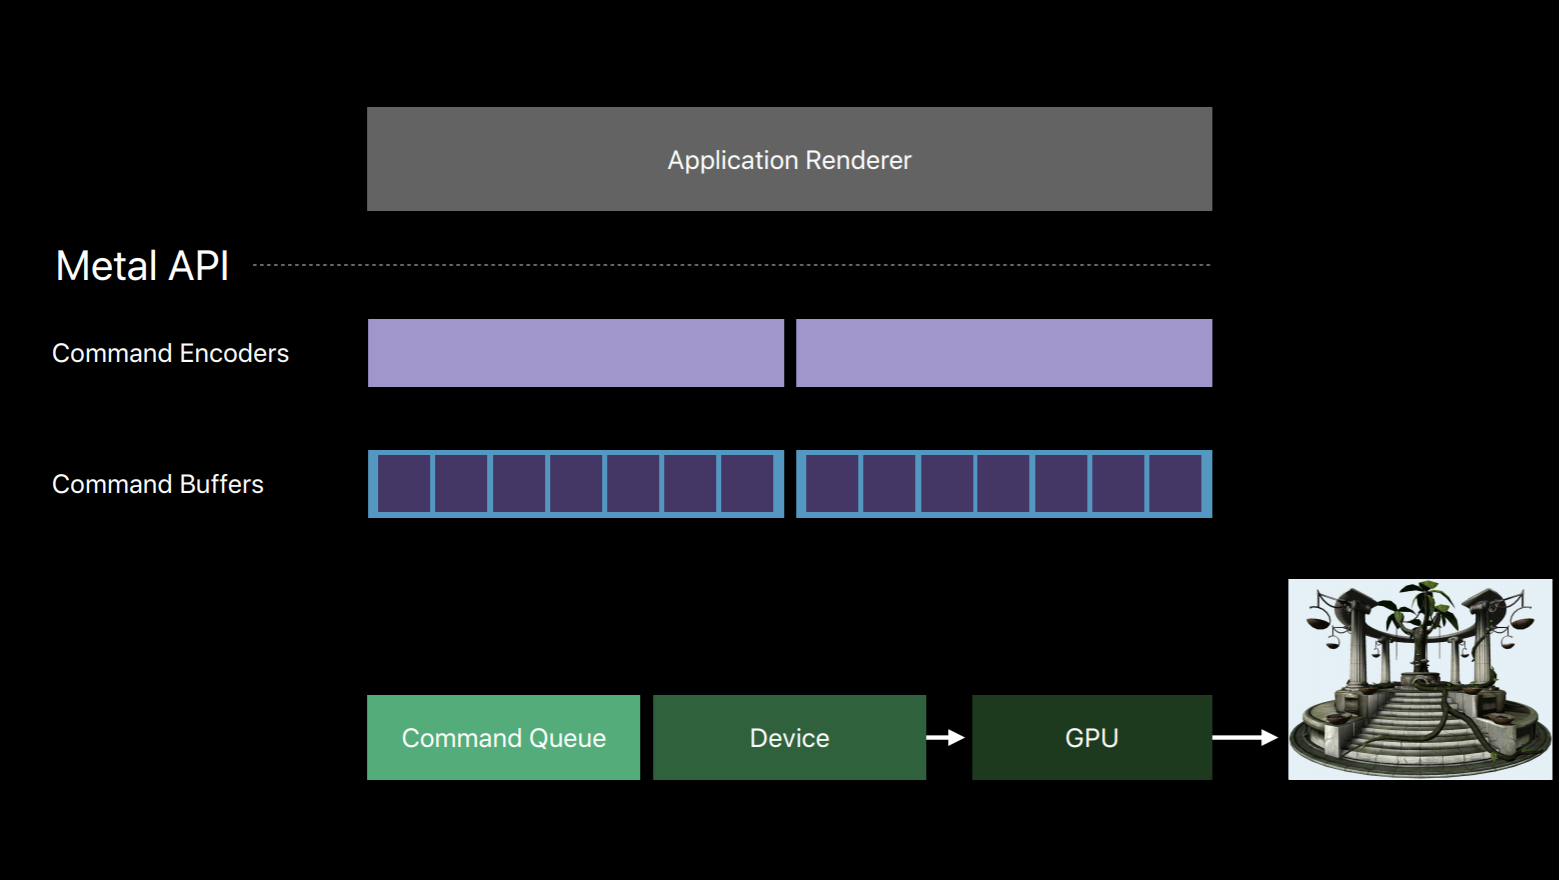
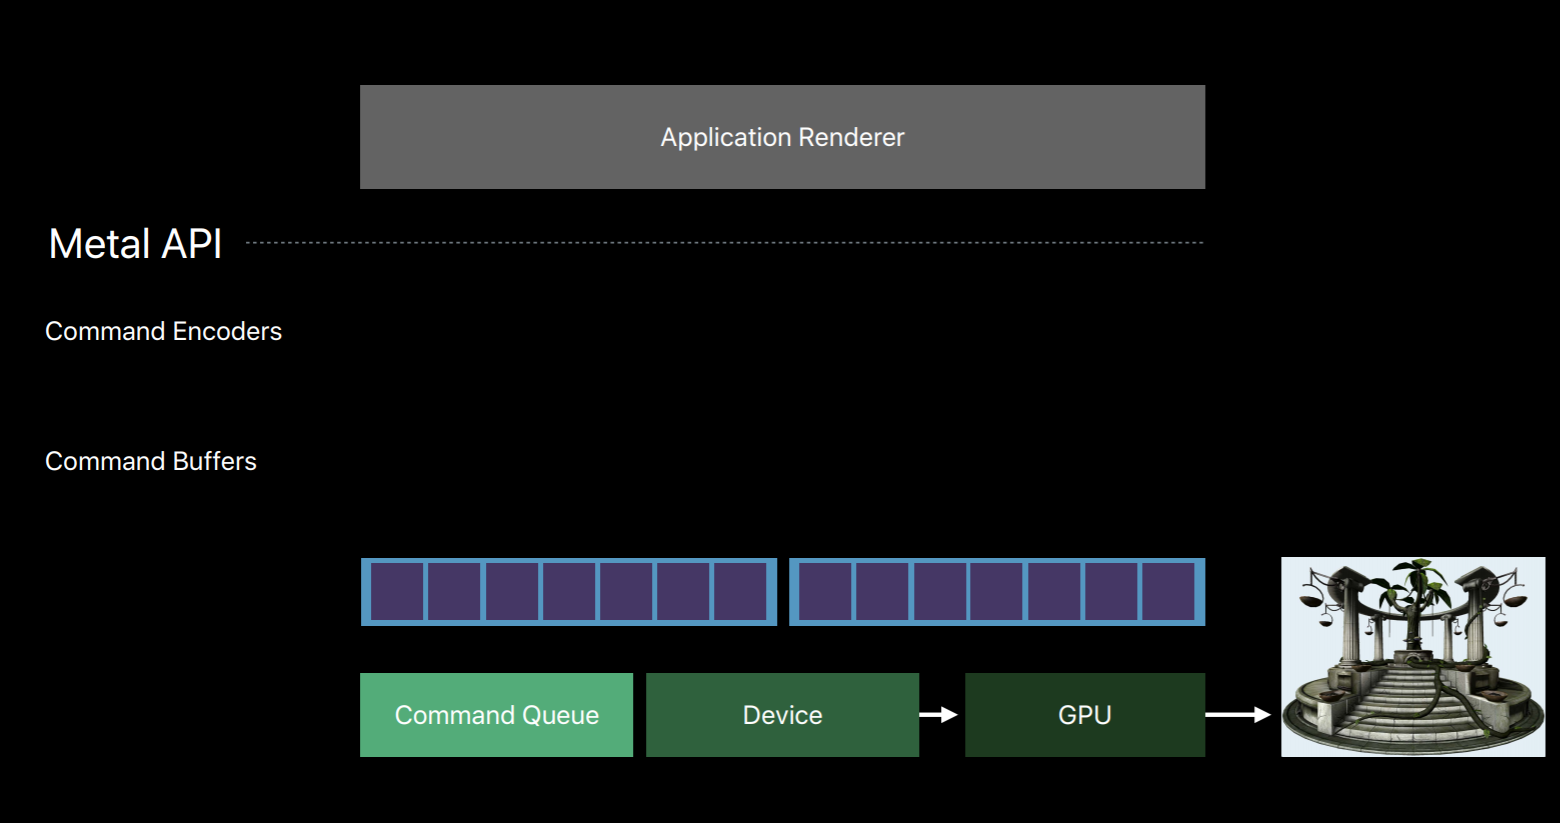
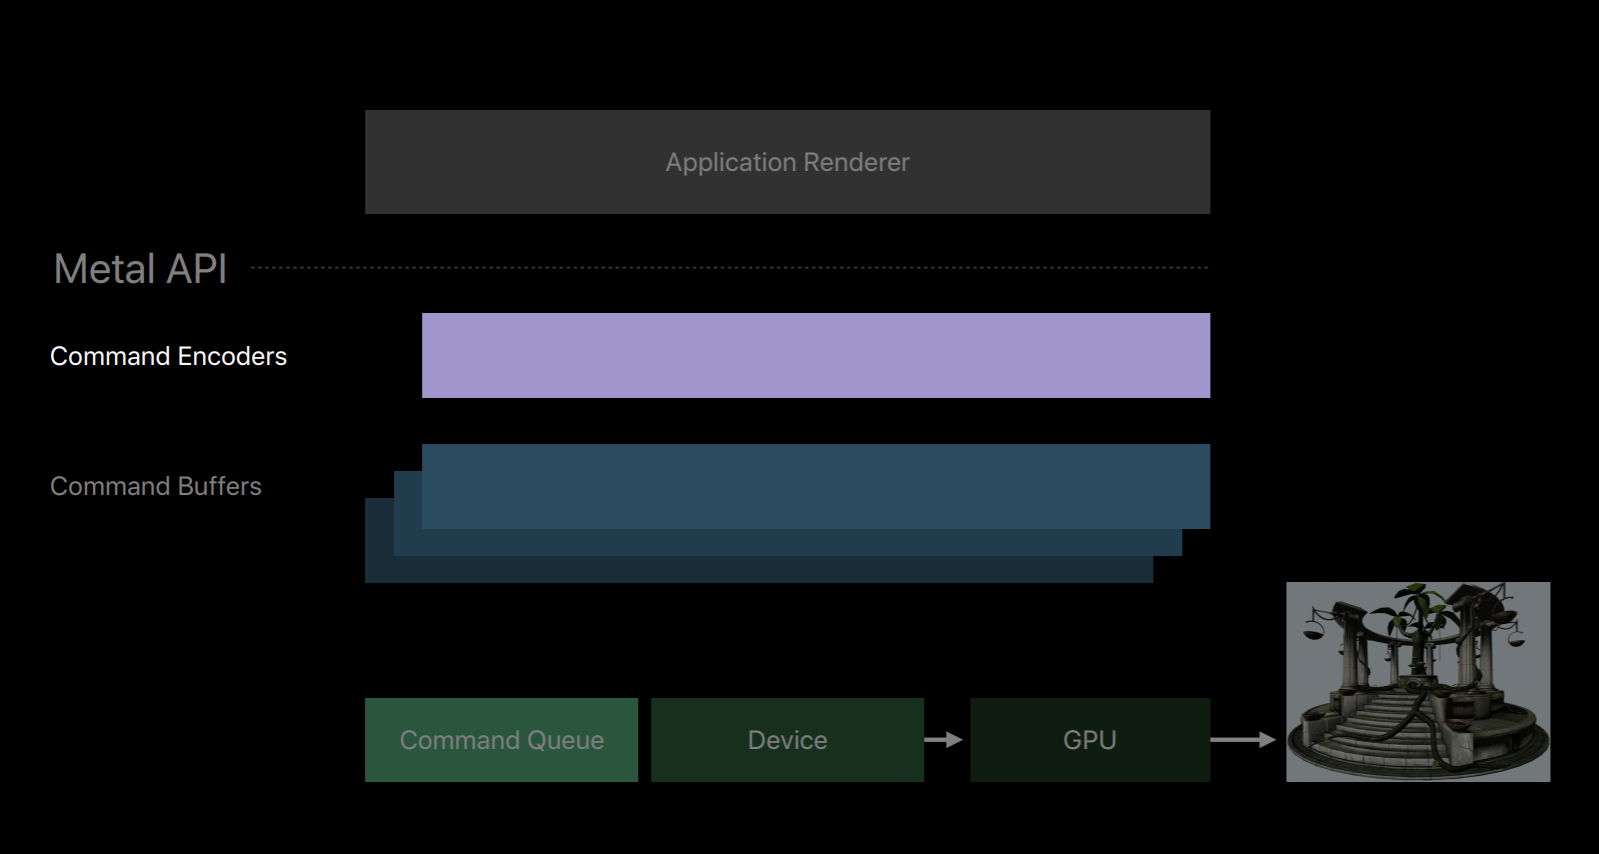
You can also encode commands to multiple command buffers in parallel on separate threads. Now I've already spoken about how the command queue produces a sequence of command buffers and that you create a command encoder from a command buffer.
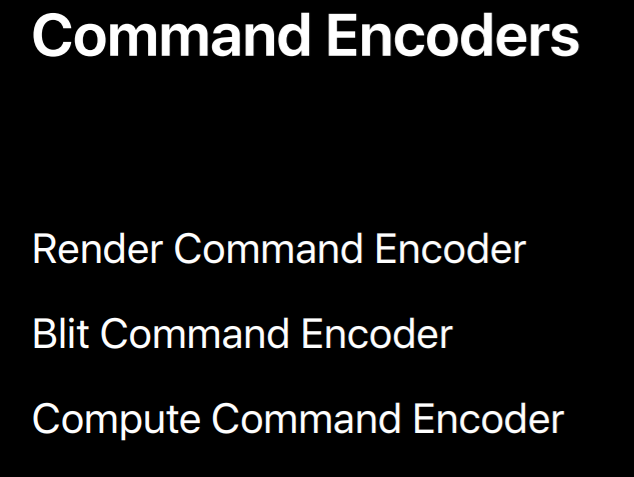
Let's take a closer look at these encoder objects used to write to our command buffers. There are three main types. There's the Render Command Encoder whose commands resemble that of an OpenGL command string where you set state, bind objects, and issue draw calls. There's the Blit Command Encoder with which you can issue texture and buffer copy operations. You can also use it to generate Mipmap for textures and transfer pixel data from buffers similar to how glReadPixels operates with OpenGL's pixel buffer objects. And then there's the Compute Command Encoder which allows you to dispatch commute kernels.
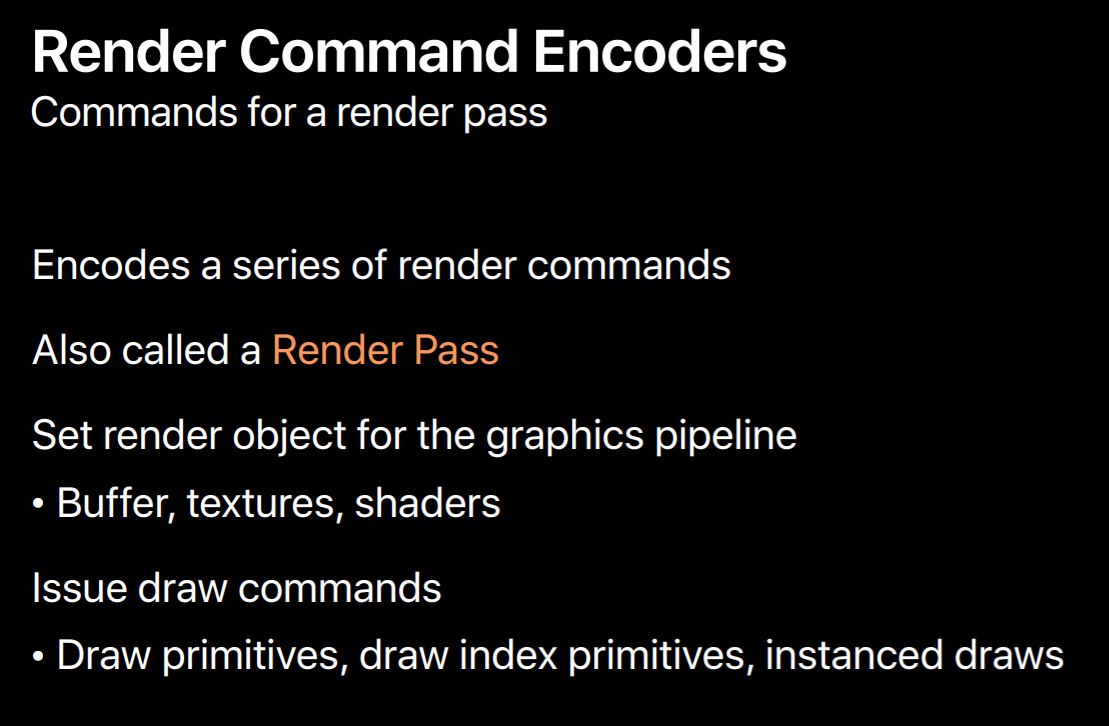
The Render Command Encoder is probably the encoder you'll become most familiar with as it's responsible for the majority of operations that a graphic centric app needs. The set of commands encoded into a Render Command Encoder is often referred to as a Render Pass. In a Render Pass you set up render objects for the graphics pipeline and issue draw commands with those objects. This includes operations similar to glDrawArrays and glDrawElements and other OpenGL draw commands.
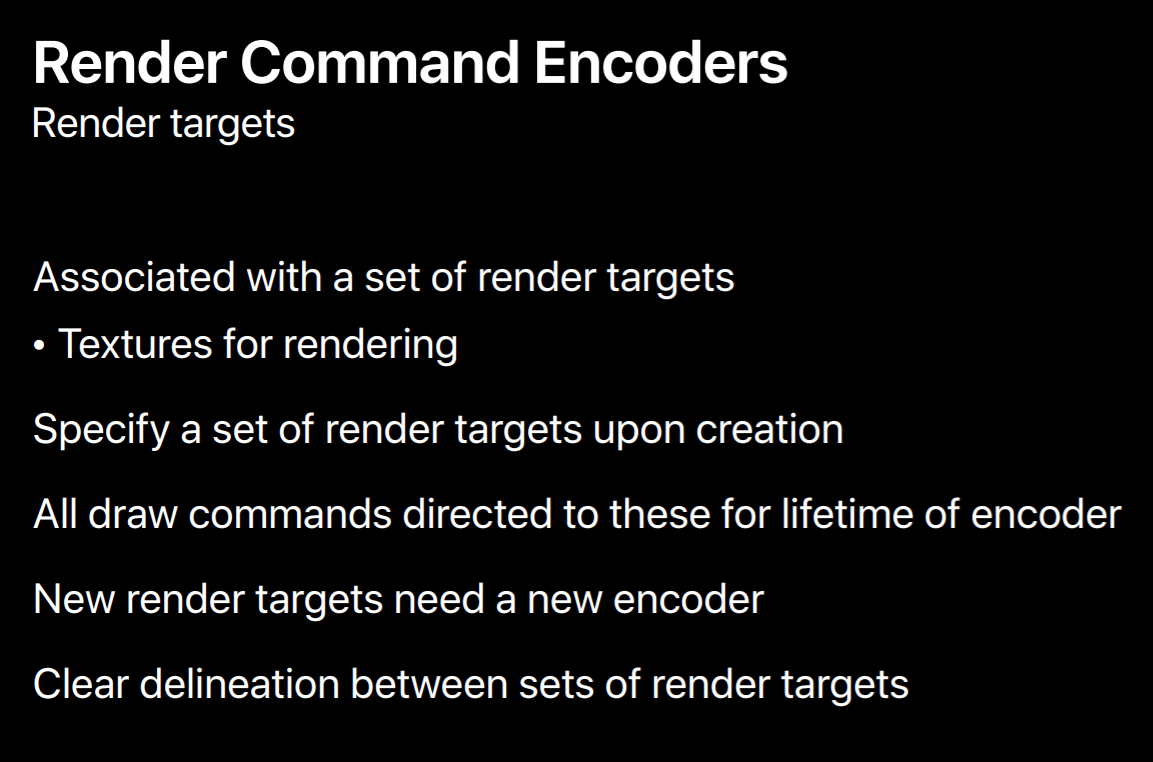
Each Render Command Encoder is strongly associated with a set of render targets. And the render target is simply a texture that can be drawn to. This includes color, depth and stencil textures, as well as multi-sample textures. You specify a set of render targets when you create a render command encoder from a command buffer. And all draw commands are directed to these targets for the lifetime of the encoder. To direct commands to a new set of targets you end encoding with a current render command encoder and create a new encoder with new targets. This creates a very clear delineation between commands directed to different sets of render targets.
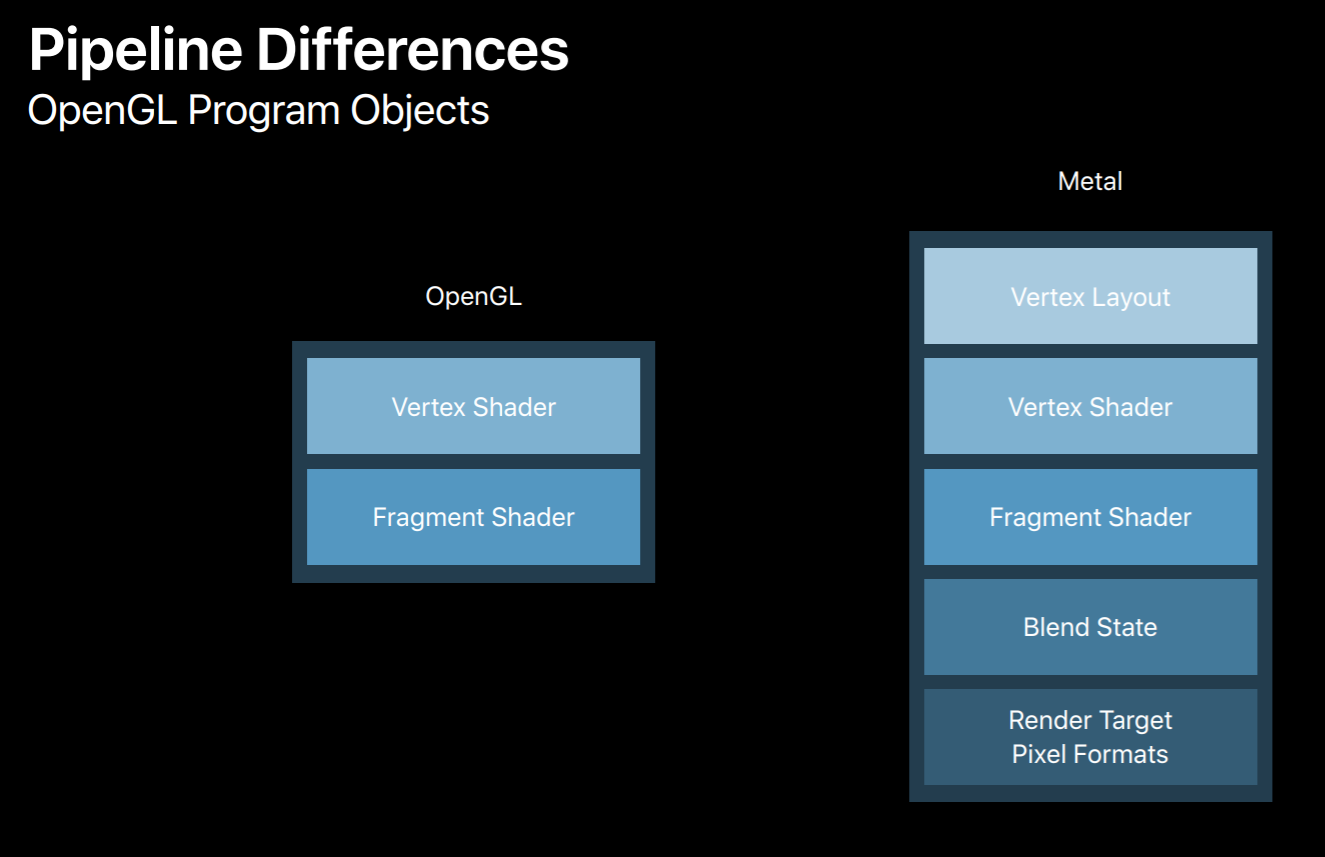
Let's talk a little bit about the object you'll use for rendering. Metal has a number of similar objects to OpenGL. There are textures, buffers, samplers and pipeline state objects which resemble OpenGL's program objects, and also depth stencil state objects which don't really exists in OpenGL but are just the containers for the same depth and stencil state that OpenGL's got.
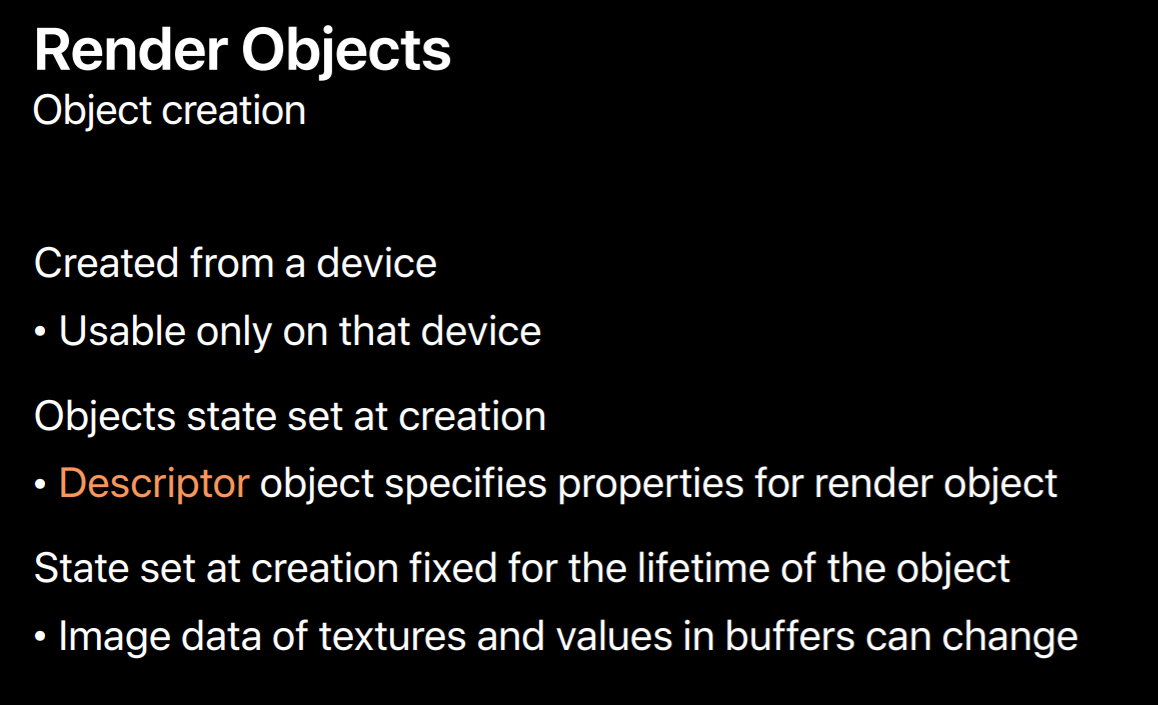
One significant difference between OpenGL and Metal objects are how they are created and managed. The objects are all created from a device object so they're associated with a single GPU. You set most of an object state when you create it by specifying properties in a descriptor object. All states set when the object is created is fixed and immutable. Although the state of textures and buffers are fixed upon creation, data contained by these objects can be changed.
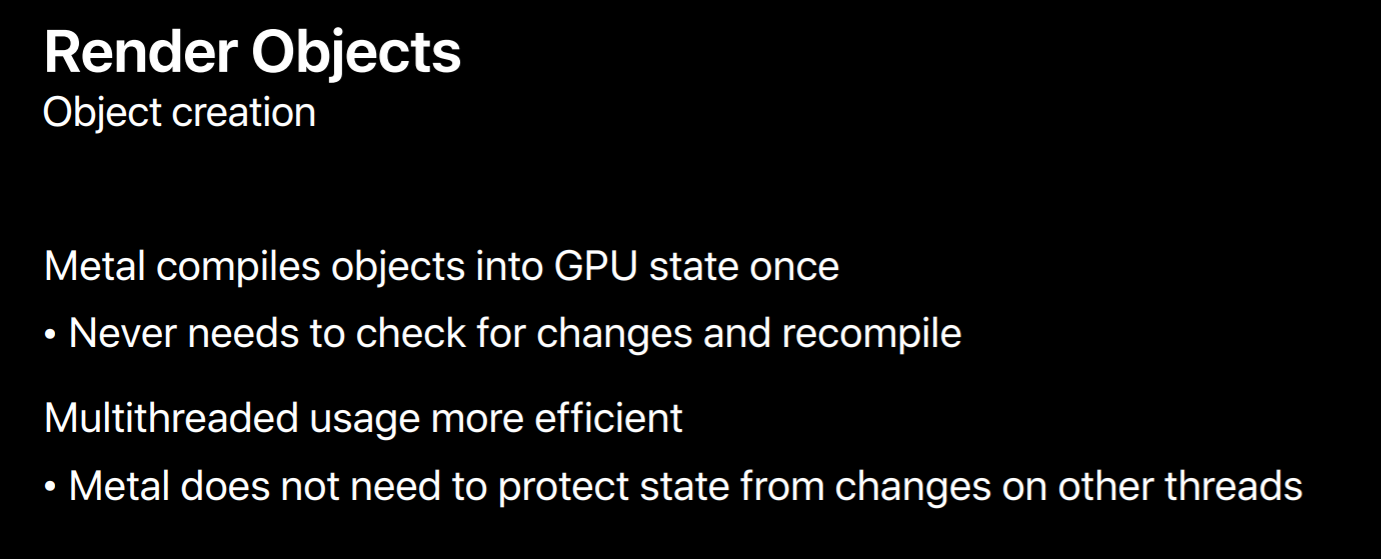
Metal can do all the expensive setup for an object once when it's created. OpenGL's mutable model makes it completely possible that if your app touches a little piece of state the recompilation of that object may occur. And even if your app doesn't change an object state OpenGL needs to check a hierarchy of flags to confirm this before drawing. So with this immutable model Metal never needs to check for object state changes make draw calls much faster. Additionally, objects can be efficiently used across threads, Metal never needs to lock an object to prevent it from getting into an invalid state from a change on another thread.
Build Shaders
So let's talk about porting.
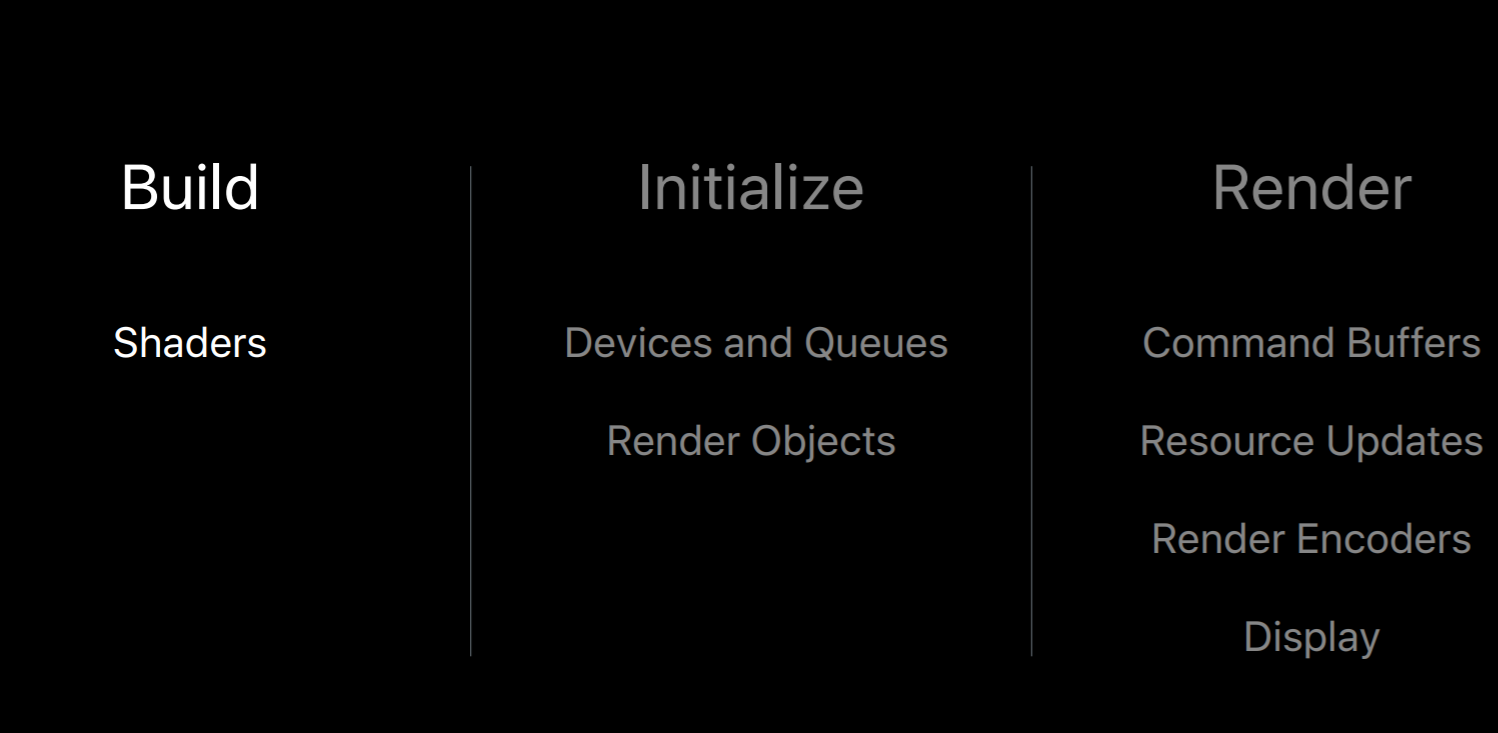
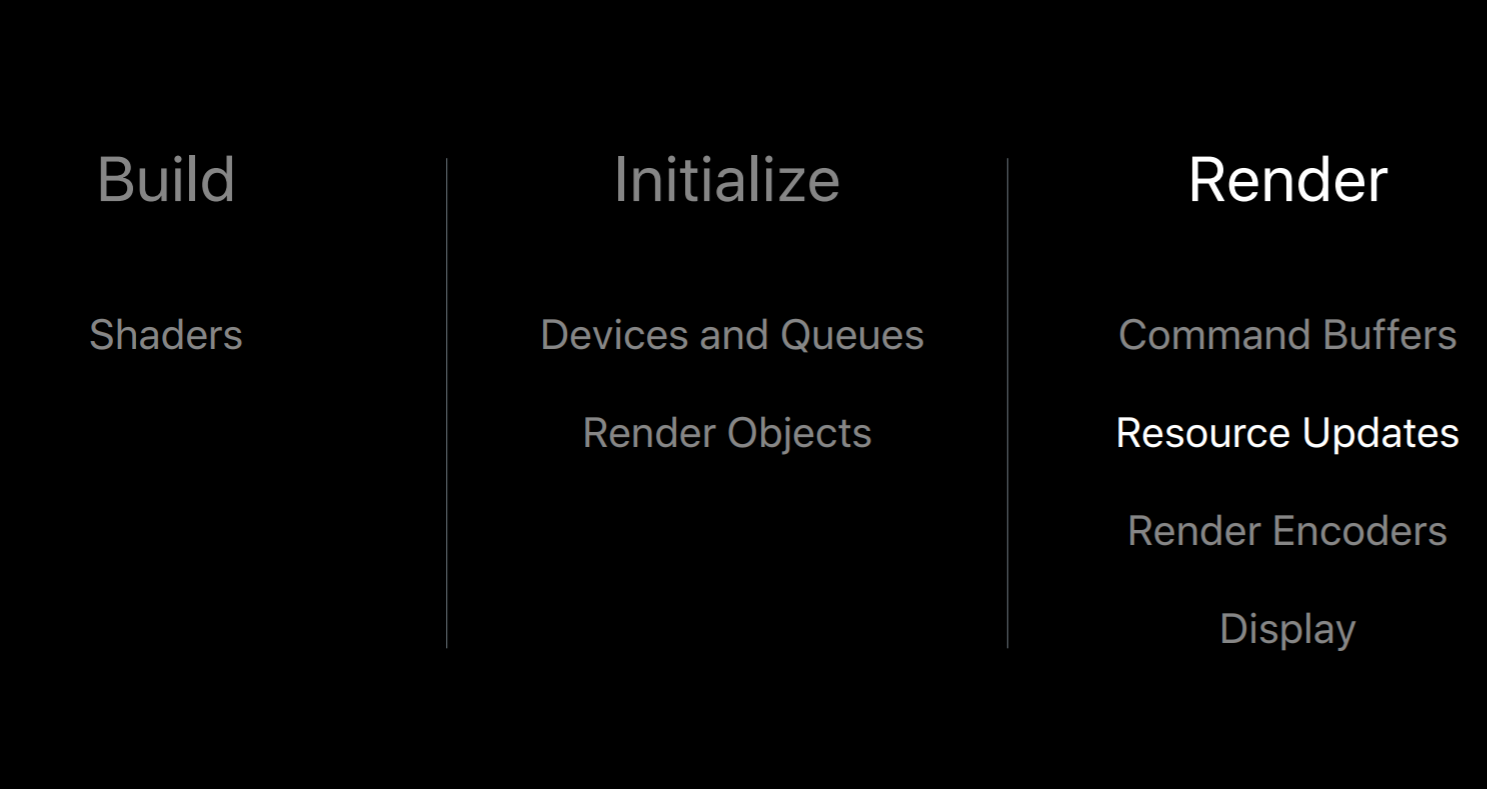
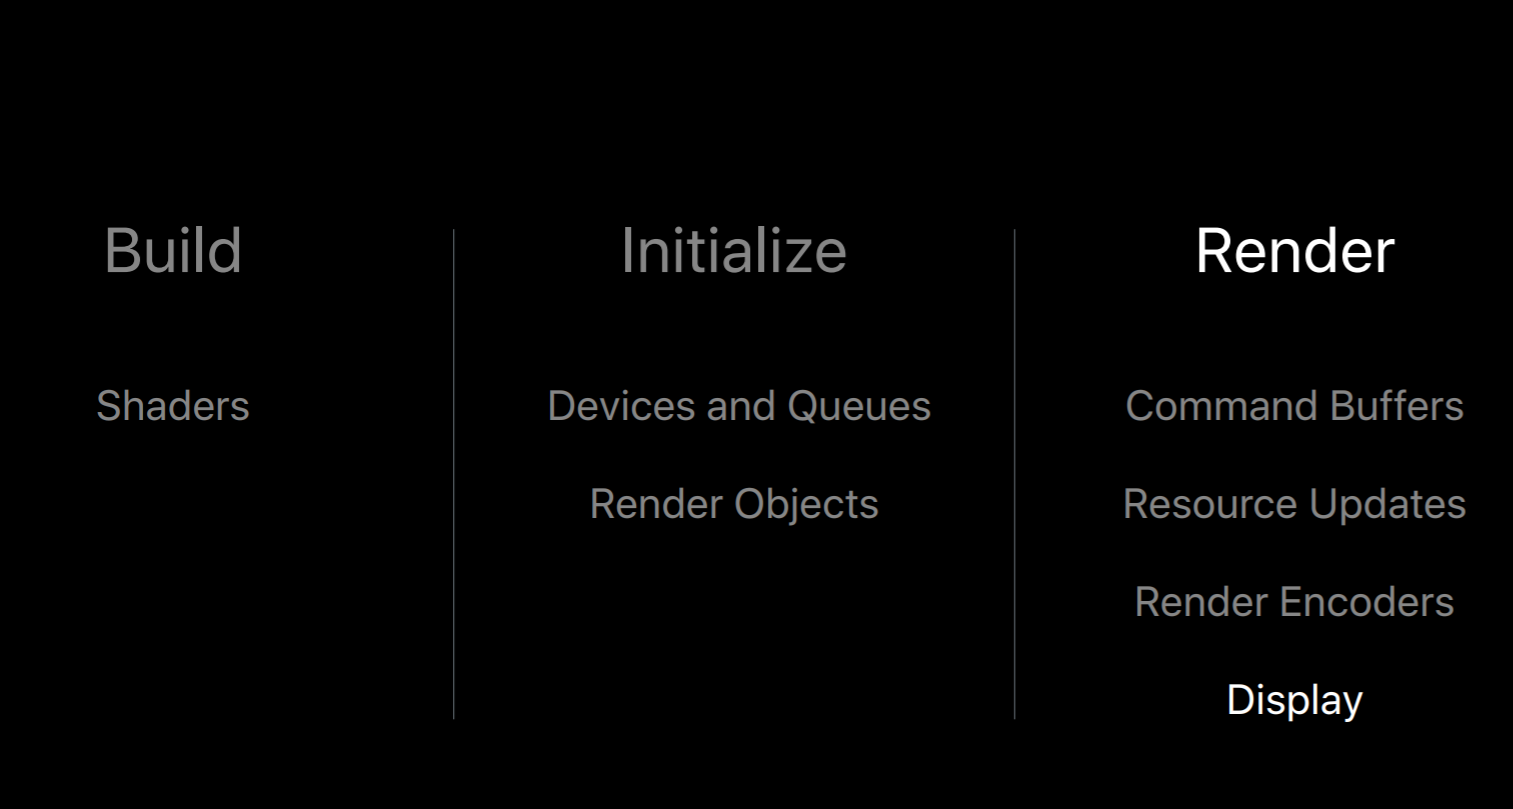
Here is the typical phase, here are typical phases of a rendering application. You build the app compiling source and bundling your assets. Start up and initializing it. Loading the assets and initializing objects that will persist for the lifetime of your application. And you repeatedly render setting up state, issuing many draw calls, and presenting frame after frame. I'll talk about developing for Metal in the earlier stages of the application's lifetime, including building shaders offline and creating object's initialization. And Sukanya will describe how to port your per frame rendering code.
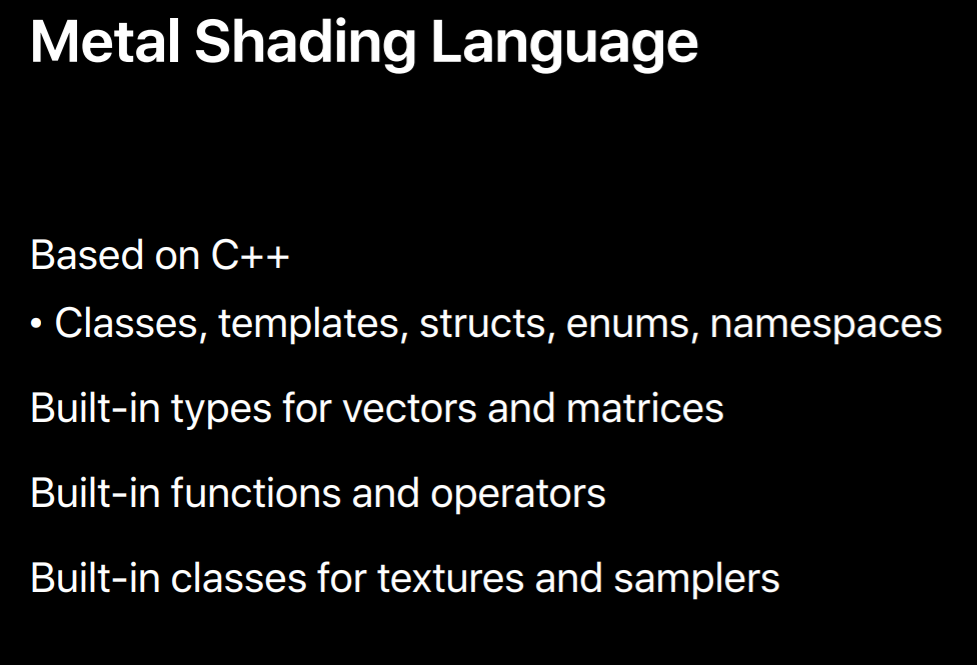
So let's start out with application build time which is where shaders are typically compiled. We'll begin with a look at the shading language. The Metal shading language is based on C++. So just like C++ you can create classes, templates, structures, define enums and namespaces. Like GLSL there are built-in vector and matrix types, and numerous built-in functions and operators commonly used for graphics. And there are classes to specify sampler state and operate on textures.
The best way to describe the language is just to show you. So here is a vertex and fragment shader pair. The vertex keyword at the function at the top specifies that that function is a vertex shader, likewise for the fragment keyword for the function at the bottom. Note that they have custom names unlike GLSL where every shader is just called main. This is important because it allows you to build large libraries of unique shaders using names to indicate what they do. Anything passed from your application is an argument to one of these shaders. There aren't any loose variables outside of functions as there are with GLSL. As you can see, there are these bracketed symbols next to each parameter. These are attribute specifiers which extend upon the C++ language to indicate special variables. So this vertex ID attribute indicates that this VID parameter should contain the index of the current vertex when this vertex executes. It's used down here in two places to index into an array of vertices. These parameters here with a buffer attribute specifier these indicate that these variables are filled by buffer's objects set in the Metal API. I'll talk more about how the Metal API relates to these in just a minute.
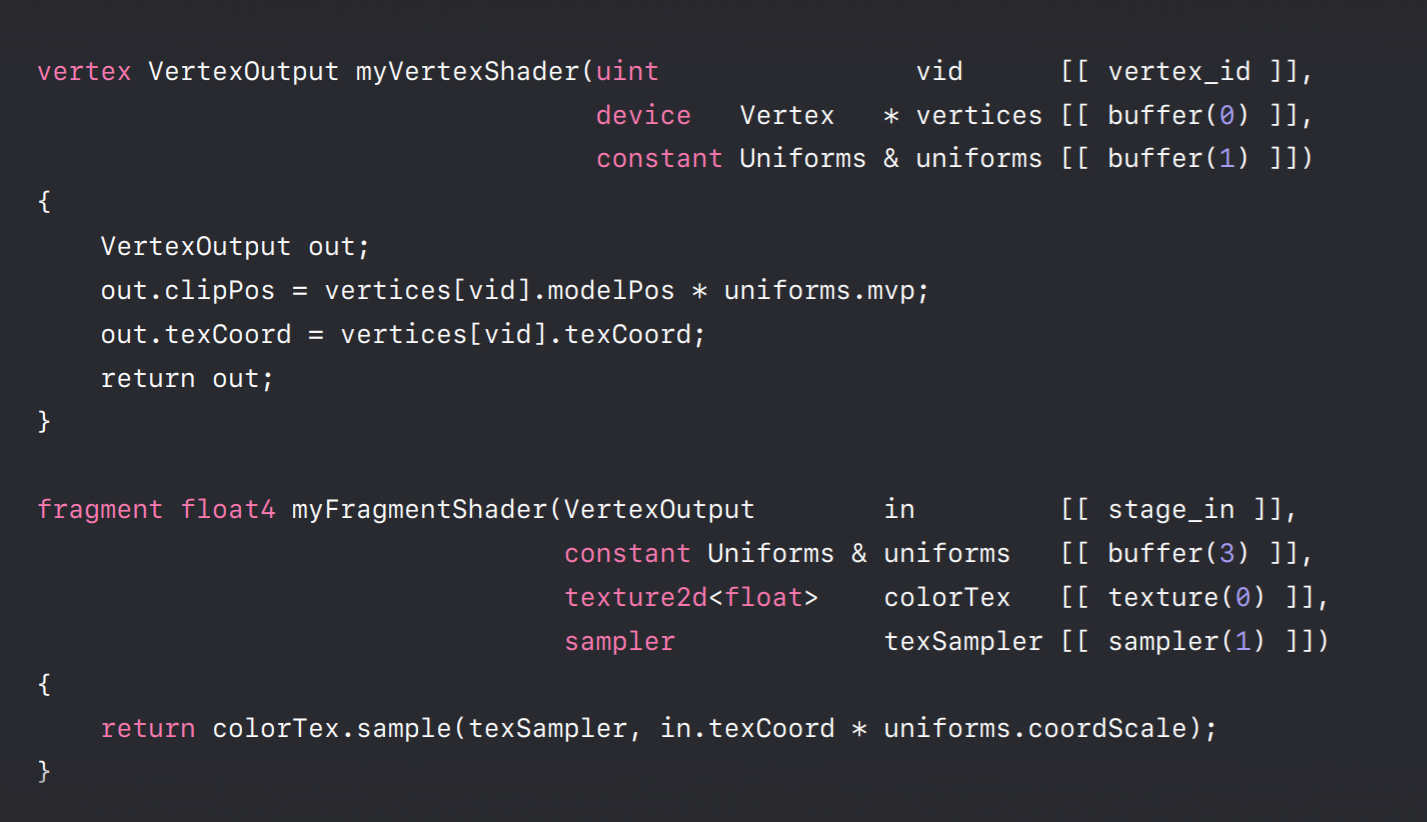
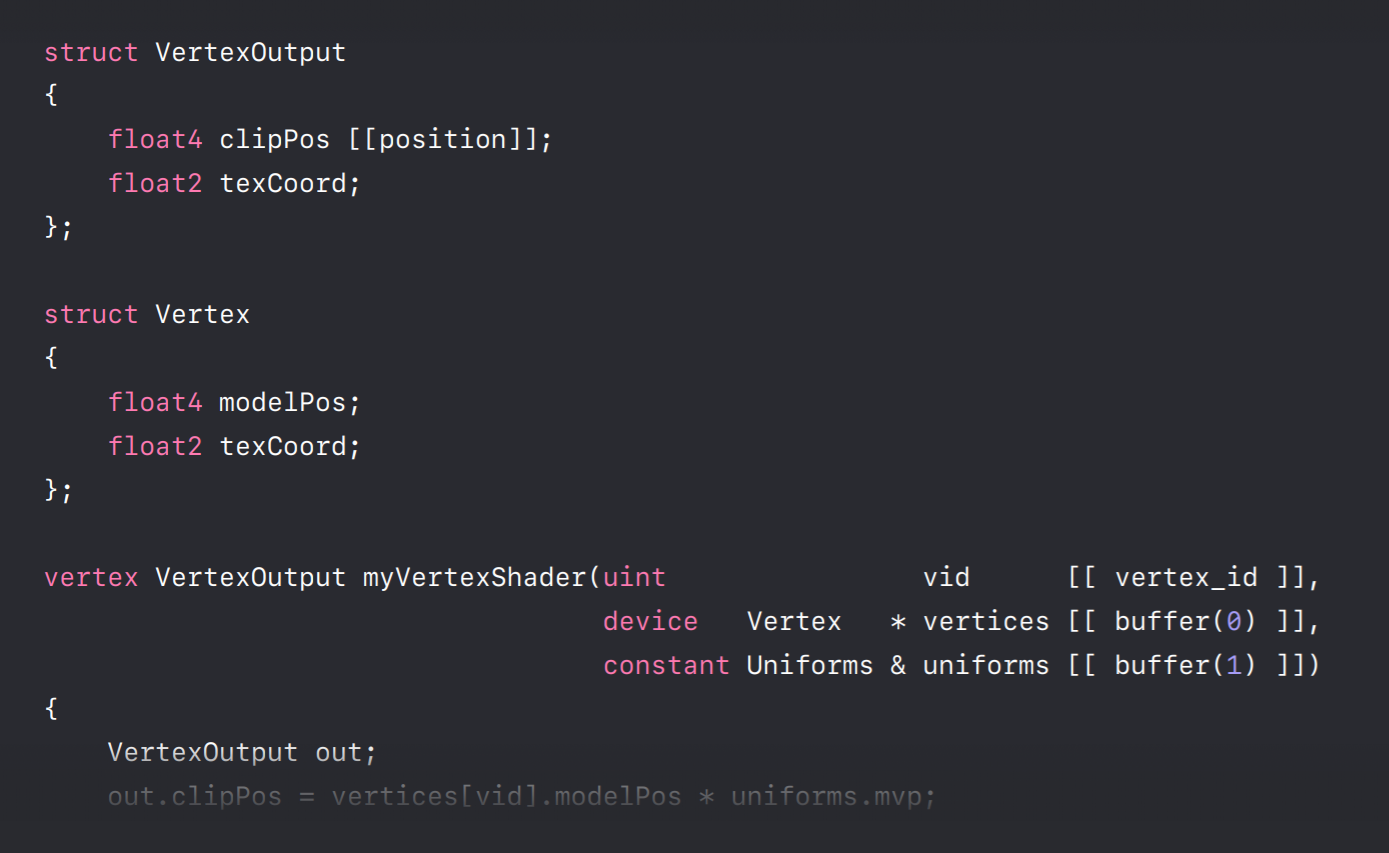
But first let's take a closer look at some of the types used here. Now these are all custom types that you would define. The vertices parameter here is defined as a pointer to a vertex type and its definition is right here. The structure has two members, a model position member and a texture coordinate member. It defines the layout and memory of each vertex in a vertex array passed into this vertex shader. Let's look at this vertex output type returned by our vertex shader. Its definition here specifies what's passed down for the rasterization stage and eventually to the fragment program. The four-component floating-point member named clipPos has this position attribute specifier next to it. This indicates that this member will serve as the output position of our vertex shader. This texCoord member which doesn't have an attribute specifier defaults to a variable that will be interpolated with the texture coordinate values of other vertices defining the rasterized triangle much like a varying in GLSL.
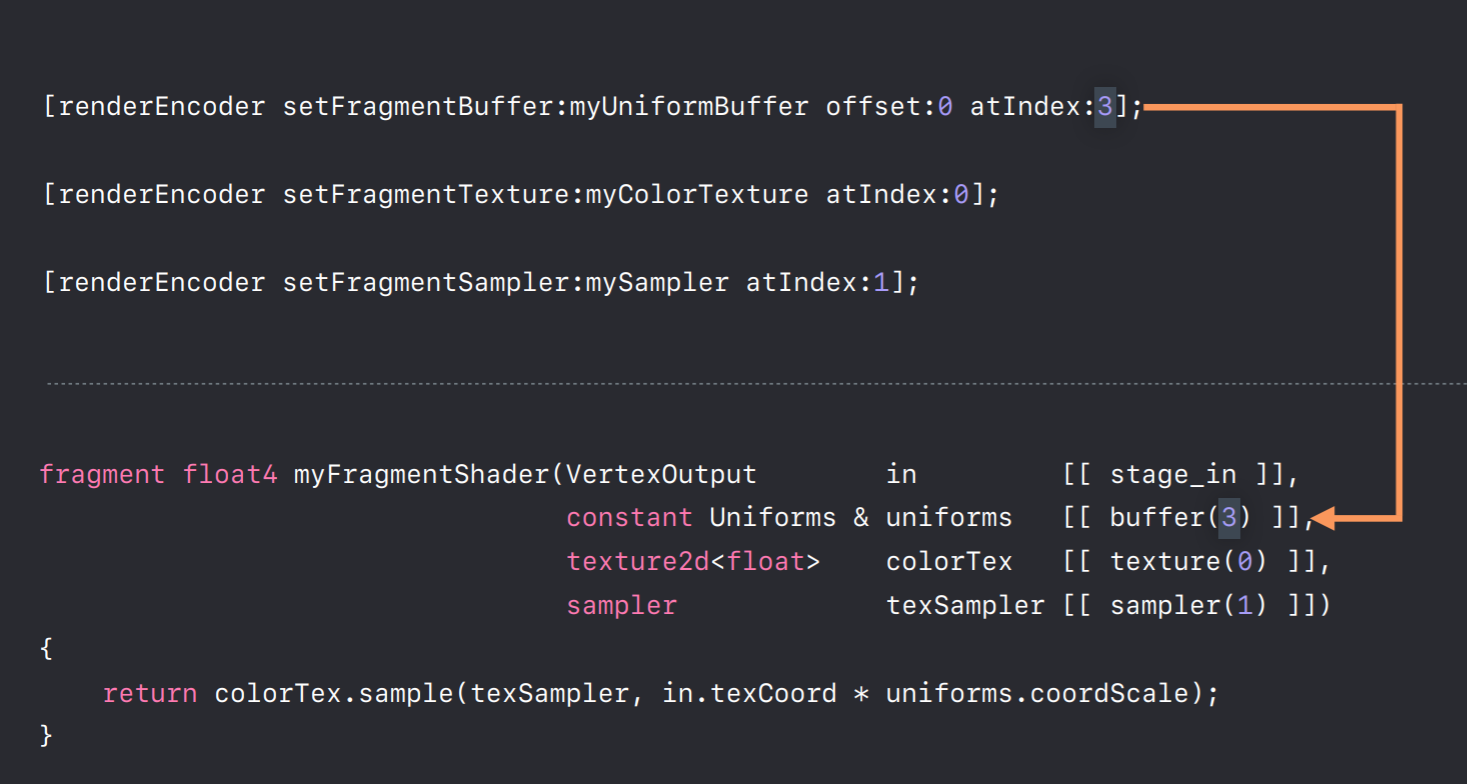
Let's take a look at some of the parameters of our fragment shader. So we're using this vertexOutput struct that we just looked at down here as an input to our fragment shader. And it gives us the interpolated texture coordinate that we constructed in the vertex shader and we use it here to sample from a texture. In our application code which is written in Objective-C we use a Render Command Encoder to map objects to shader parameters. The index argument with each of these calls are similar to OpenGL's attribute indices, vertex attribute indices, and textured units. They specify indices which map to indices in our shader parameters. So by calling the encoder's set fragment buffer method with an index of three we map this my uniform buffer object to the uniform's parameter of our encoder, of our shader. We make similar calls to set our texture and sampler objects.
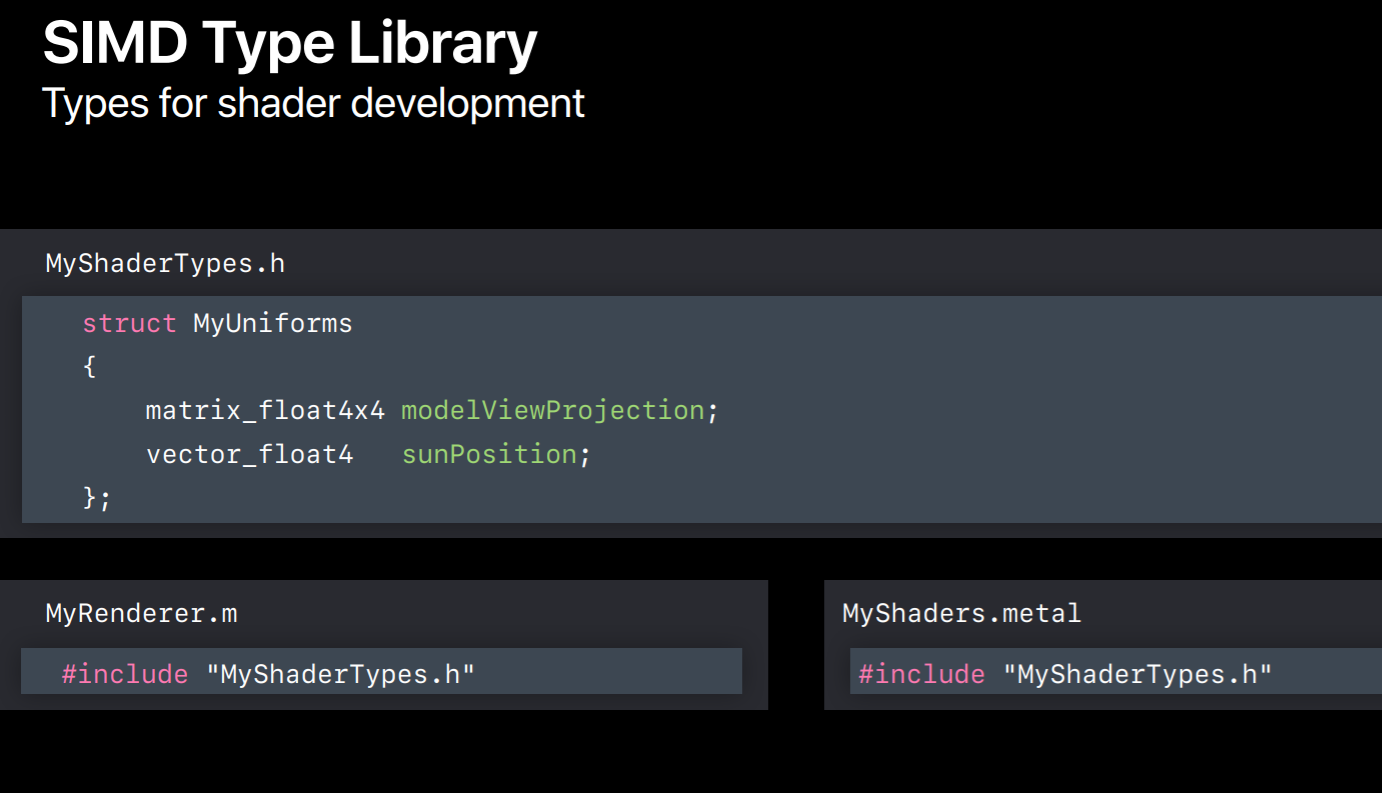
Now I want to talk about one library that's incredibly useful for shader development. This is called SIMD. Now SIMD is actually a library that's separate from Metal and is used in many orthogonal frameworks. But it was built with Metal in mind. SIMD defines vector and matrix types commonly used to implement graphics algorithms, so this includes three and four component vector types and three by three and four by four matrix types. One of the nicest features of this library is that you can use it to share code between your application code and your shading language code. This is really useful because you can define the layout of data passed from your application to your shaders with structures using these types.
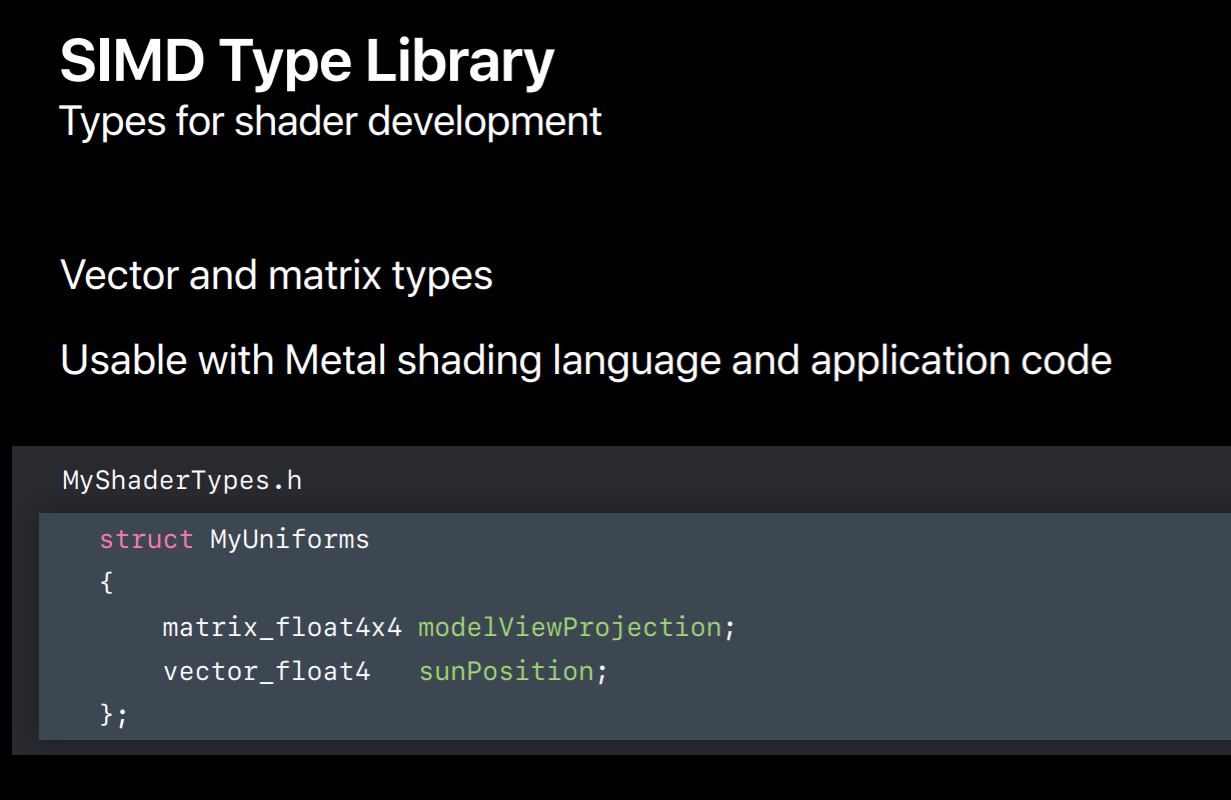
Here's how it works. You create a structure with data you'd like to pass from your application to your shaders. So for instance, if you want to pass down a model view projection matrix to the and the position of the SIMD primary light source you can use SIMD types in your structure to do this. You put the structure's definition and a header which you would include in both your application code and Metal files. This way the data layout used by your shaders matches what you've set in your code because they're using the same types. This makes bugs due to layout mismatches much less common.
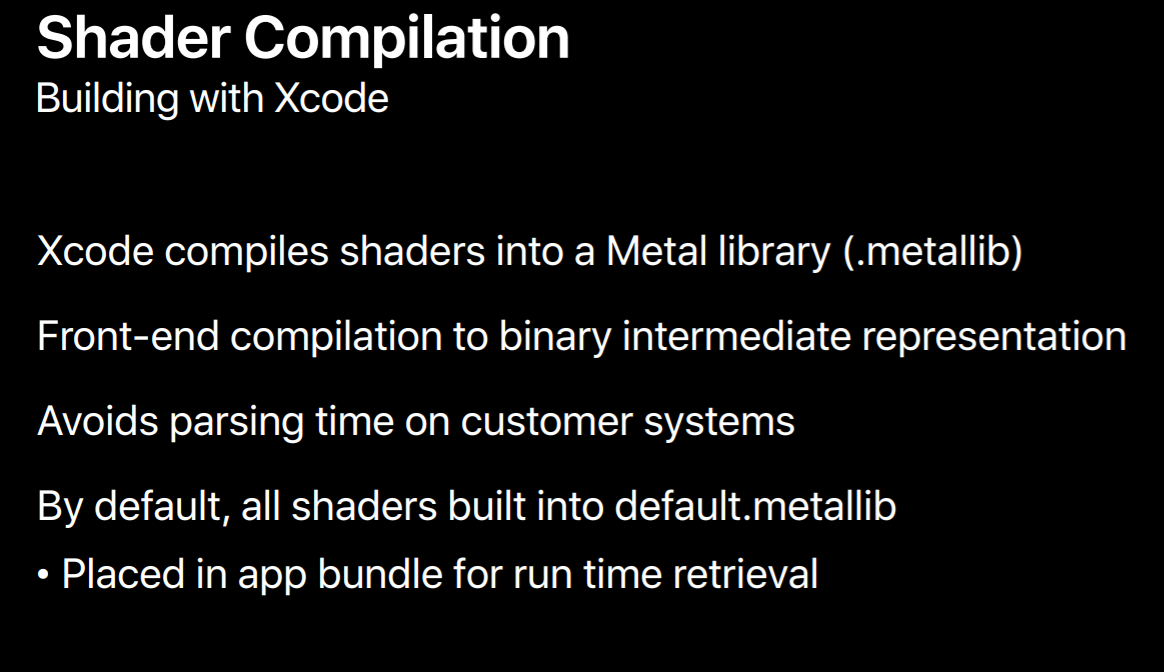
One of the key ways in which Metal achieves its efficiency is by doing work earlier and less frequently. So you'll use Xcode to compile Metal shader files when you build your application. This runs a front-end compilation performing string parsing, shader analysis, and some basic optimizations. It converts your code into a binary intermediate representation that is usable on any hardware. Actual GPU machine code isn't built until your app runs on the user's system. But this removes half the compiled time needed when your app runs. The built intermediate representation binary is archived into a Metal library file. Xcode will compile all the Metal shader source files into a default Metal library, placing it into your app bundle for retrieval at runtime.
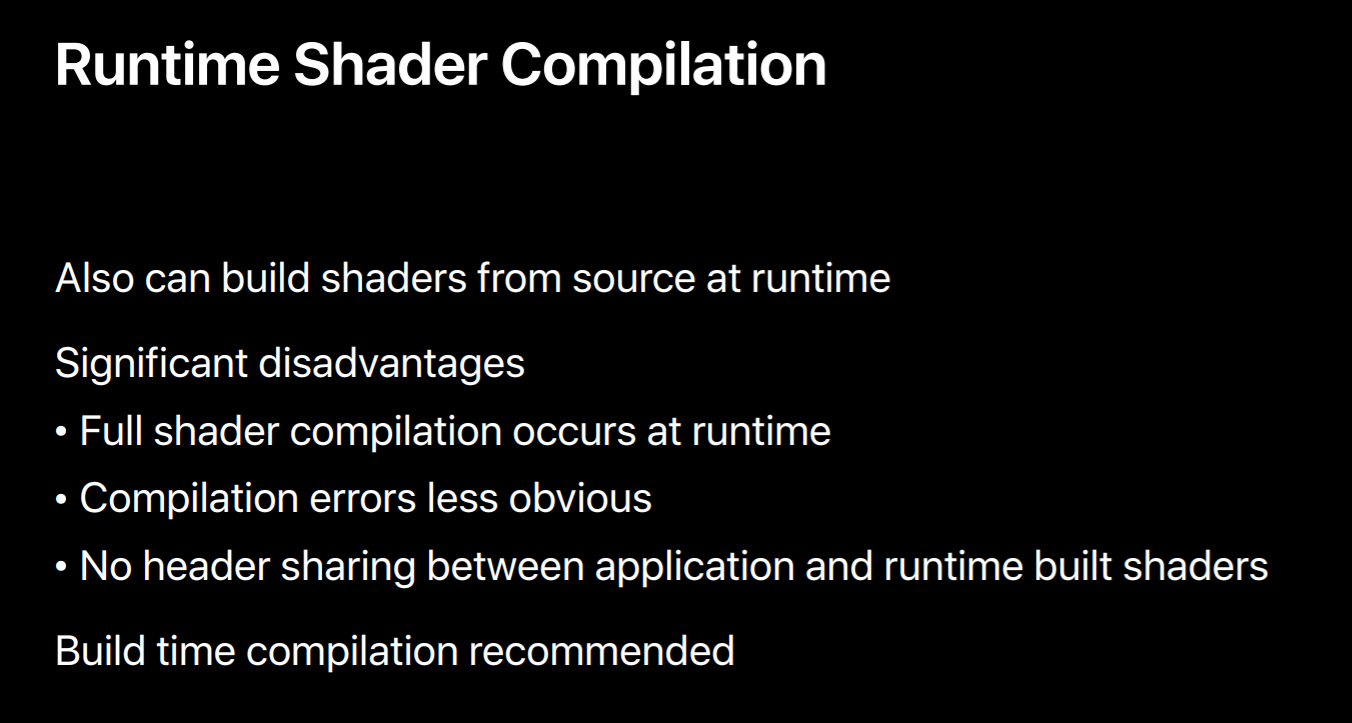
In addition to having Xcode built shaders you also can build shaders during your app's runtime. Some OpenGL apps construct shaders at runtime by concatenating strings or running a source code generator of some kind. For those gathering all of the shaders at build time can be a challenge. But for bring up purposes or if built time compilation just isn't possible for your app Metal is able to compile shaders from source at runtime just like OpenGL. However, there are a number of disadvantages to this, most obviously you give up on the performance savings of keeping this work off the user's system. You won't see any shader compilation errors at built time so you'll only find out about them when you run your app. Finally, if you compile at runtime you can't include headers in your shaders, so you can't share types between your shaders or your application code. If you use runtime share compilation to get your app up and running quickly I strongly encourage you to spend some time getting your shaders to build within Xcode. This way you can benefit from not only the runtime performance savings but also these conveniences in shader development.
Initialize Devices and Queues & Render Objects
Let's move onto the steps your app will need to take to initialize your Metal renderer, so this includes creating a number of objects. I'll start out with the devices and command queues and then I'll describe how to create objects for your assets, including textures, buffers and pipeline objects.
Devices
So devices and queues. These are the first objects you'll create. The device is an abstract representation of a GPU. It's responsible for creating objects that are used for rendering including these textures, buffers and pipeline objects. In iOS since there's only ever one GPU there's only one device you can get, but on macOS systems can have multiple devices since there may be both an integrated and discrete GPU and even multiple eGPUs. Usually though, getting the default device is sufficient for most applications. And getting this device is really simple, you call MTLCreateSystemDefaultDevice.

CommandQueues
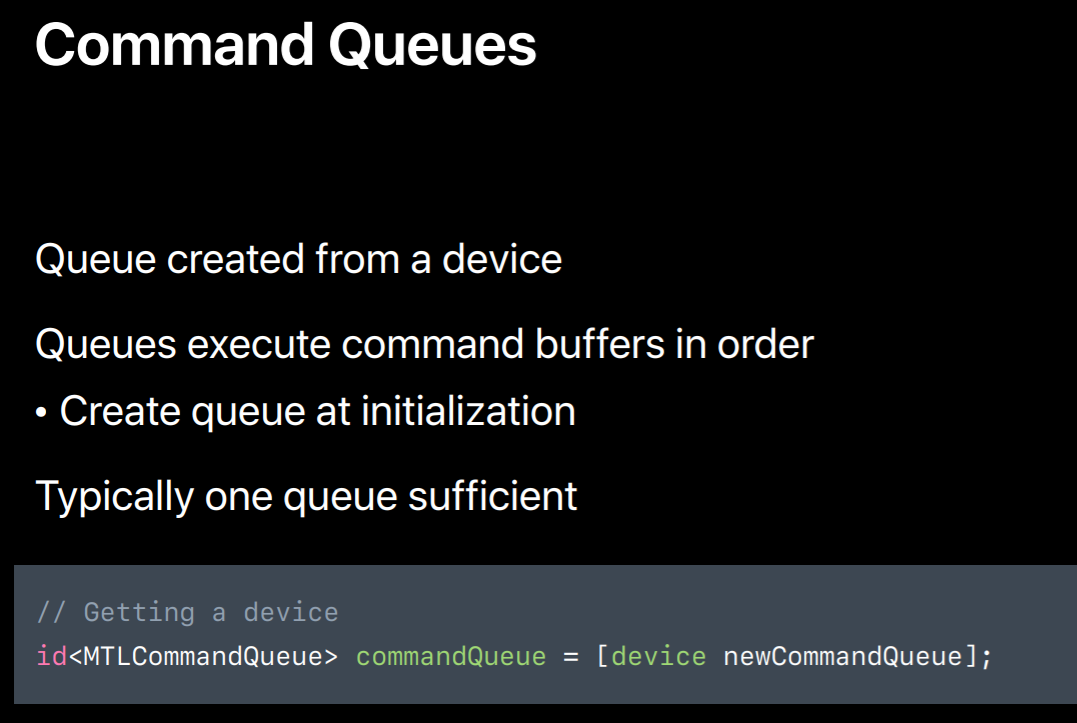
One of the first things you'll do with this device is create a command queue. The queue is used mostly in your applications render loop to obtain command buffers each frame, but you want to create the command queue at initialization. Typically, a single queue is sufficient but more complex apps that execute many tasks in parallel may need multiple queues. Creating a queue is also really simple, you call newCommandQueue with the device you just created. And once you've got your queue you can get command buffers for your render loop.
Textures
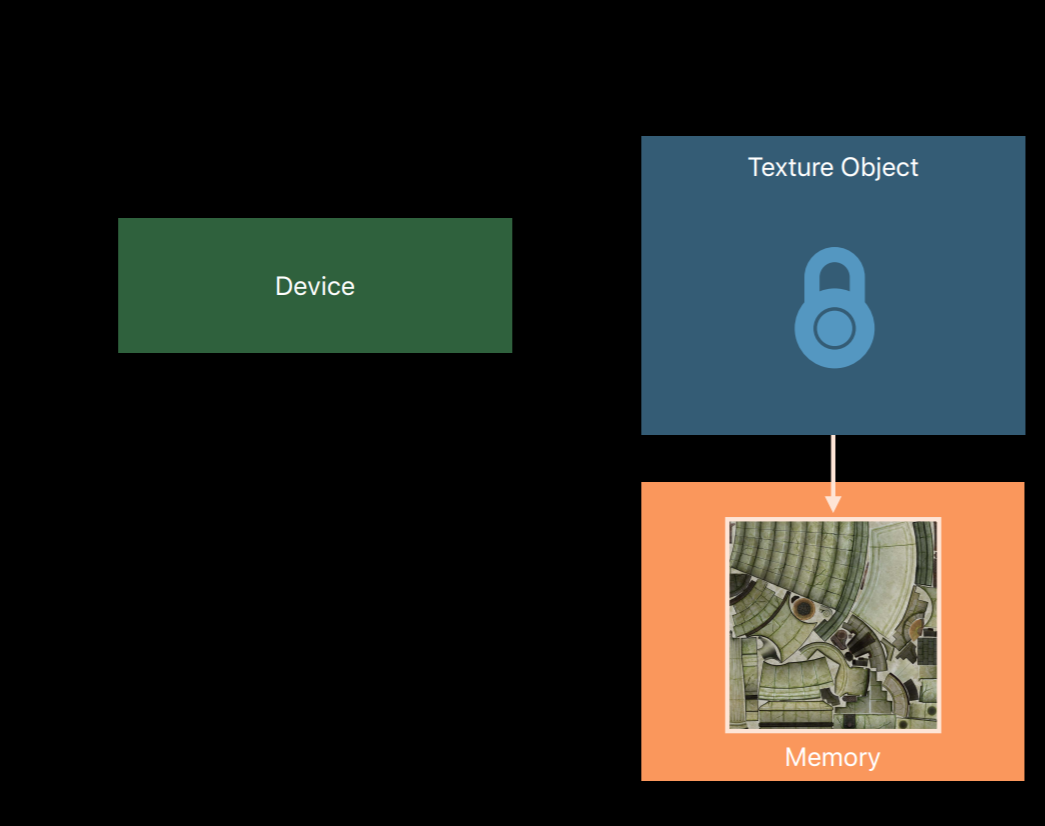
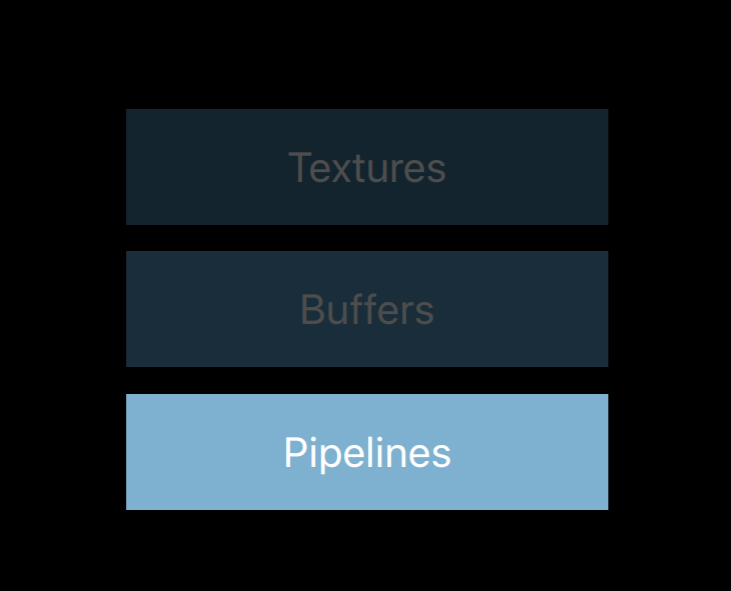
Let's move on building your render objects. I'm going to talk about creating three types of objects used for rendering, textures, buffers and pipelines. Let's start with textures. As mentioned earlier, you create render objects from a device object. You'll use a descriptor object to create most of these. Descriptors are really simple objects without any true methods. They only contain properties needed for object setup. So for example, to create a texture you'd use a texture descriptor. You specify the properties that you'd like the created texture to have. So things like the type of texture, 2D, 3D, cubeMap. The texture's dimensions and the number of Mipmaps you'd like it to have. And the pixel format of data in the texture. Once you've set the desired values for each of the properties you call a method on the device to create a usable texture object. This also allocates the memory backing the texture image. Once you've created the object you no longer need the descriptor as it's only used for object creation. And properties you set in the descriptor are locked and can no longer be changed.

However, the contents of the texture image can be modified.
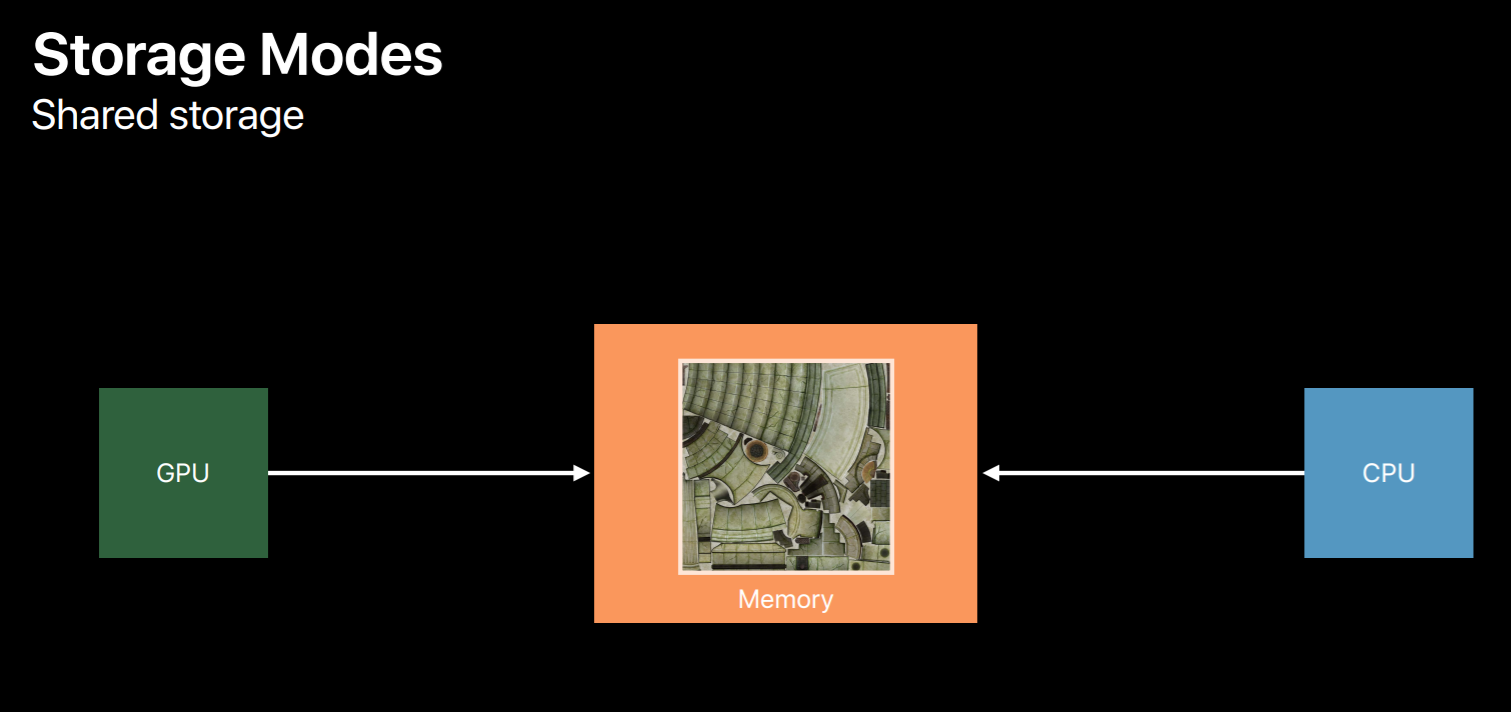
So I want to talk about one property you'll set in the texture descriptor and you'll also use when creating a buffer. This is called the storage mode. As mentioned, when you create a texture object Metal allocates memory for it right then and there. The storage mode property tells Metal in which pool memory it should be allocated.The simplest option shared storage mode gives both the CPU and the GPU access. For buffers this means you get a pointer to the memory backing the object. Protectors, this means you can call certain easy-to-use methods to set and retrieve data from the texture.
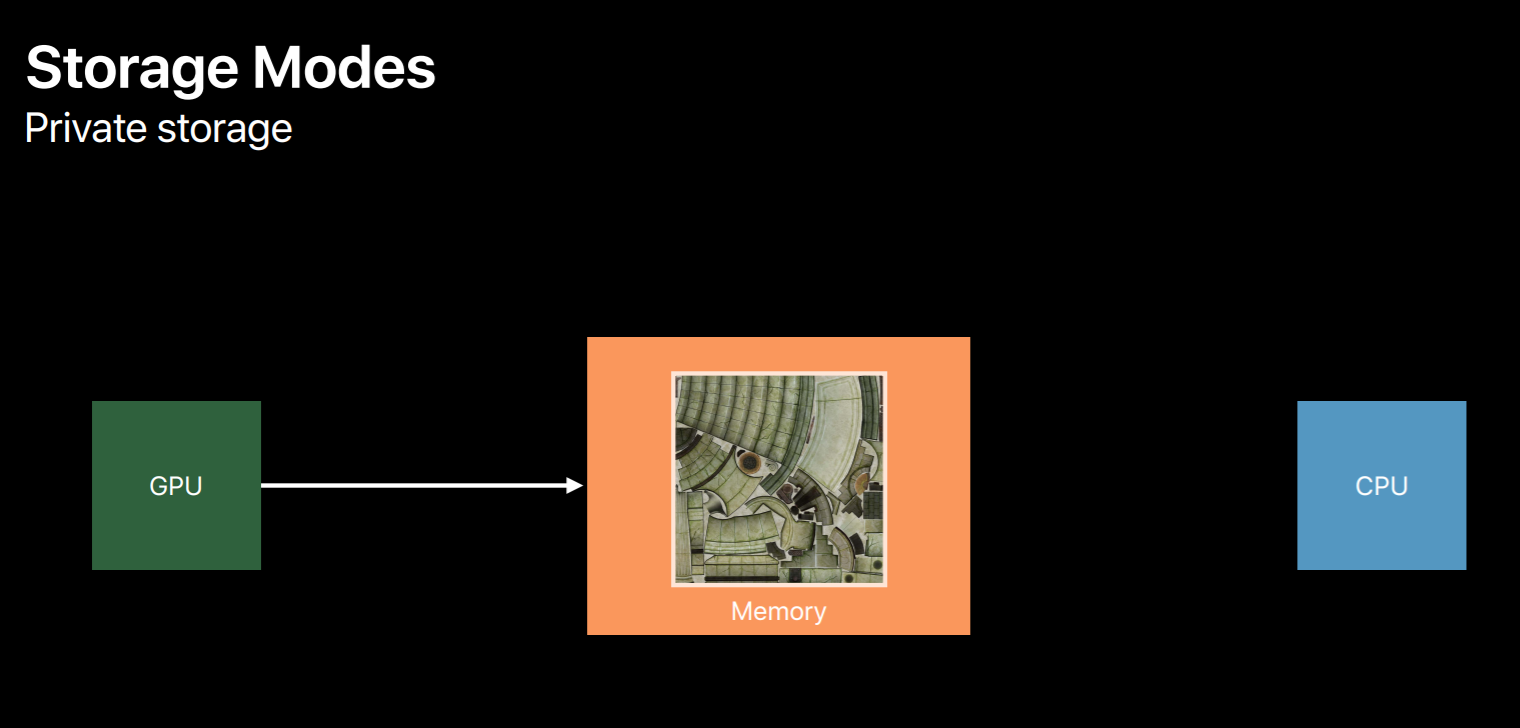
You can use private storage mode which only gives the GPU access to the data, this allows the Metal to apply some optimizations it would be unable to if the CPU also had access to that data. But only the GPU can directly fill the contents of this type of texture. You can indirectly fill data from the CPU using a blit encoder to copy from a second intermediate resource using shared storage. On devices with dedicated video memory setting the resource to use private storage allocates it in video memory only.
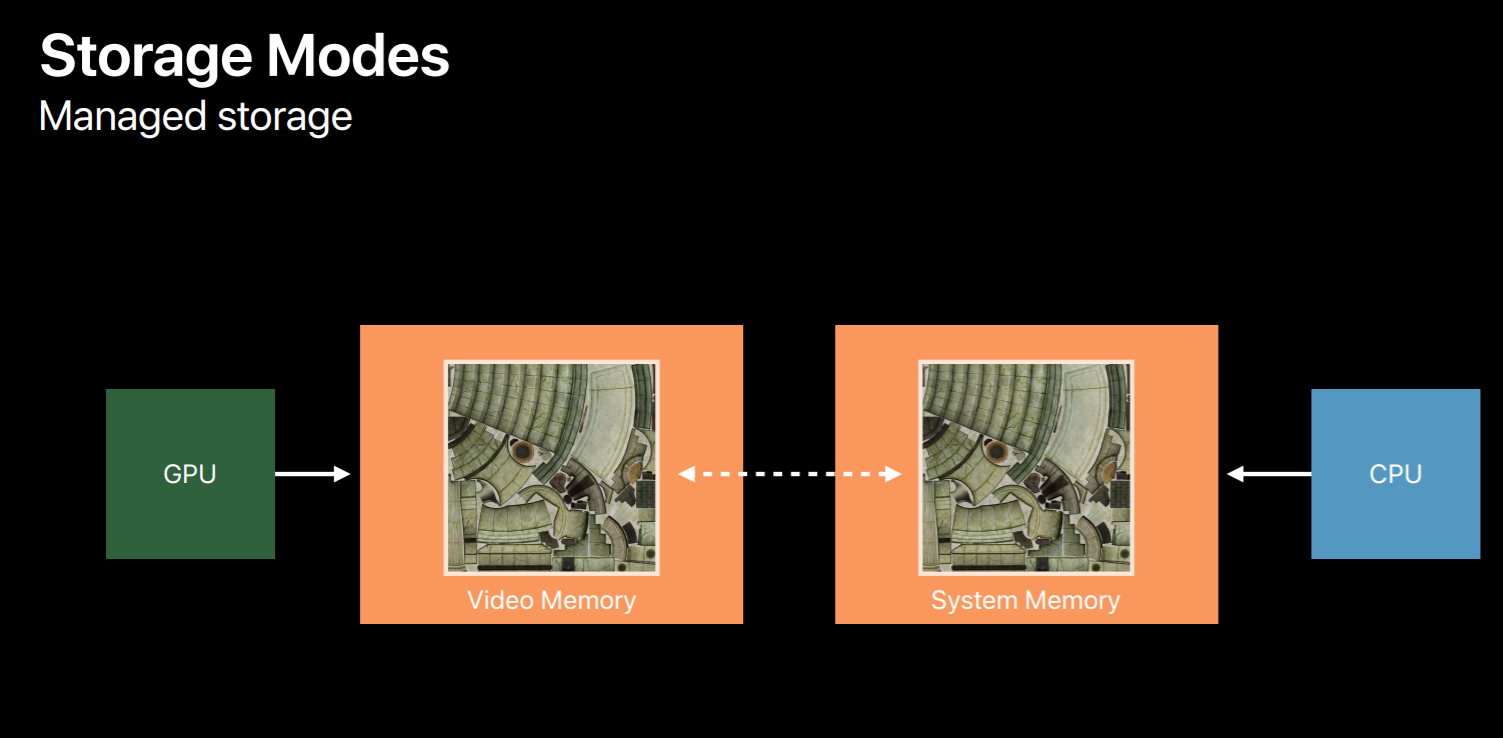
Finally, on macOS you can use a third storage mode called managed storage. This allows both the GPU and CPU to access the object data. And on systems with dedicated video memory Metal may create a mirrored memory backing for efficient access by both processors. Because of this, explicit calls are necessary to ensure data is synchronized for GPU and CPU access.
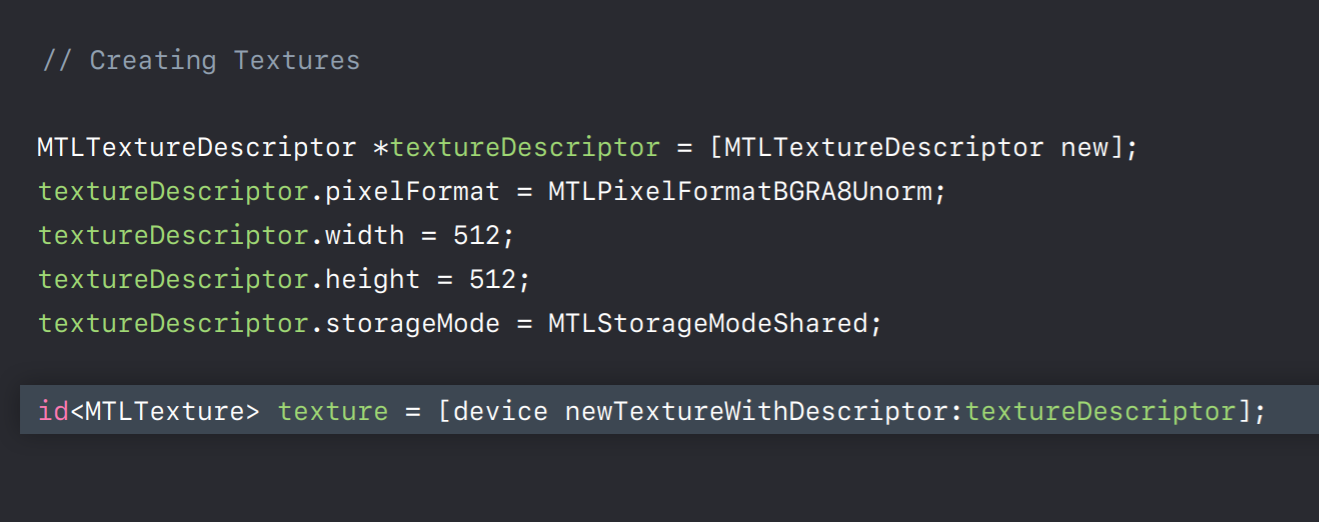
Here's an example of creating a texture object. First you create a texture descriptor and set a number of properties in it, including the storage mode. And then we create a texture using the device.
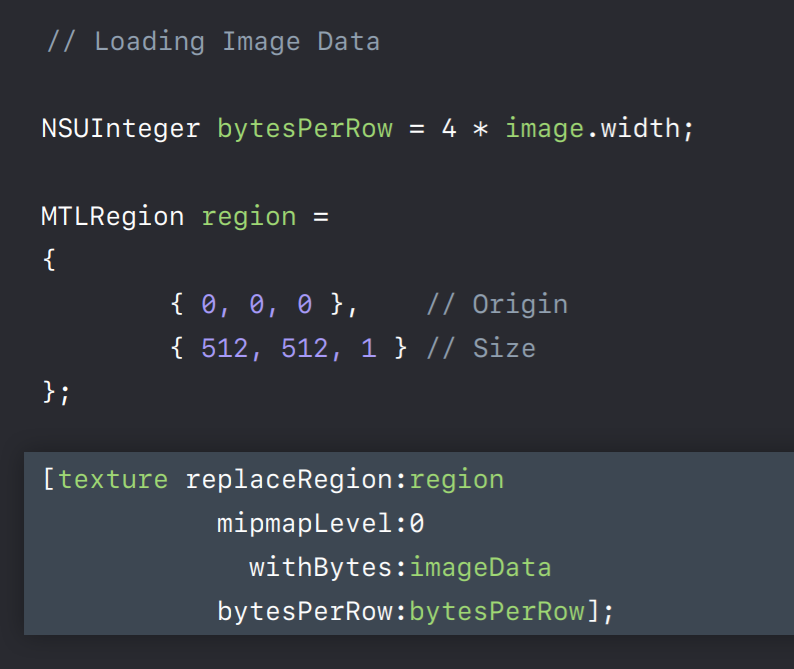
To fill a texture's image data we calculate the bytes per row and just like with GLText we specify a region to load. And then we call the texture object's replace region method which copies the data into the texture from a pointer we supply.
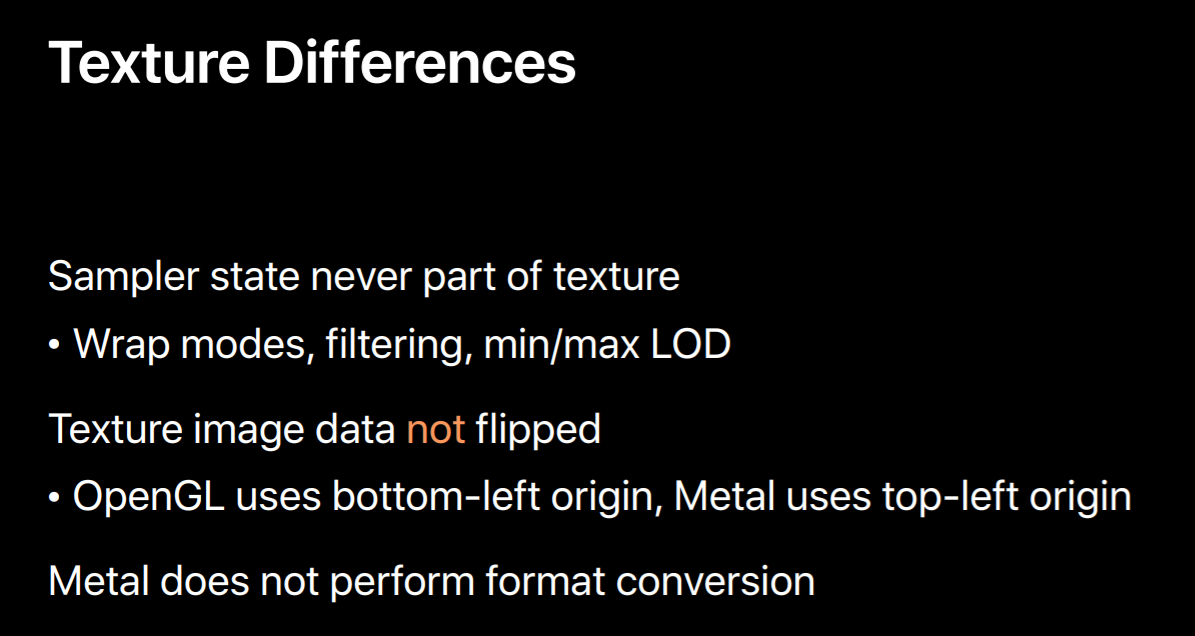
Now there are a few notable differences between OpenGL and Metal texture objects. While OpenGL does have a sampler object they are optional. Wrap modes and filters can be set in the texture's object itself in OpenGL. In Metal you need to create a separate sampler object or specify sampler parameters in your shaders. Texture image data is not flipped in Metal. OpenGL uses a bottom-left origin while Metal uses a top-left origin. So make sure you're aware of the difference when loading your textures. Desktop OpenGL also performs conversions when the data supplied is in a different format than the internal format. However Metal similar to OpenGL ES does not, so you'll need to make sure your assets are already in the proper format or implement paths to perform conversions.
Buffers
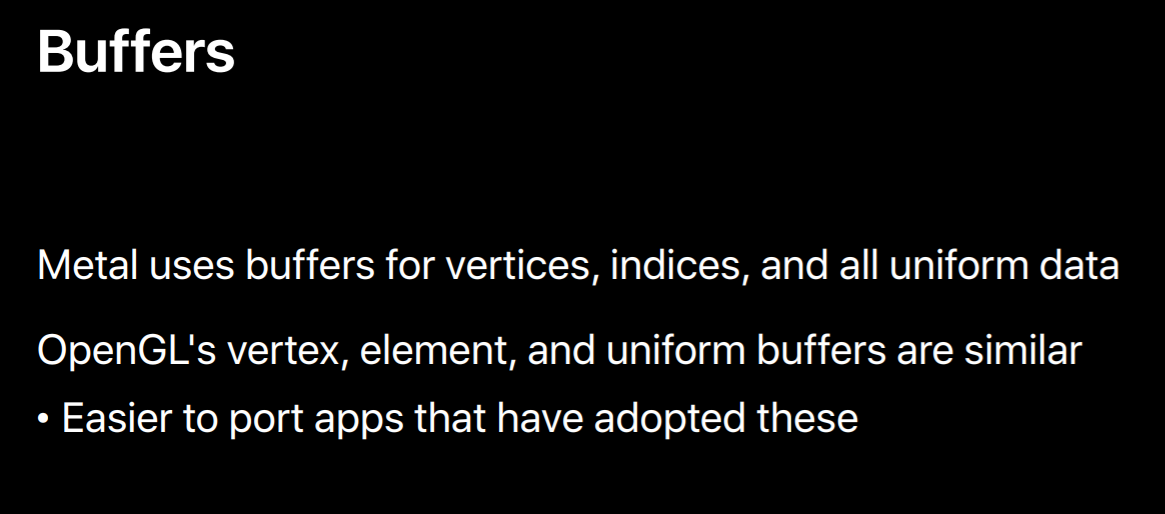
Let's move on to buffers. Metal uses buffers for all unstructured data. They're really similar to OpenGL's vertex, element and uniform buffers. So if you're already using these buffers in OpenGL you'll have an easier time with your port.
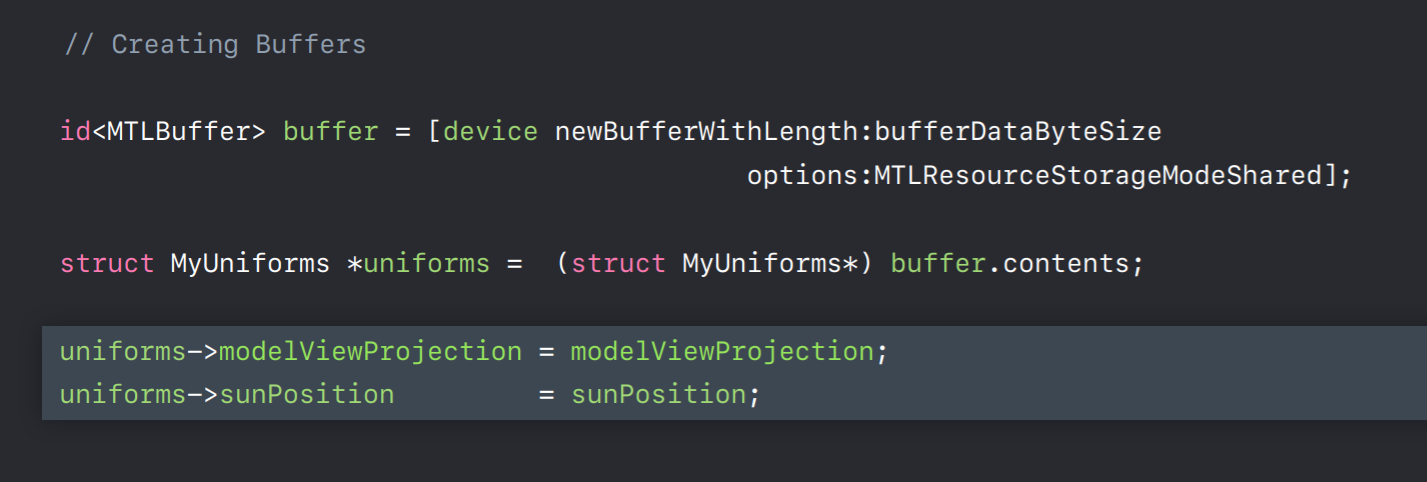
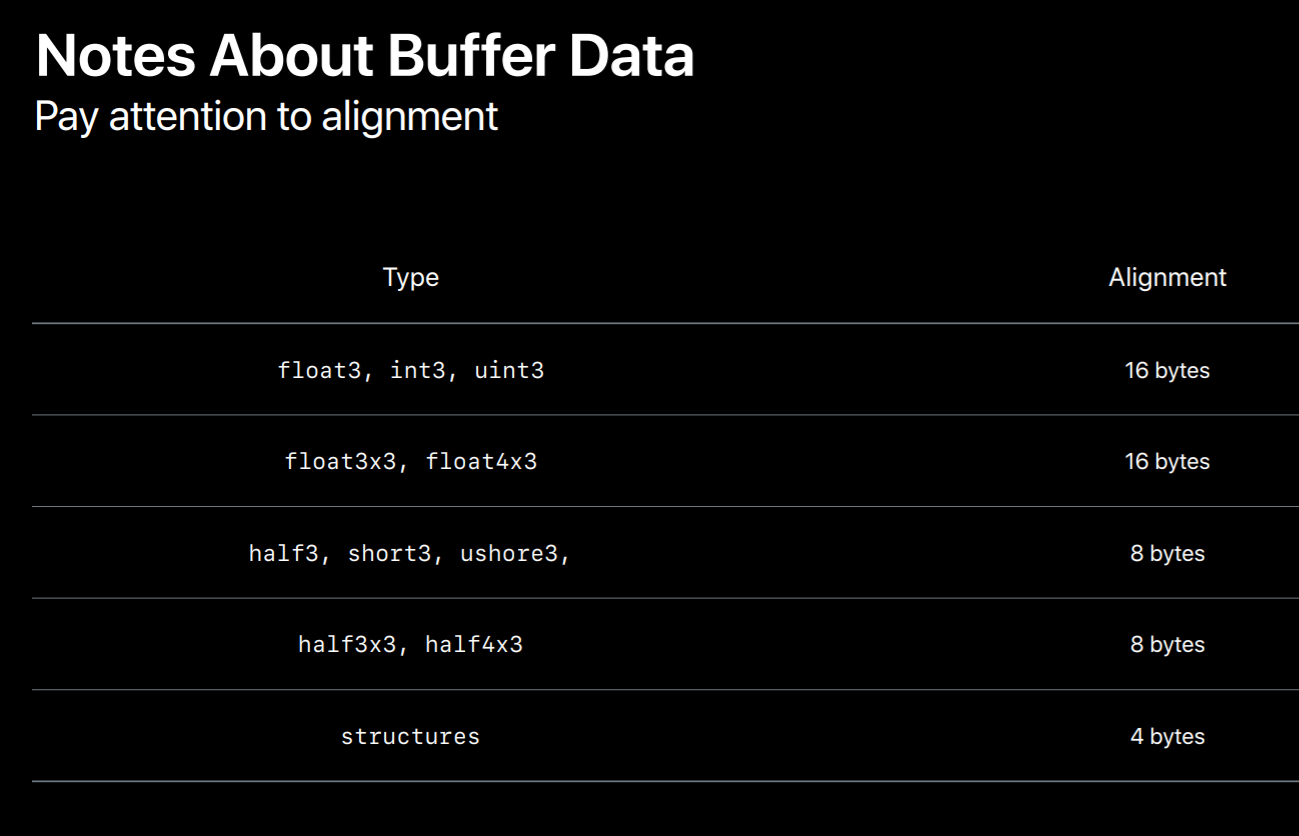
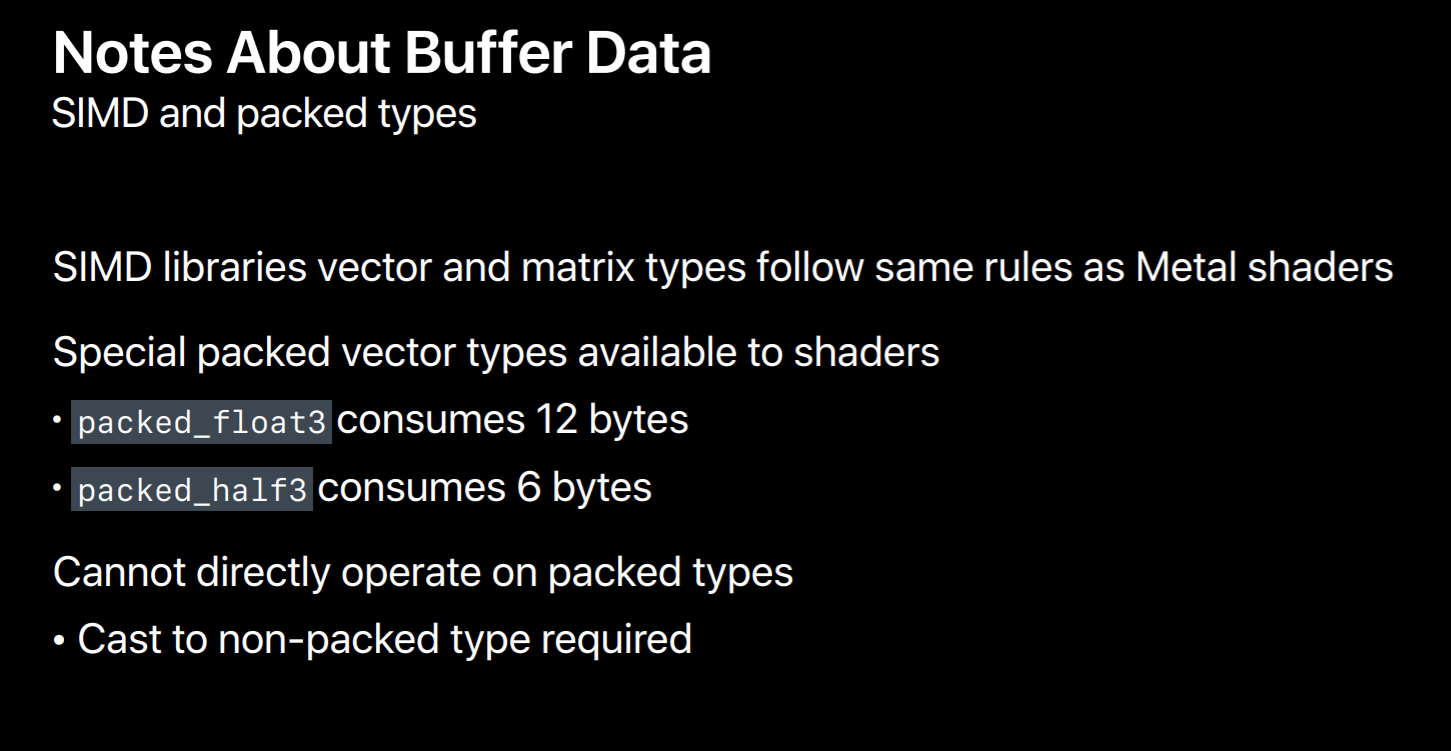
Creating a buffer is pretty simple with a device you call newBufferWithLength specifying the size of the buffer you want. You also specify a storage mode. You load a buffer through the contents property, which is simply a void pointer to the memory backing the buffer. To Metal's core the data is completely unstructured, so it's up to you to define the layout in your application and share your code. Here we're casting the contents pointer to a structure which uses some of the SIMD types I mentioned earlier. We set the members of the structure which fills in the buffer's data using the layout or application as is defined with the structure's definition. As mentioned earlier, you can share a structure's definition between your application and share code which ensures the layouts match between these two components. A common mistake is a mismatch between buffer data and how it's interpreted in the shader due to an assumption or due to assumptions about alignment.For instance, you might assume that the shading language's float3 type consumes only 12 bytes. Three 4 byte components is 12 bytes right. Well if you pack your data that way you'll run into trouble because the shading language actually interprets a float3 as consuming 16 bytes. That's because the types are kept as stricter alignments for CPU and GPU optimal CPU and GPU usage. Similar problems often occur with three by three matrices. If you really want to tack, if you really want to pack data tightly there are pack types available in the Metal shading language. After passing a pack data in a buffer your shader code would need to pack data, would you need to pass that packed data to a regular vector before it can perform operations on that data.
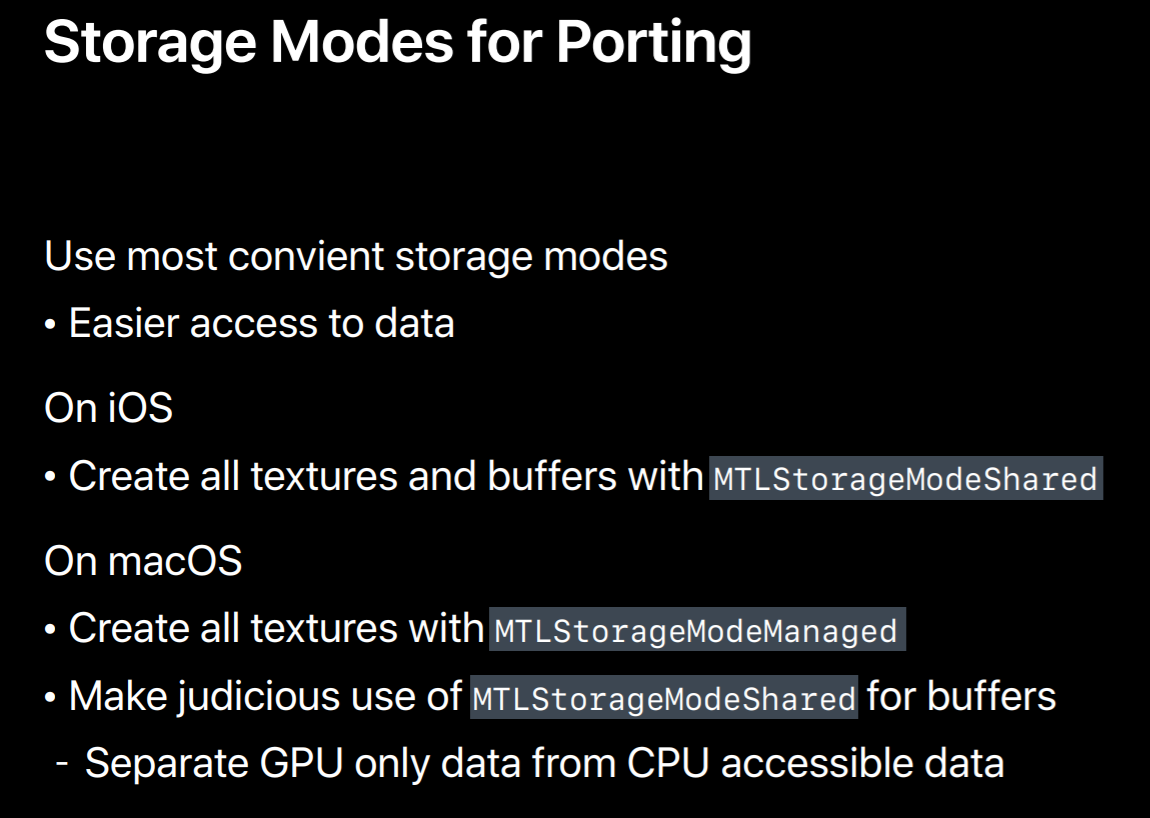
So when you're bringing up your application I recommend using the most convenient storage modes. This makes it more easy to access the data in those resources. So in iOS create all textures and buffers with StorageModeShared. On macOS you can't use StorageModeShared with textures, but StorageModeManaged does make image data access easier, although private storage is most optimal. You can use StorageModeShared with buffers on macOS, but be careful with this. If you mix data that both the CPU and GPU needs access to with data only the GPU needs access to it can be difficult to detangle these two types of data later on and put them in separate memory pools.
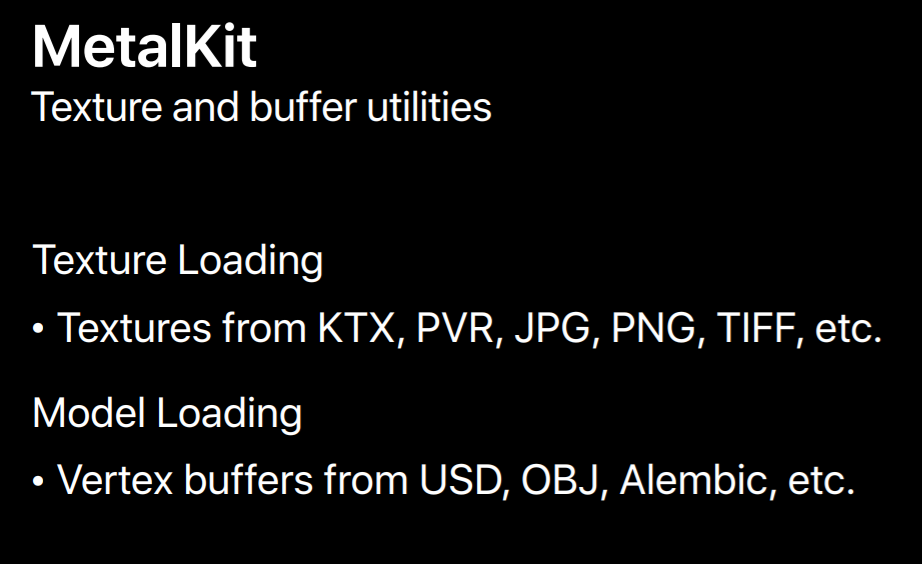
Now that I've described a little bit about creating textures and buffer objects directly I'd like to mention the MetalKit framework which can easily create textures and vertex buffers from common file formats. There's a texture loading class and some functionality to create Metal buffer backed meshes loaded by Model I/O.
RenderPipeline
Let's talk about shaders and the render pipeline objects that contain them.
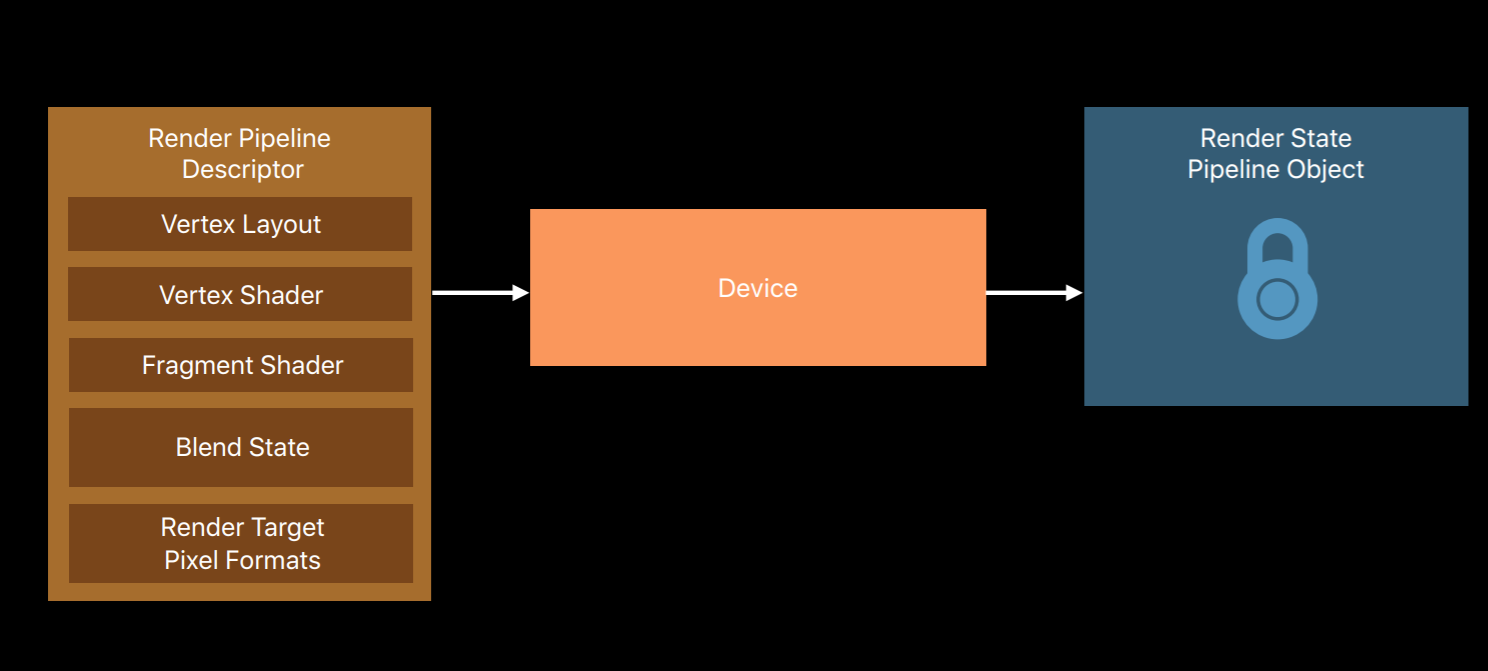
You create one of these pipeline state objects using a render pipeline descriptor object. The object contains a vertex and fragment shader pair. It also specifies the layout of vertices feeding the vertex shader. And also blend state and the pixel formats of render targets that the fragment and shader can render to. Just like with the texture object you call method on the device which will produce an immutable render state pipeline object. And also like a texture object you only need the descriptor to create that object.
Here's some code showing how to build these pipeline state objects. Before you create the pipeline, you'll need to get the shaders out of a Metal library. This line here loads the default Metal library that we built in Xcode. For this library you can obtain your vertex and fragment shader using their function names. You create a render pipeline descriptor object where you set these shading functions and also specify render target pixel formats. Finally, you use the device with the descriptor object we've set up to produce a pipeline state object.

The most significant difference between the OpenGL and Metal graphics pipelines is that while an OpenGL program object contains just a vertex and fragment shader pair Metal pipeline objects also include a vertex layout, blend state, and render target pixel format. So you need to know all of these things before you build a pipeline.
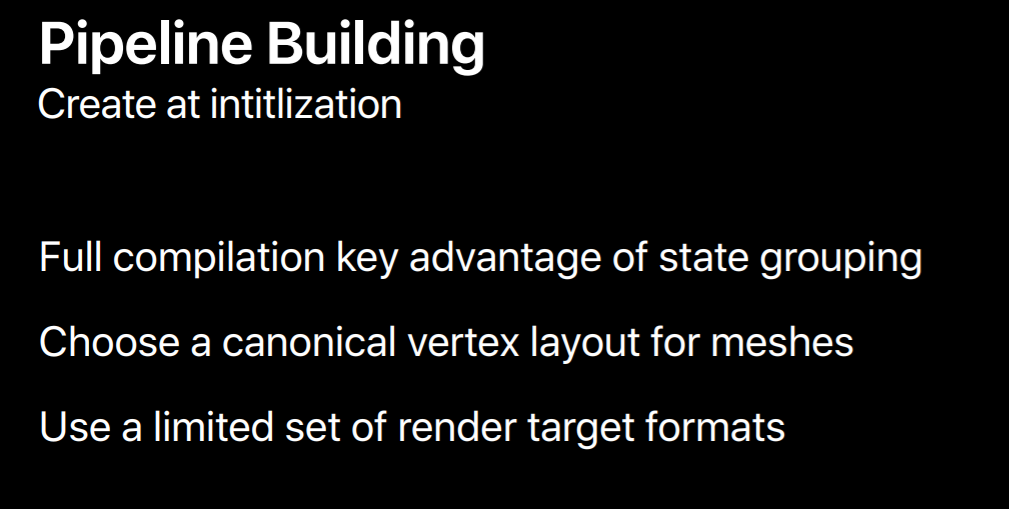
Having these extra pieces of state in the pipeline enables Metal to fully compile shaders into GPU machine code upon object creation. This is something that's not possible with OpenGL's program objects. Now you'll need to build a system that allows you to create pipelines when you initialize your app. It helps if you can choose a canonical vertex layout and a limited set of render targets. This reduces the combinations of state your app uses and the number of pipeline objects needed.
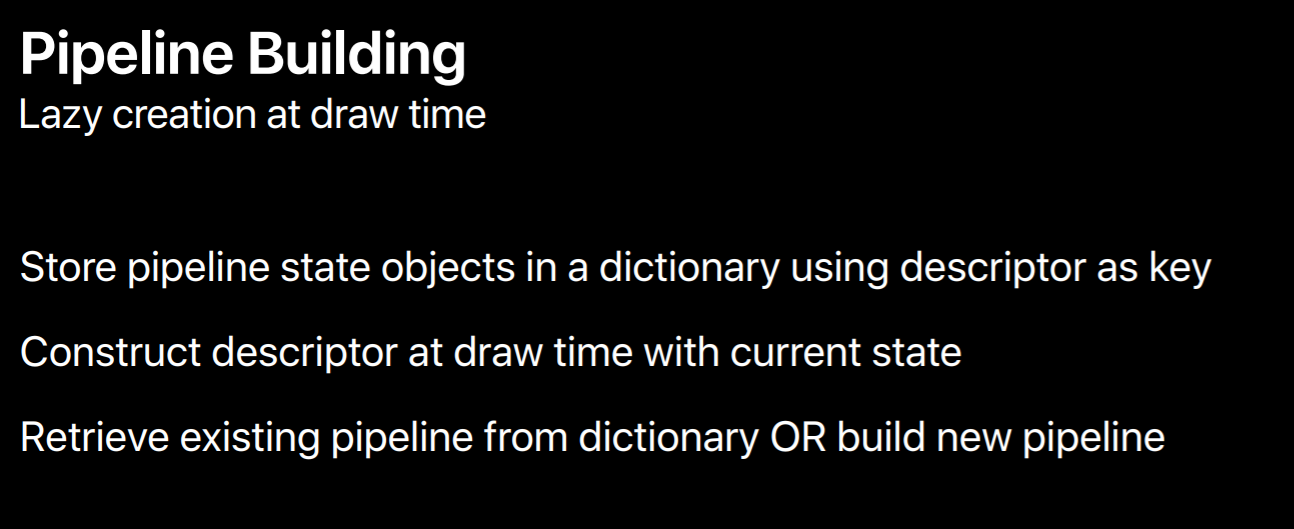
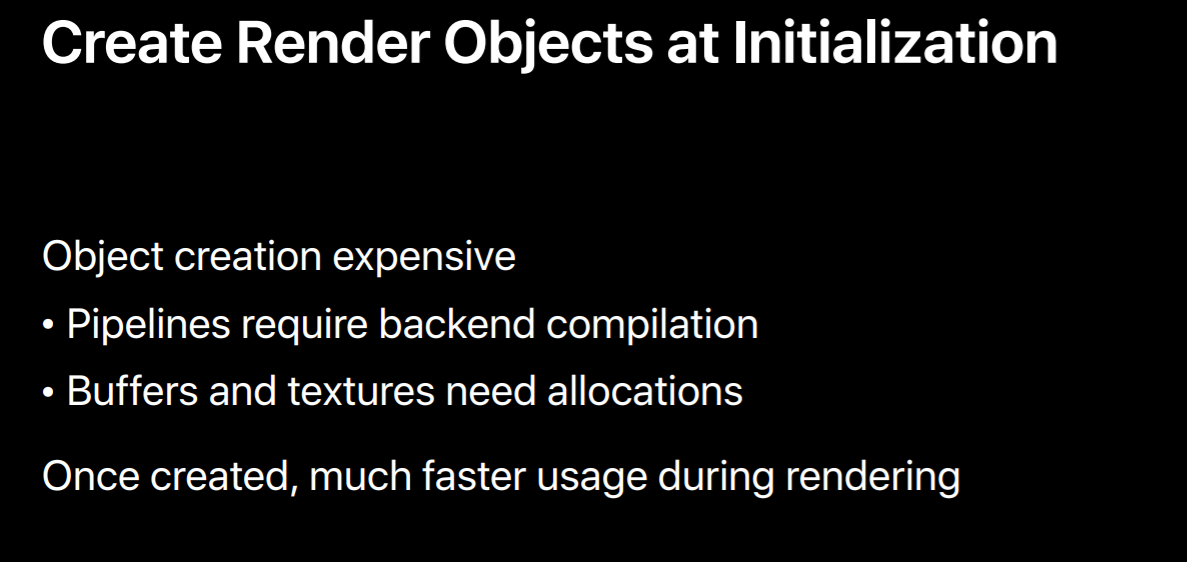
However, not everyone knows up front which pipelines their app will need. A common first step in porting an app to Metal is to keep a dictionary of pipelines you've already made. As your app encounters new combinations of state it can build and store pipelines using the descriptors as keys. Keep in mind this solution I mentioned is kind of a hack and you want to avoid shipping your app with it. This is because creating any of these objects is expensive. When you create a pipeline object the GPU compiler kicks in and translates and optimizes the shader's binary intermediate representation to machine code. If your app creates these just-in-time during its render loop you're likely to see stalls and a reduced frame rate for a short period of time. Allocating memory for textures and buffers is also an expensive operation, that's not even accounting for the processing required to fill in these resources with data. However, once you've created these objects using them in your render loop requires very little CPU over since so much is done up front.
Render
With that I'd like to hand it over to Sukanya who will talk about porting your render loop. Good evening everyone, I am Sukanya Sudugu, GPU software engineer at Apple. I am super excited to share some of our porting experience with you, so let's continue porting.
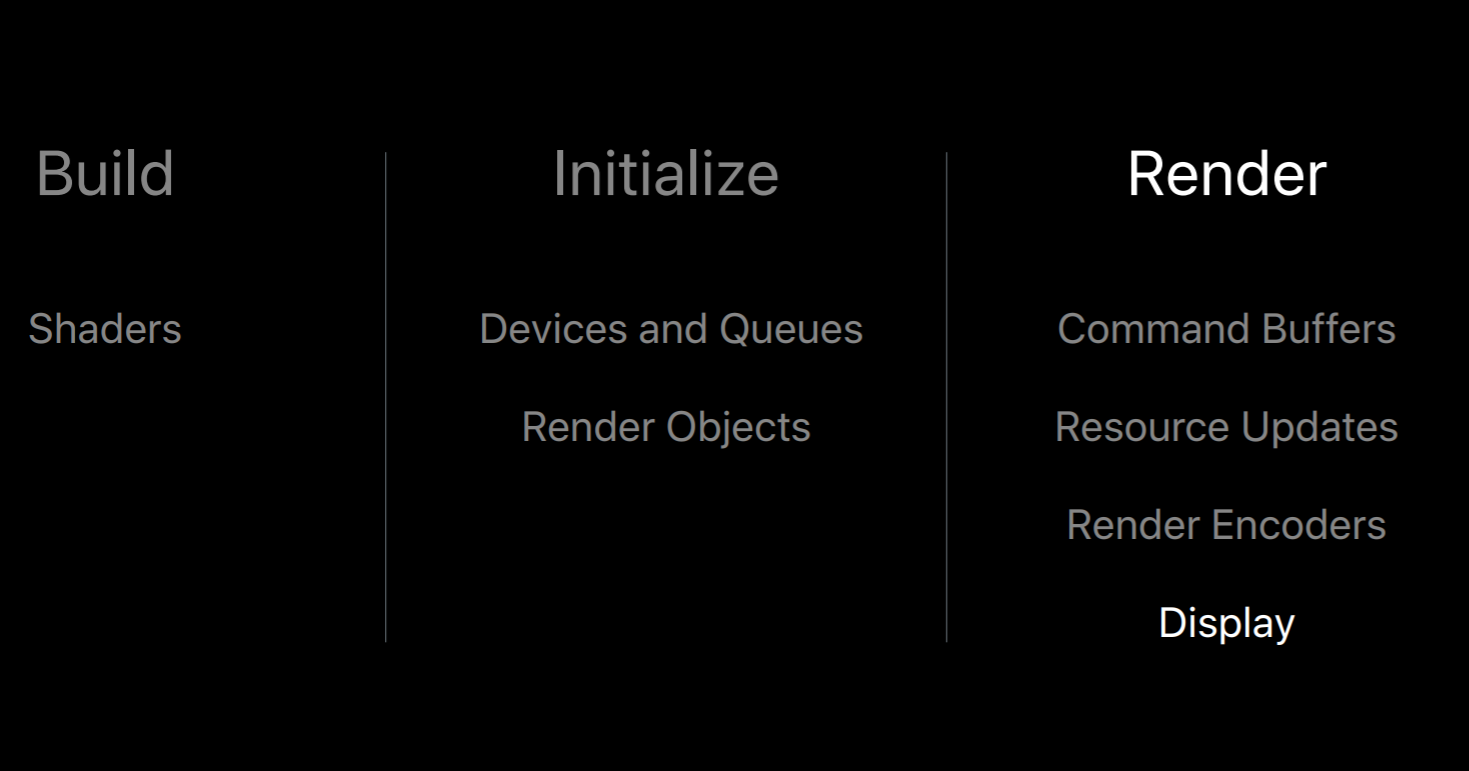
Dan already talked about application setup, so by now you would have built all your shaders and also created all persistent objects needed for frame generation. So now let's dive into your application's render loop which is the code that runs for every frame. With Metal you will explicitly manage the asynchronous nature of GPU's execution in your render loop. So this includes obtaining and submitting command buffers to GPU with the list of GPU commands. And updating your resources in such a way that allows the GPU to asynchronously read from it which you have written in your render loop. And encoding render passes by creating render command encoders. And finally, presenting your frames to the display.
CommandBuffer
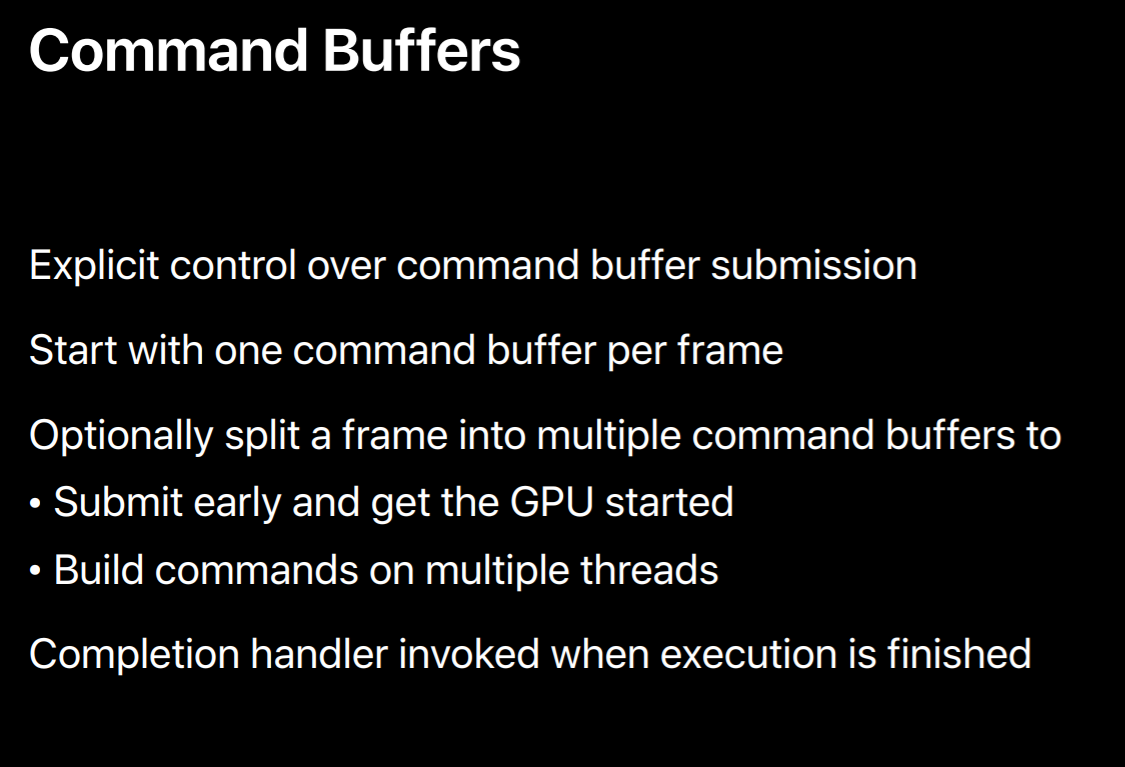
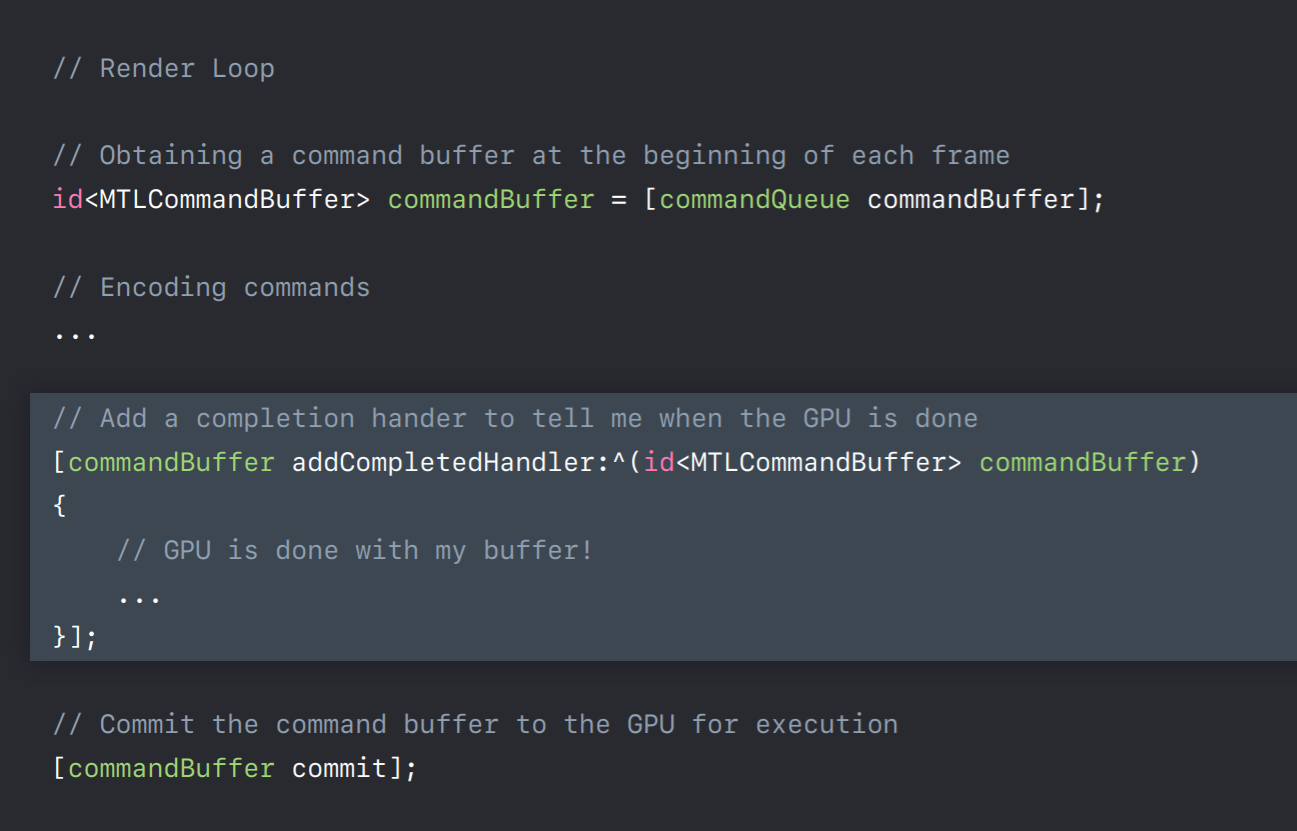
So let's first talk about this command buffer object. One of the key changes from OpenGL is that Metal provides explicit control over command buffers, which means it's up to you to create these command buffers and you can decide when to commit them to GPU for its execution. So the straightforward thing to do is to create one command buffer which will render your whole frame. And once your application is up and running and if you perhaps see some idle time on GPU, then you might want to consider splitting your frame across multiple command buffers. And then the GPU can get started executing one command buffer while CPU is encoding the others. Alternatively, splitting your frame encoding across multiple threads requires you to create one command buffer per thread. But keep in mind that there is some additional CPU cost associated with each command buffer. So you should be using as few as possible. Metal also provides an API to register a completion callback, which will be involved when GPU completes executing this command buffer.
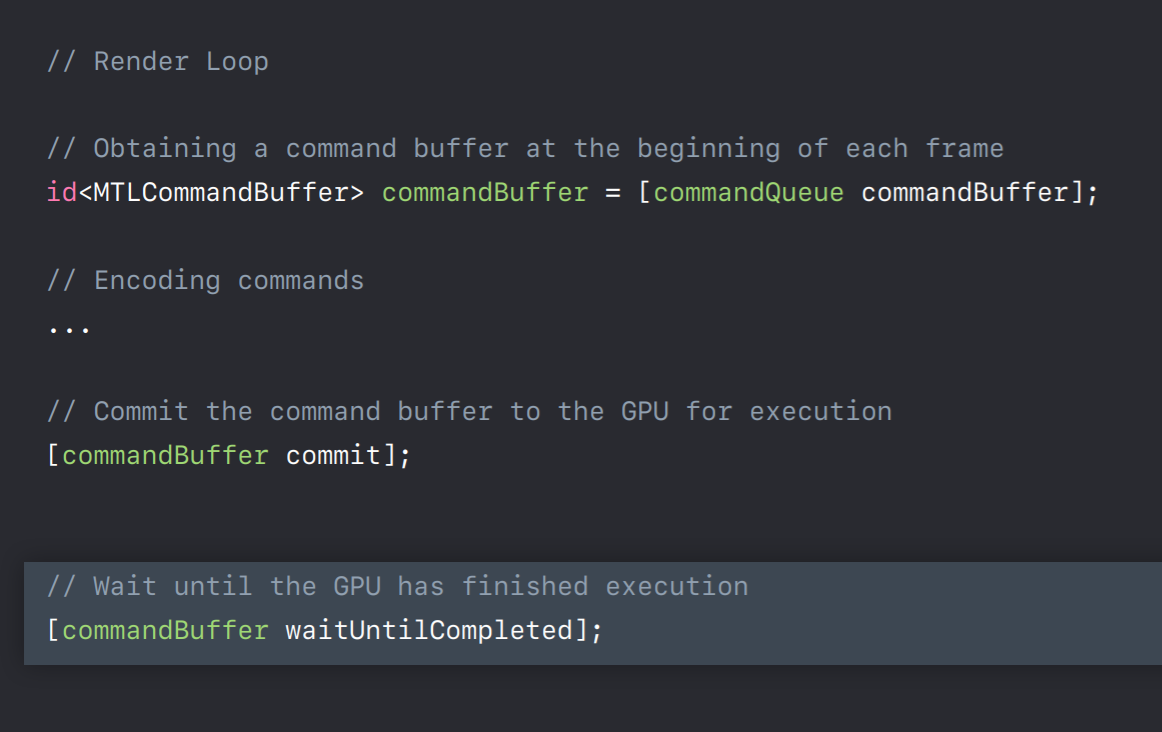
So let me show you all these APIs in action. So you will have created command queue in your application initialization method. Now in render loop you will use it to obtain command buffer by calling its command buffer method. Now you will encode commands into this command buffer. I'll talk more about this encoder shortly. But when you are finished encoding you will call commit method so that this command buffer will be submitted to GPU for its execution. Now you have two options for what to do while this command buffer is being executed on GPU. You can wait by calling this waitUntilCompleted method which is similar to glFinish in OpenGL. This method will synchronously wait and only returns when all the commands in the command buffer has been executed by the GPU. Alternatively, before you commit this command buffer to GPU you can add a completion handler, which will be invoked when GPU is done executing this command buffer. This allows CPU and GPU to execute in parallel. Also this allows us to track and efficiently update shared resources whose data is changing every frame.
Resource Updates
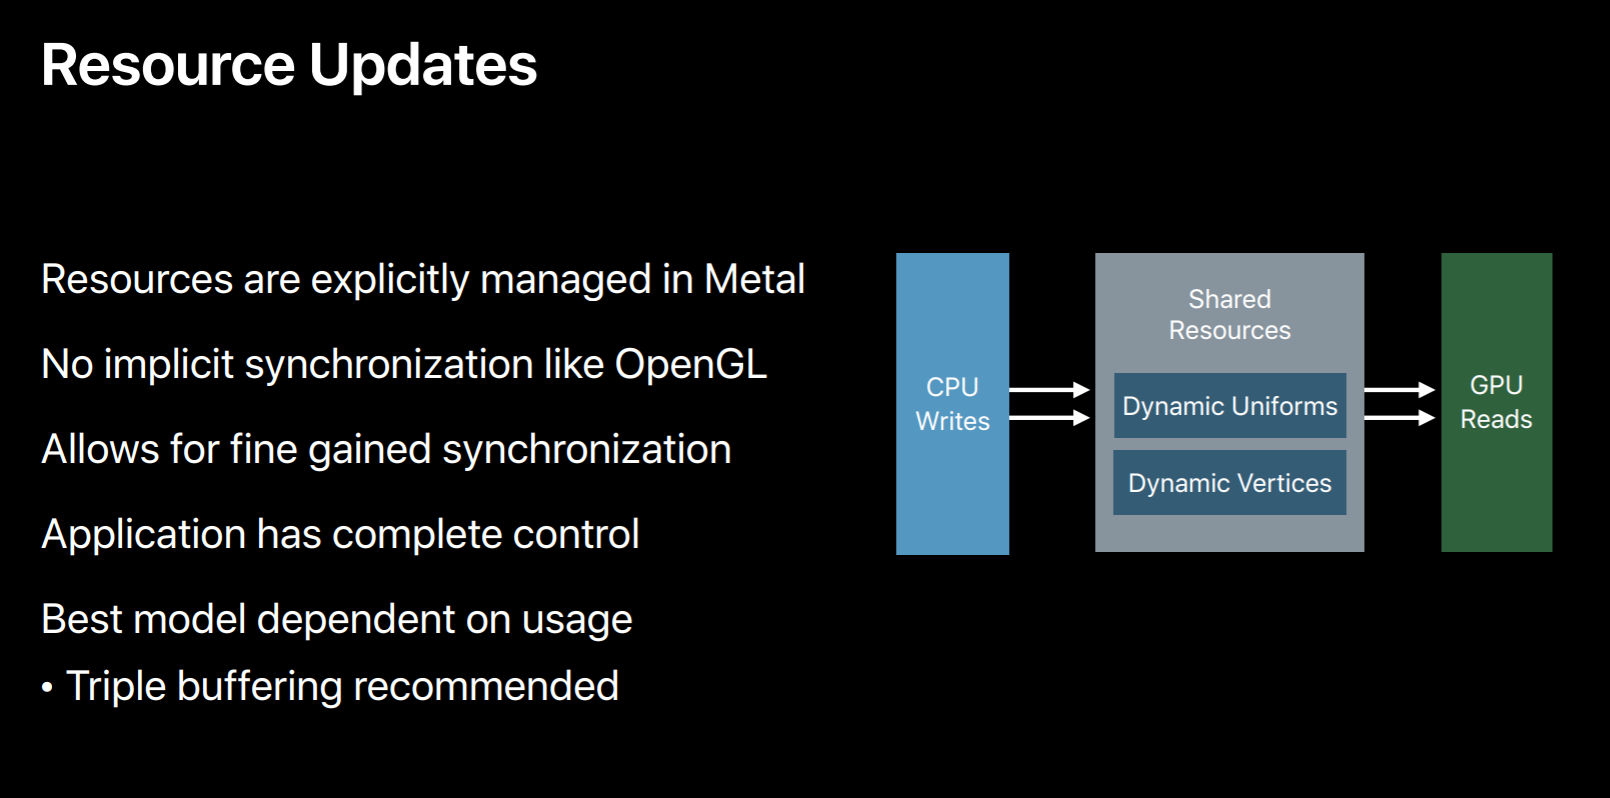
Since we are here let's talk more about these resource updates and see how we can make them efficient using this completion handler. So almost all applications will be pushing new data to GPU every frame. For example, new shaded uniforms needed for animations. In Metal CPU can write to this shared resources anytime even if GP is accessing the same memory at the same time. Metal does not protect you against these data-races. This compares to OpenGL which by default prevents these data-races either by waiting for the GPU workloads to finish or by doing extra copies, which may not be optimal for your application. With Metal you can implement any optimal synchronization strategy which suits best for your applications. So in most cases, best approach is to multi-buffer your shared resources so that CPU and GPU are never trying to access the same buffer simultaneously.
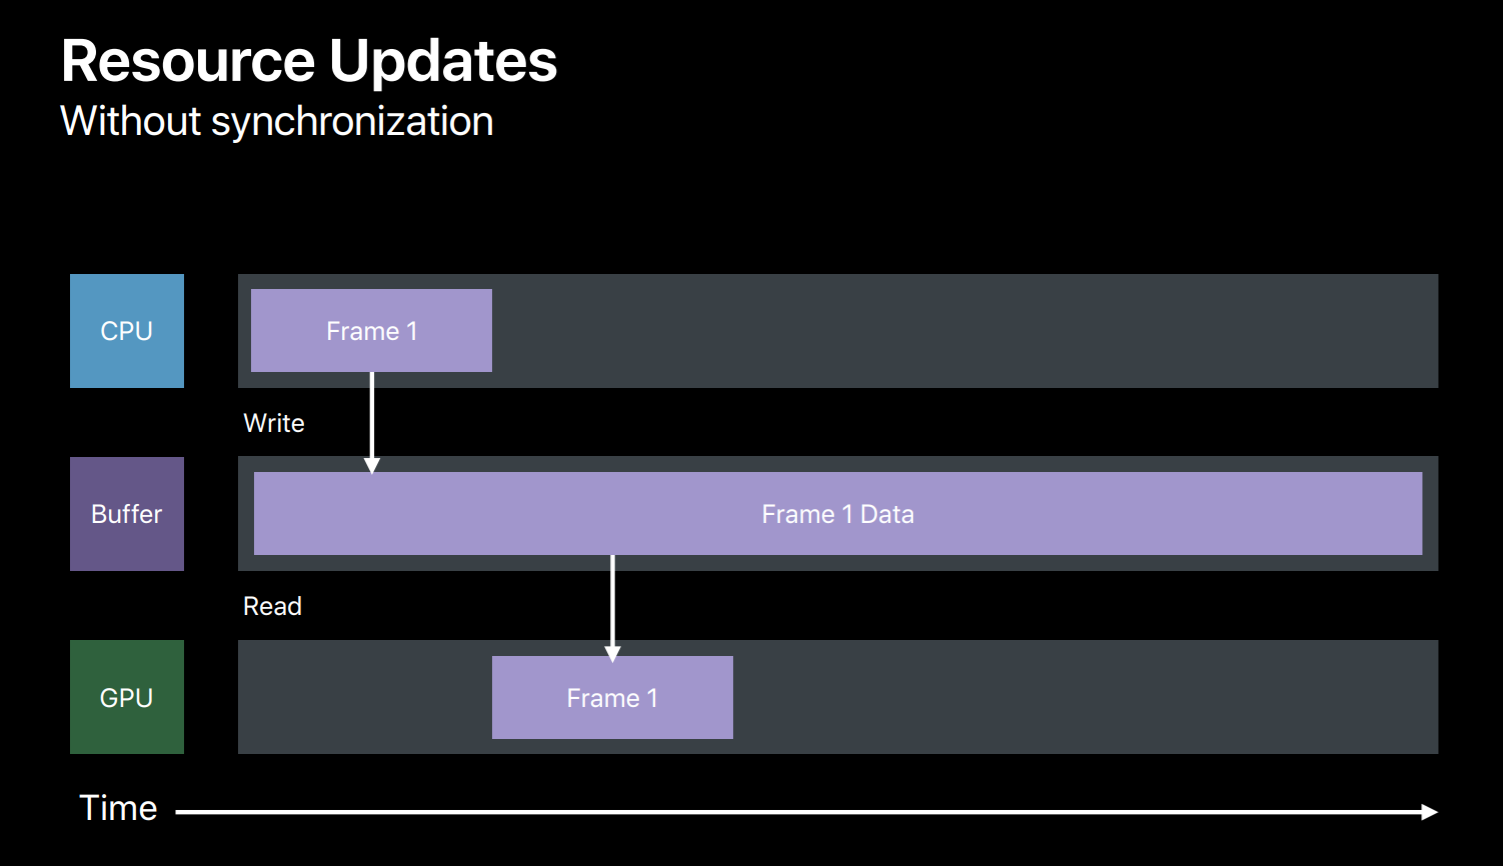
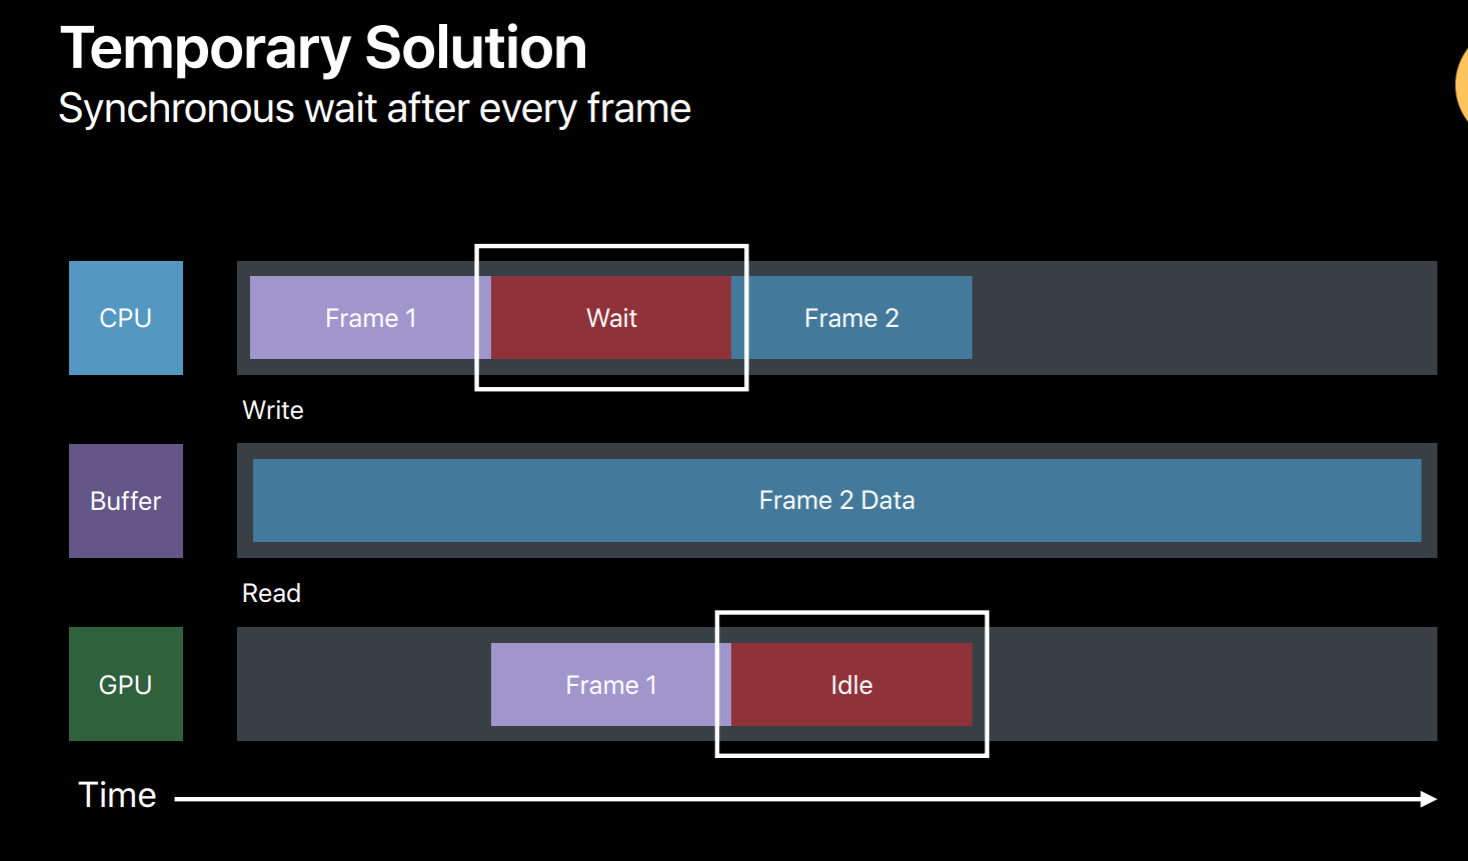
So let's see an example, you have an OpenGL application and you just ported it to Metal and it is using single buffer for these dynamic data updates and you did not implement any synchronization method yet in your application, then here's what will happen. Your application will write to that buffer while generating commands for the first frame and then submits this command buffer to GPU. Then GPU when it is executing this command buffer will try to read from this buffer. And while you're updating the same buffer for the next frame GPU is still reading from this buffer. So this is clearly a race condition and the results are undefined. There are a few potential fixes which you can implement in your application. The simplest is to call the command buffer's waitUntilCompleted method after every frame. But this waits for the GPU to finish reading before you override this buffer for the next frame. But as you can see, here this is a very poor utilization of both CPU and GPU, so this is not something you want to do in your shipping code. But it is very useful to get your Metal application up and running. And even to detect that if your application really indeed has these kind of data conflicts.

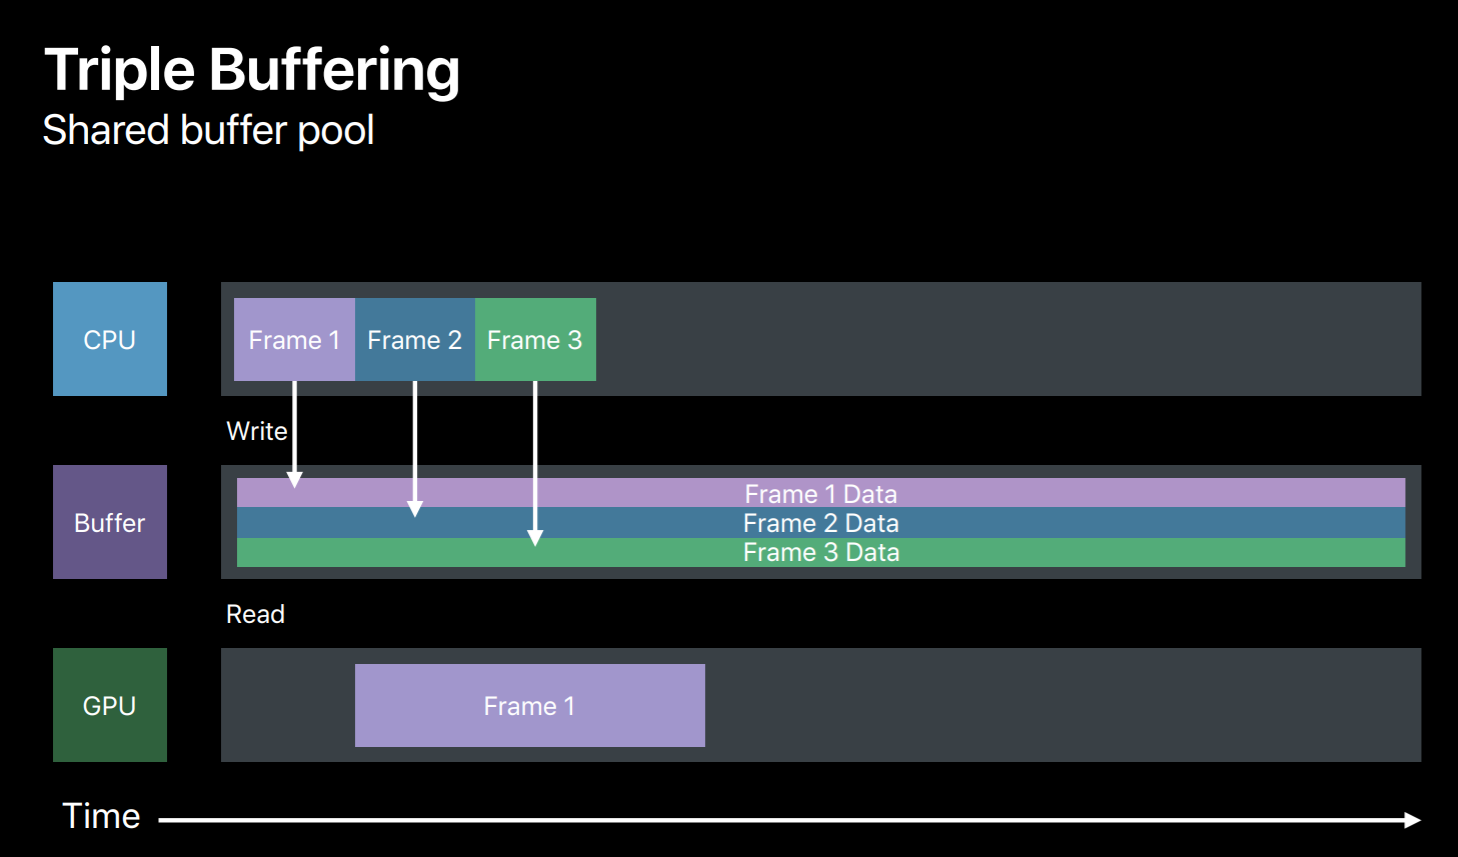
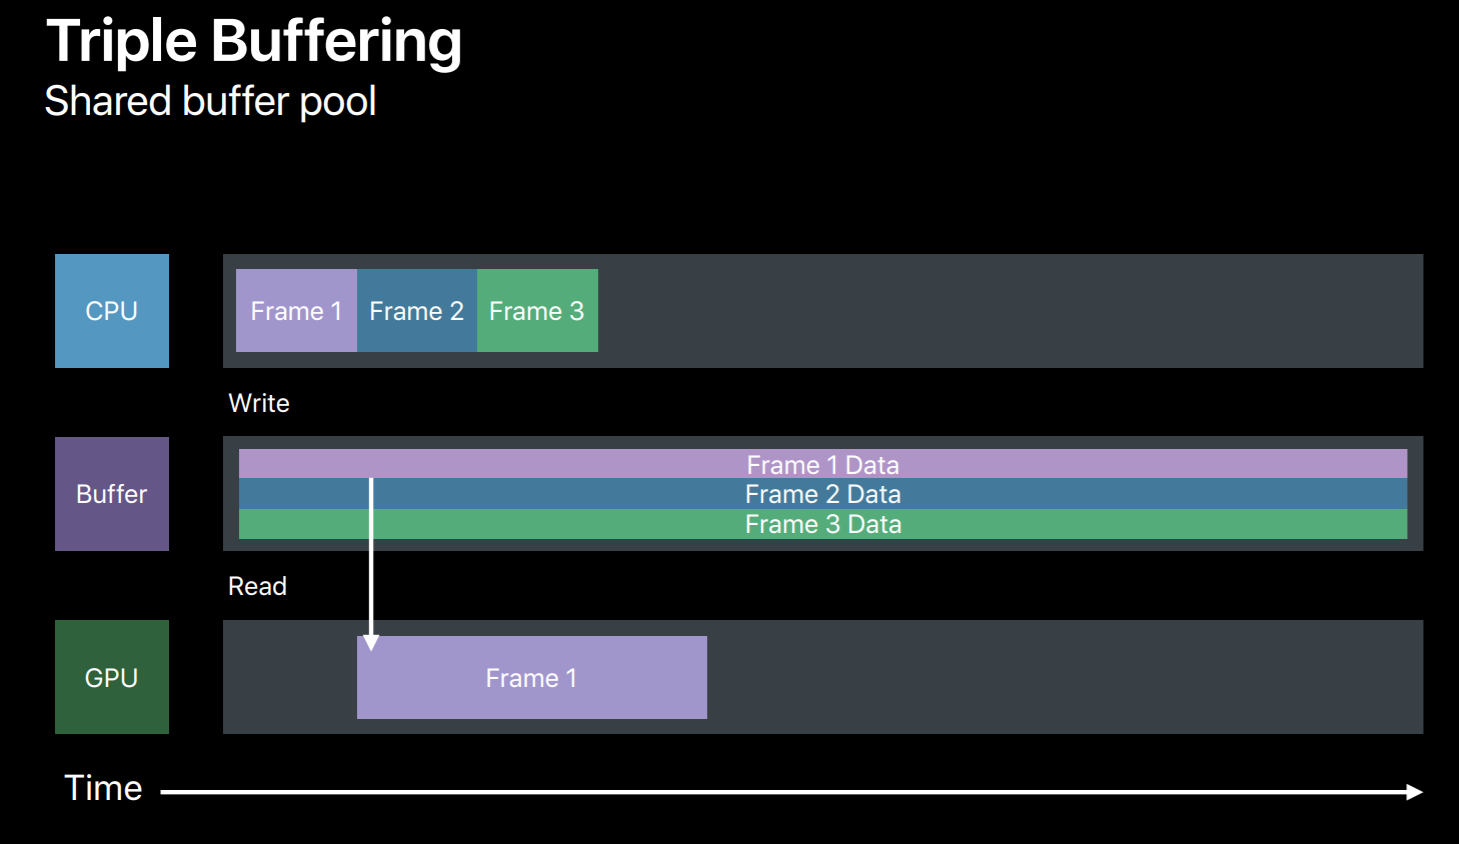
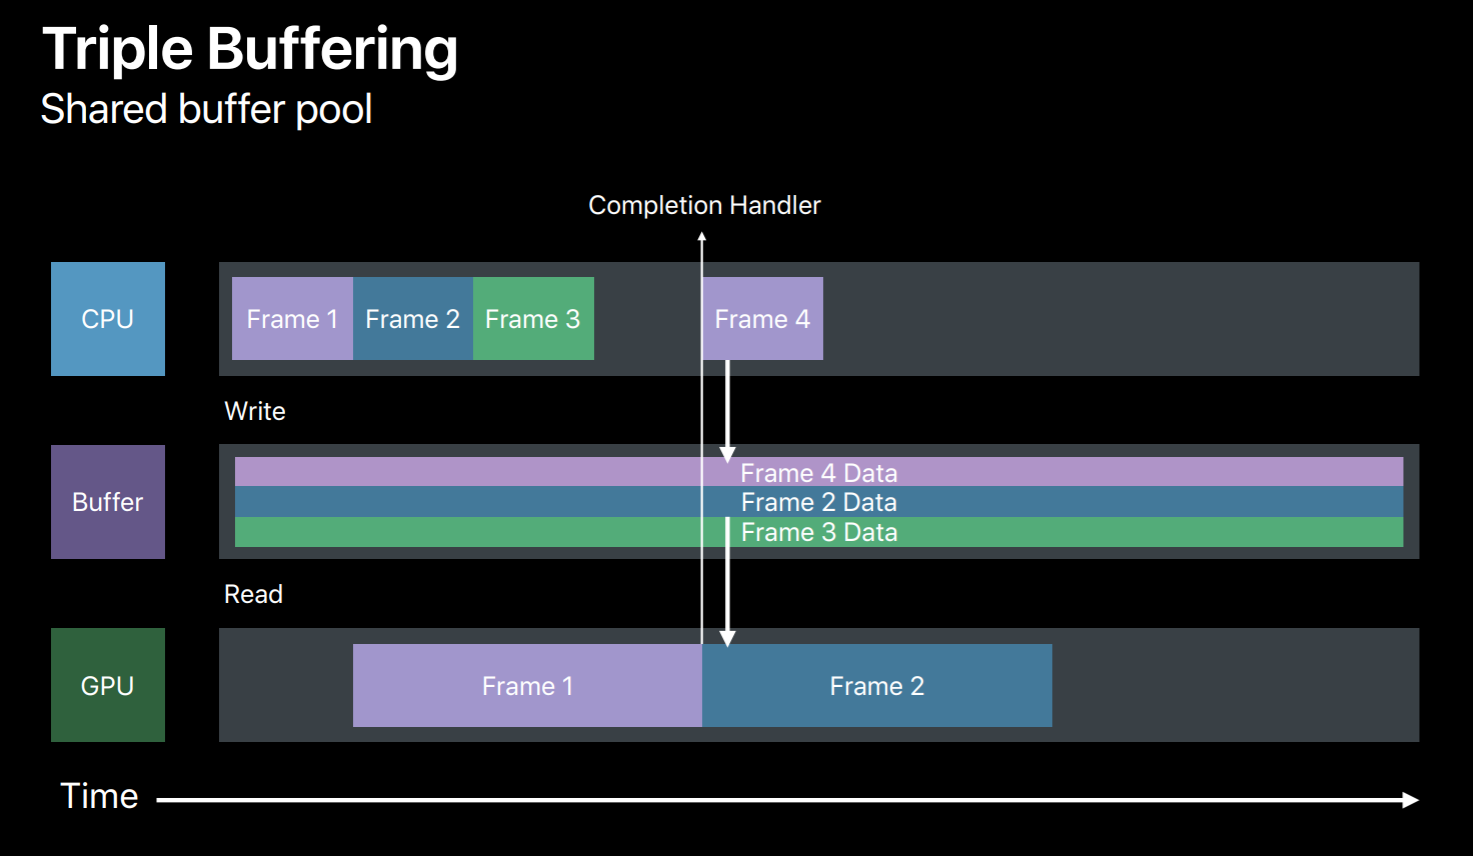
The efficient way to synchronize your resource updates is to use multiple buffers. So in this case we will use three buffers to triple buffer our dynamic data updates. So in frame 1 we will write to a buffer and then the GPU will read from it. And in frame 2 we will write to another buffer avoiding this race condition. Similarly, in frame 3 we will write the third buffer. But now we have used up all three buffers and exhausted our buffer pool. We need to wait for the GPU to finish the frame 1 so that we can reuse it for frame 4. Now this completion handler will come handy, it will let us know when GPU has done executing this frame. So when frame 1 is done we can reuse its buffer for frame 4 and so on.
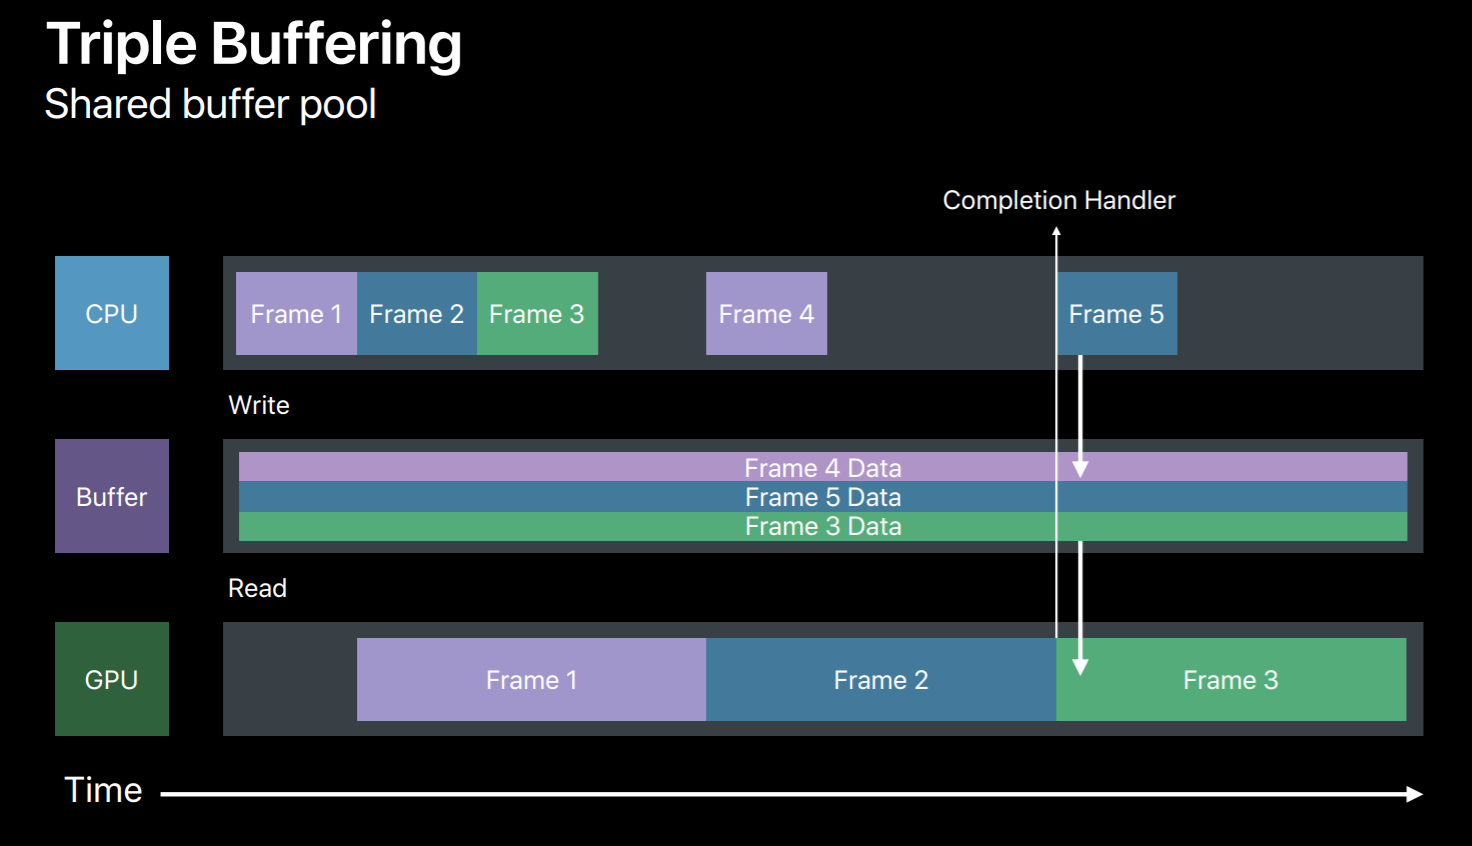
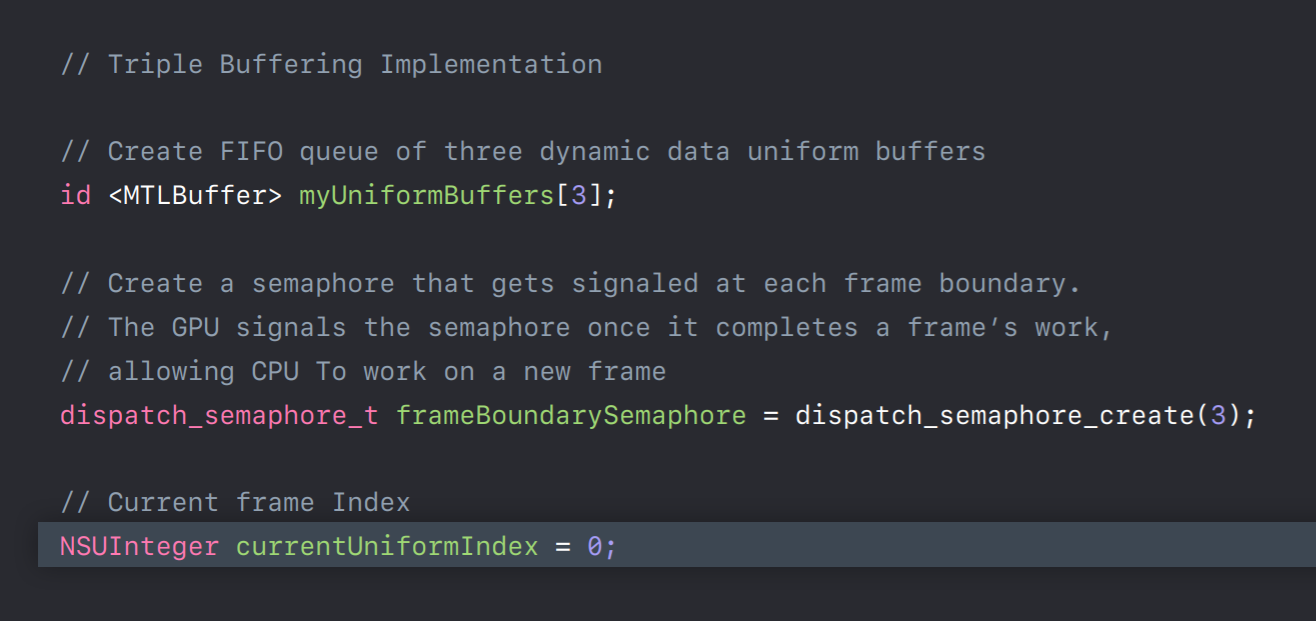
So let's look at a sample. For triple buffer implementation outside your render loop first we will create a FIFO queue of three buffers. And we also need a frameBoundarySemaphore which is initialized to start value as 3. So this says semaphore will be signaled at each frame boundary, that is when GPU finishes executing a frame allowing the CPU to reuse its buffer. Also initialize buffer index to point to the current frame's buffer.
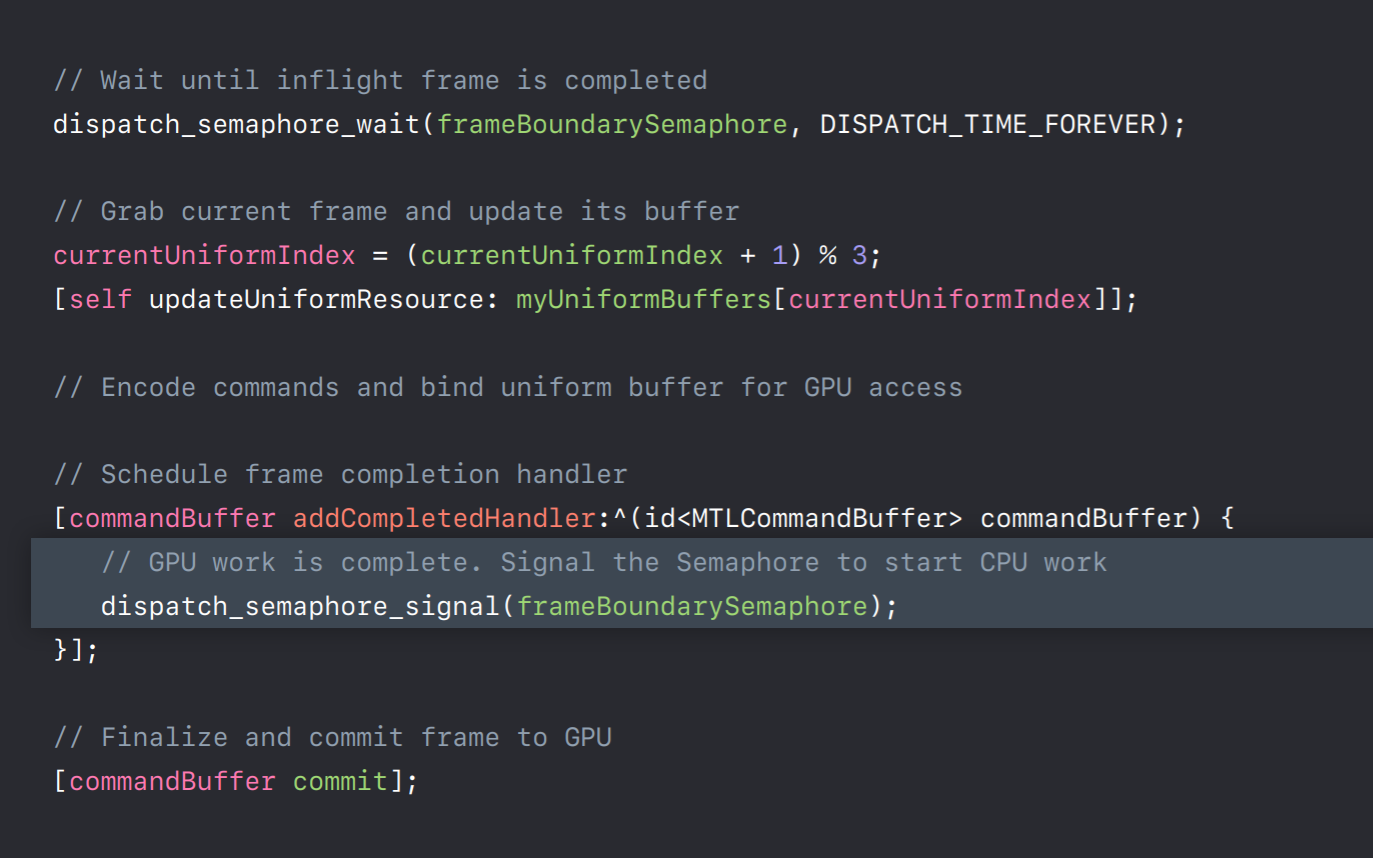
And in our render loop before we write to a buffer we need to first ensure that its corresponding frame has completed its execution on the GPU. So at the beginning of the frame we wait on our frameBoundarySemaphore. Once the semaphore is signaled indicating that the current frame has completed its execution on GPU now it's safe to grab its buffer and reuse for new frame data. And we will now encode some commands to bind this buffer to GPU. And before we commit this command buffer to GPU we will add a completion handler to this command buffer for this frame. After adding completion handler we will commit this command buffer to GPU. Now once GPU finishes executing this frame our completion handler will be invoked which will then signal this frame semaphore. This allows CPU to reuse its buffer for new frame encoding. So this was a simple triple buffer implementation which you can adopt for handling any dynamic data resource updates.
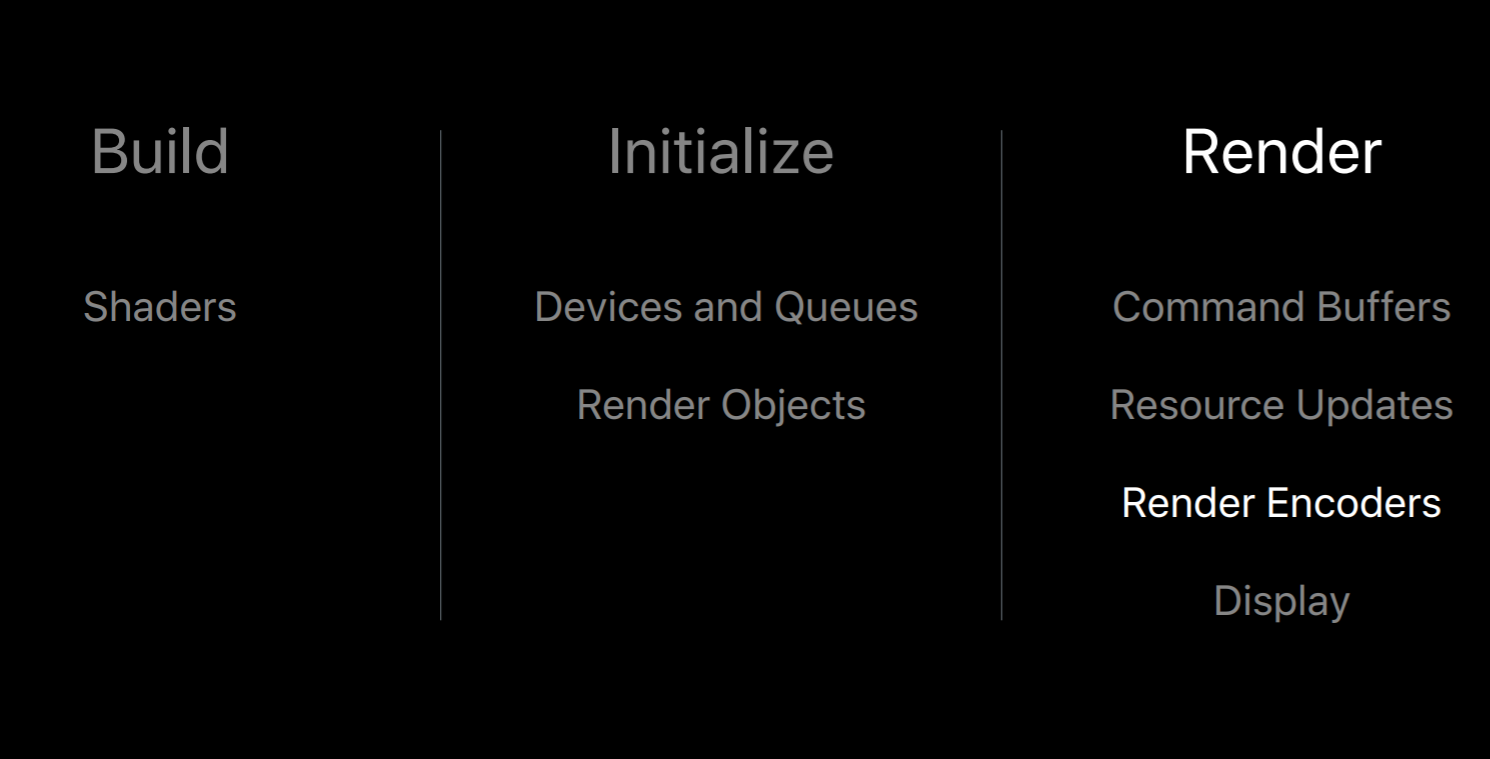
Render Encoders
Now that we have our command buffer and also, we have handled our resource updates let's talk more about render pass encoders which you will use to encode your draw calls.
As Dan mentioned earlier, command encoders translate API calls into GPU hardware commands in a command buffer. I will be talking about render command encoders which provides APIs for typical graphics, operations like setting your pipelines, texture buffer objects, and also issuing the draw calls.
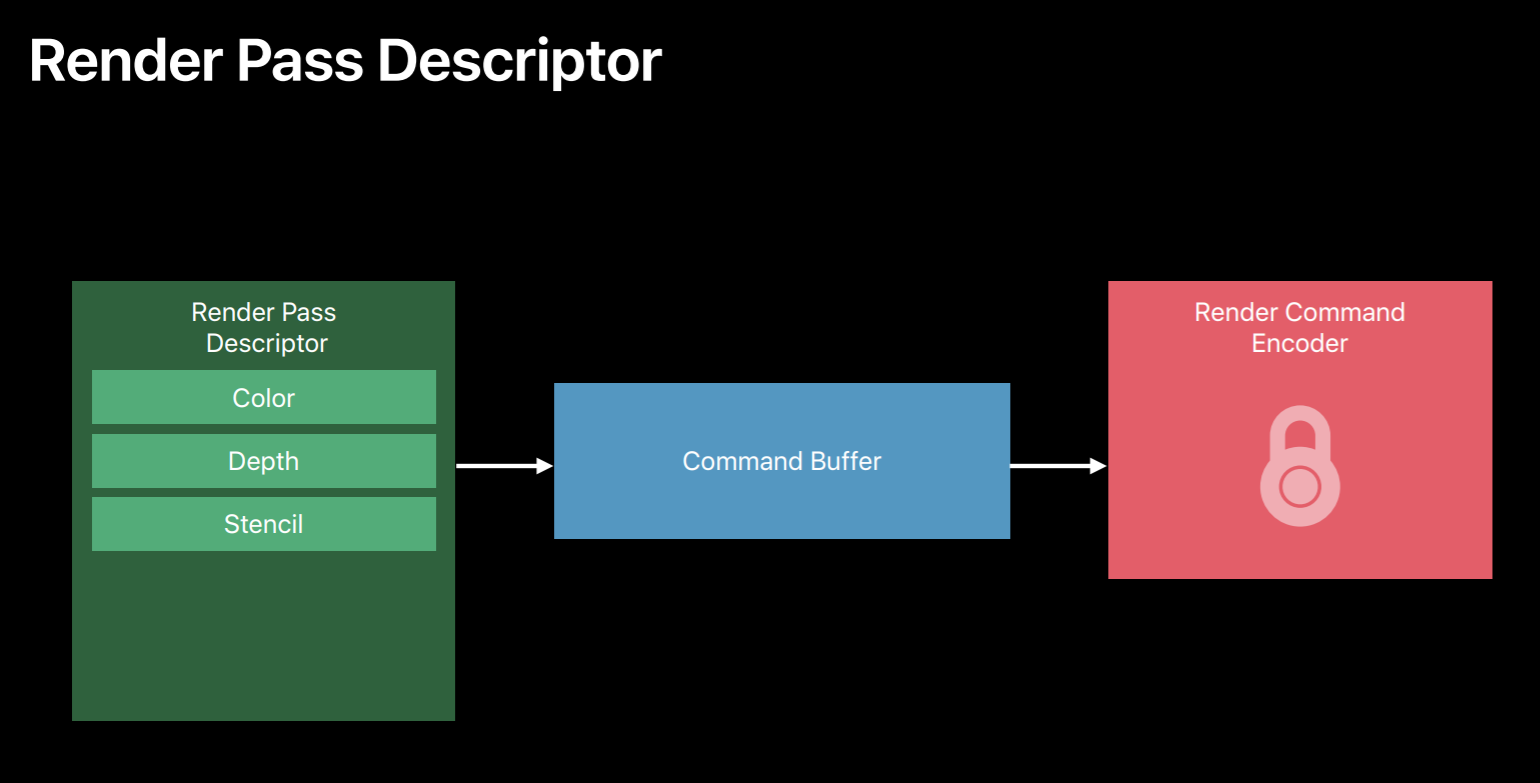
So when creating your encoder you need to first set the render targets. So here is a render pass descriptor where you will set the render targets and then ask the command buffer to create a new encoder for this render pass. And now you can use this encoder to encode your draw calls. One key change from OpenGL is in Metal once the encoder is created you cannot change its render targets because GPU performs much better when it sees a largest span of draw calls which are rendering to the same set of render targets. So Metal API reflects this by giving an explicit start and end to a render pass. Now all the draws issued by this encoder will be rendering to these render targets. When you want to draw to a different set of render targets then you end this render pass and start a new one. And here is where we are creating a render pass descriptor and binding color and depth attachments. Now you can use that descriptor and create a render command encoder. Now all the draws issued by this encoder will be rendering to these targets.

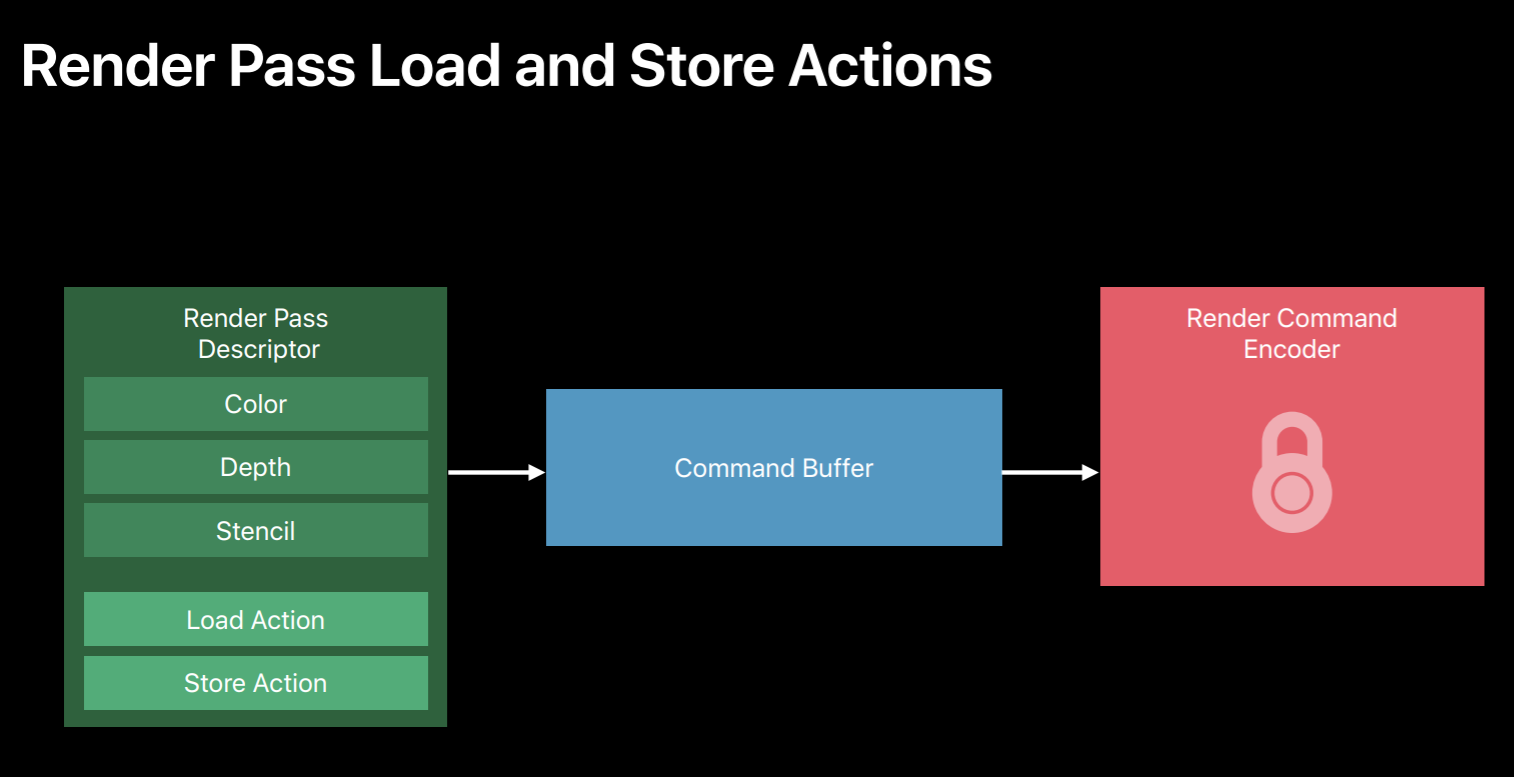
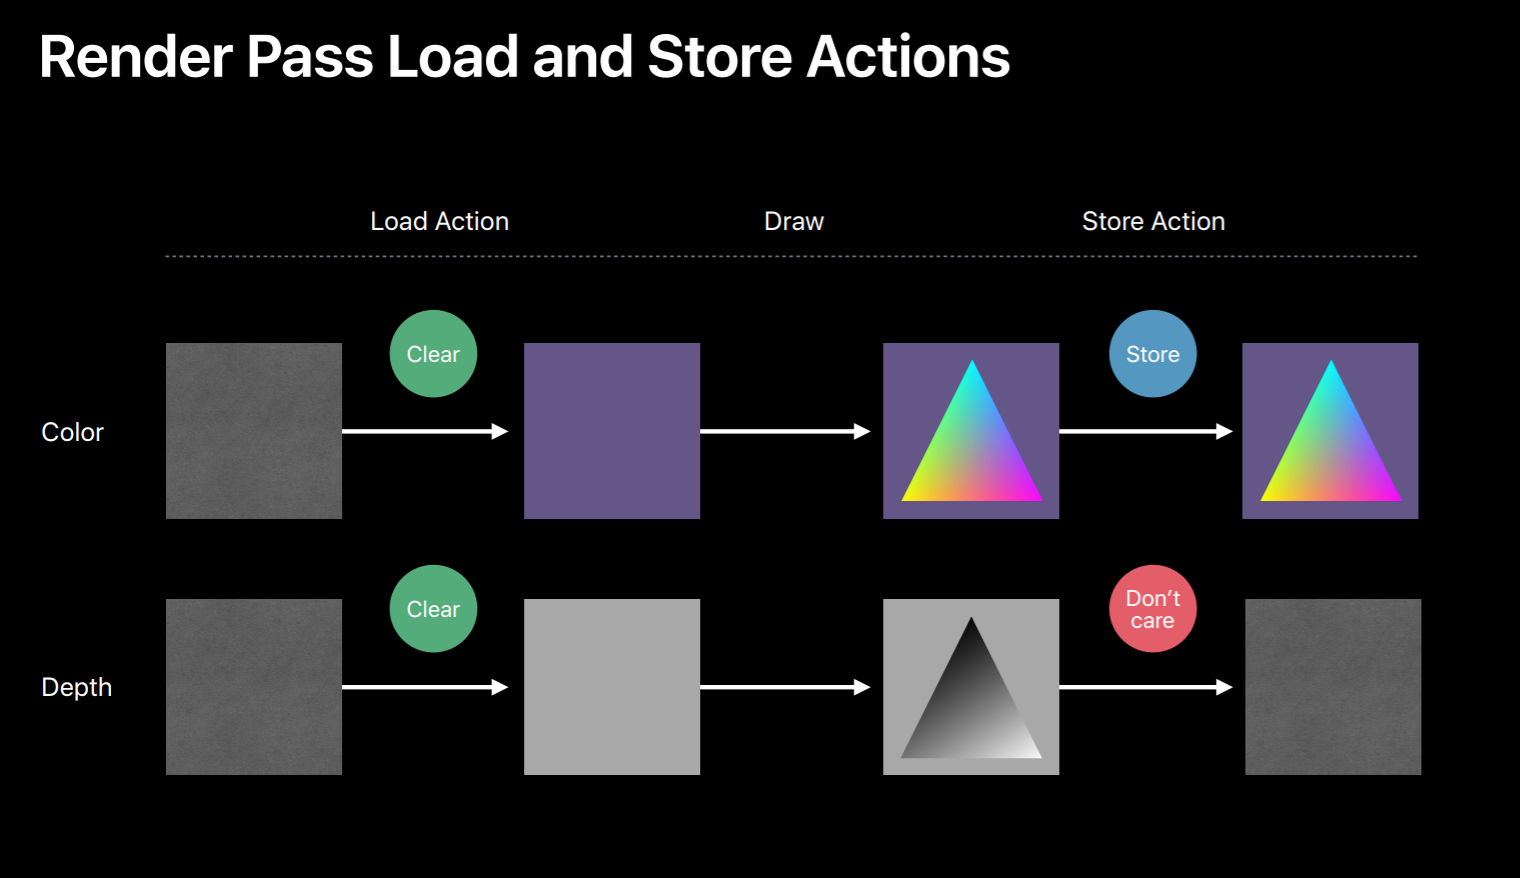
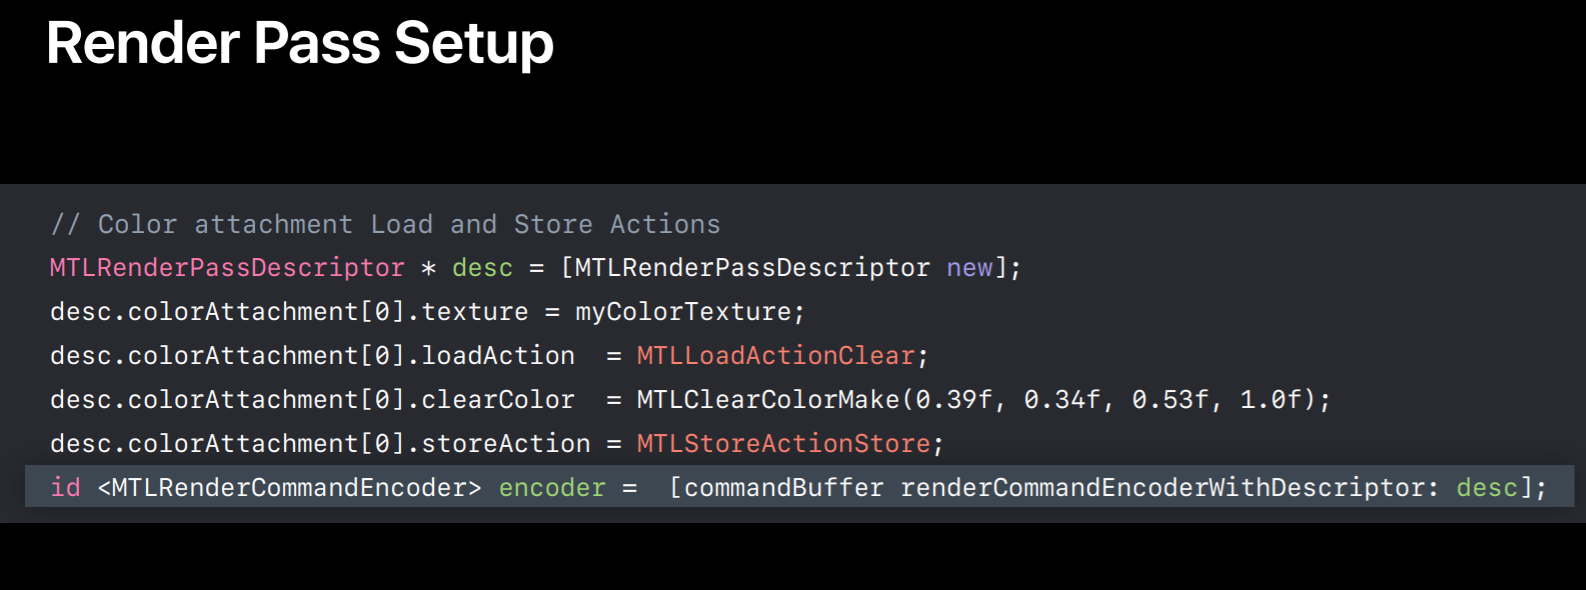
Additionally, in Metal you can also provide load and store actions for these attachments for optional GPU bandwidth usage. So these load and store actions allow you to control how the texture contents will be handled before and after a rendered pass. So here we have color and depth attachments for a render pass. If it specified the load action as clear for both of these render targets the GPU will first clear their contents. Then the GPU will execute commands in this encoder rendering to these render targets. Now you can specify the store actions to be performed at the end of the render pass. Here for the color buffer since the store action is store it will preserve the contents of this color buffer at the end of the render pass. And for the depth attachment, since we said store action as don't care it will discard its contents. So these texture load and stores are expensive GPU operations that consumes memory bandwidth. So choose clear and don't care wherever possible.
And here is how you set your action. In this example we specify clear as a load action and set the clear color. And here we specify store action as store. Similarly, you can specify load and store action for each of the render targets you set in this render pass descriptor. So that's how we configured our render targets. Now you can create the encoder from this descriptor and we can start encoding draw calls.
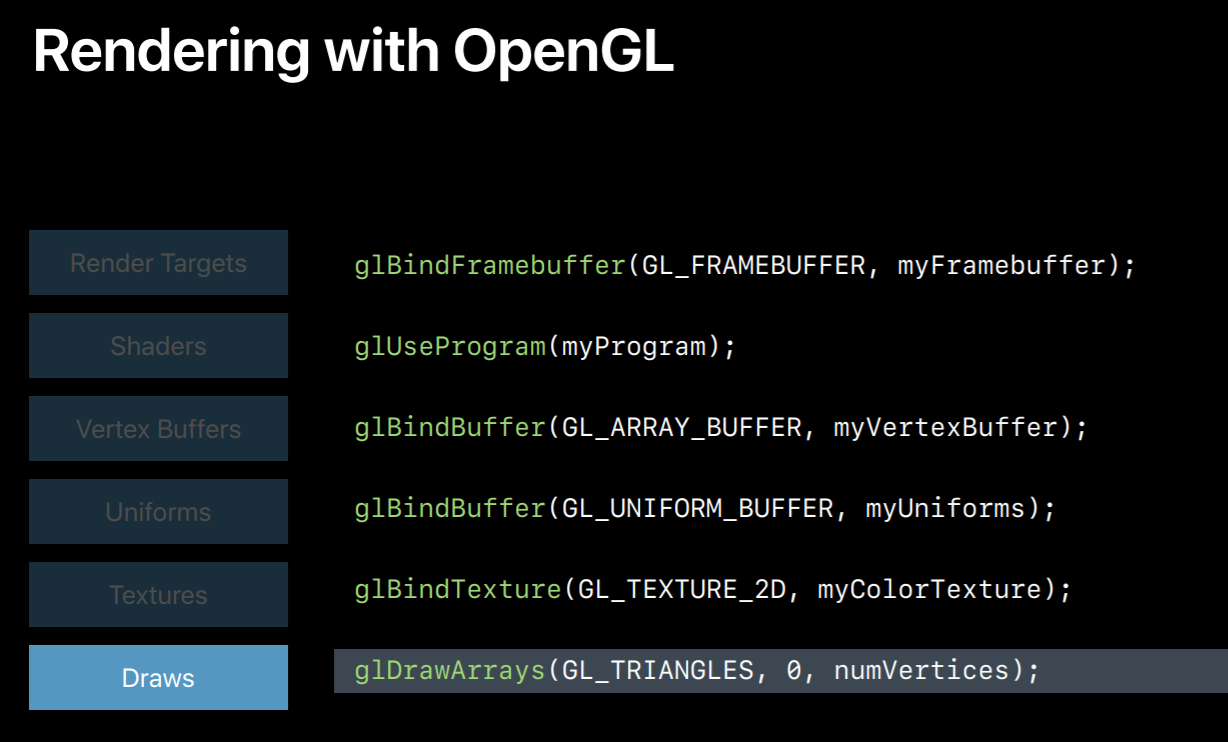
But before that I want to show you some OpenGL commands and they will show you their Metal equivalents. So this is a typical OpenGL draw sequence. In this segment first we bind a frame buffer which will set all the render targets. Then we bind our program which contains vertex and fragment shader. And we bind vertex buffer containing vertex data. And then we bind another buffer containing all the uniforms. And then we'll set a texture to sample from. And finally, we draw.
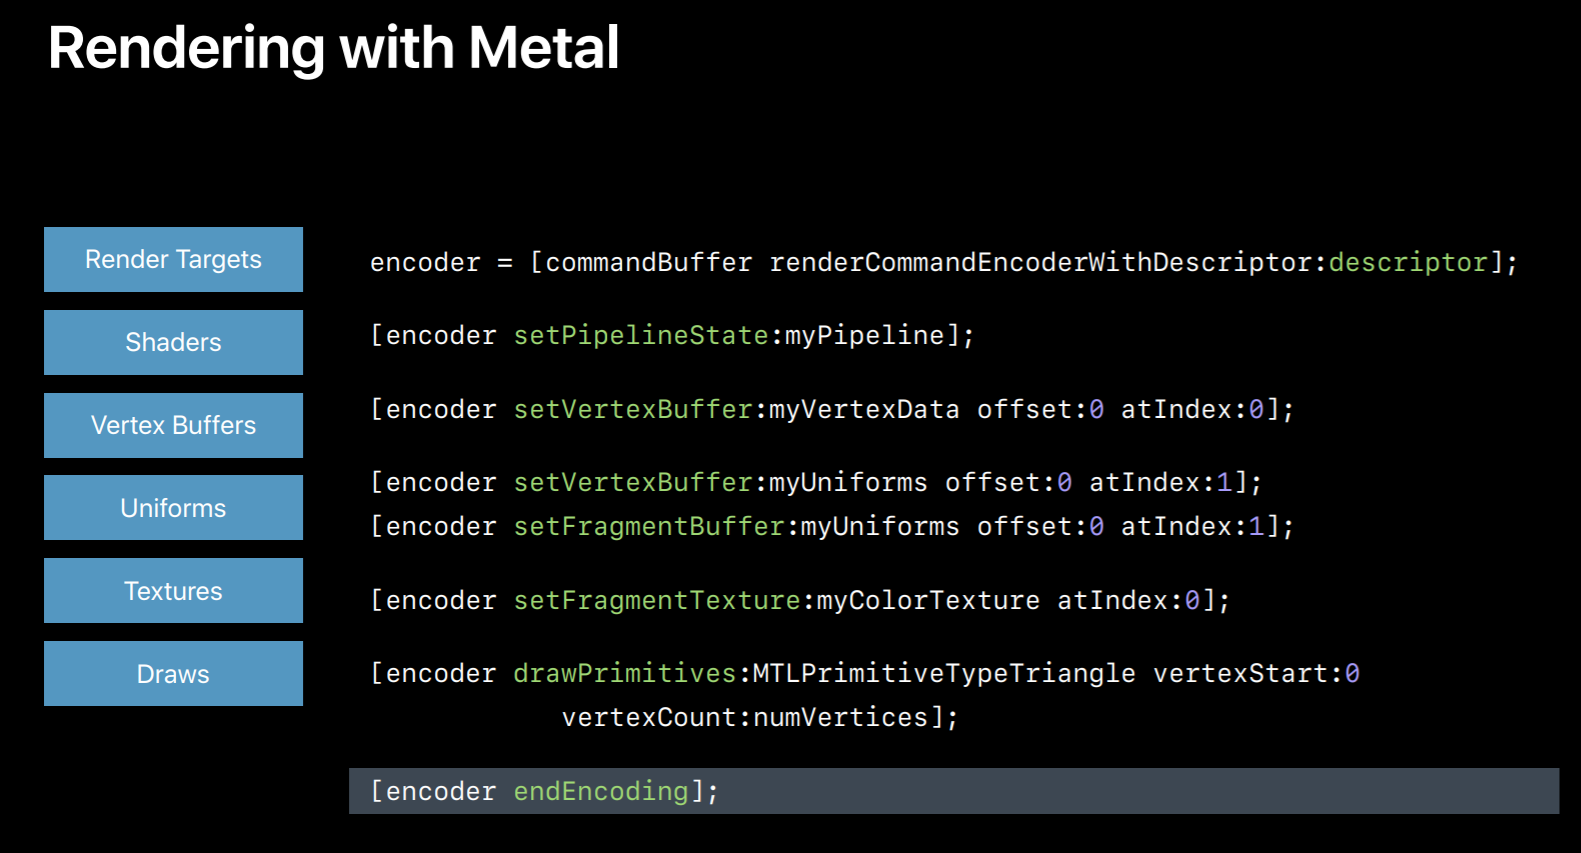
So here is the Metal equivalent, it's a few more lines of code since it's explicit but it's actually very similar to OpenGL. First, we create a render command encoder using render pass descriptor which has our render targets. Then we set a pipeline object which has our shaders. Then we set a buffer for accessing our vertex shader and this happens to contain the vertices we will draw with. Note that the Metal doesn't distinguish between buffers containing uniforms or those containing vertices. So we will use the same API to set uniform buffer. So here the first call will give buffer access to vertex shader while the second call will give access to the fragment shader. Next, we set a texture for our fragment shader to sample from. And then we draw. And once we are done encoding commands we will indicate this to Metal by calling endEncoding on the encoder object. So this was a simple example of a metal render pass.
Display
Now that we have a complete render pass let's see how to get these renderings onto the display.
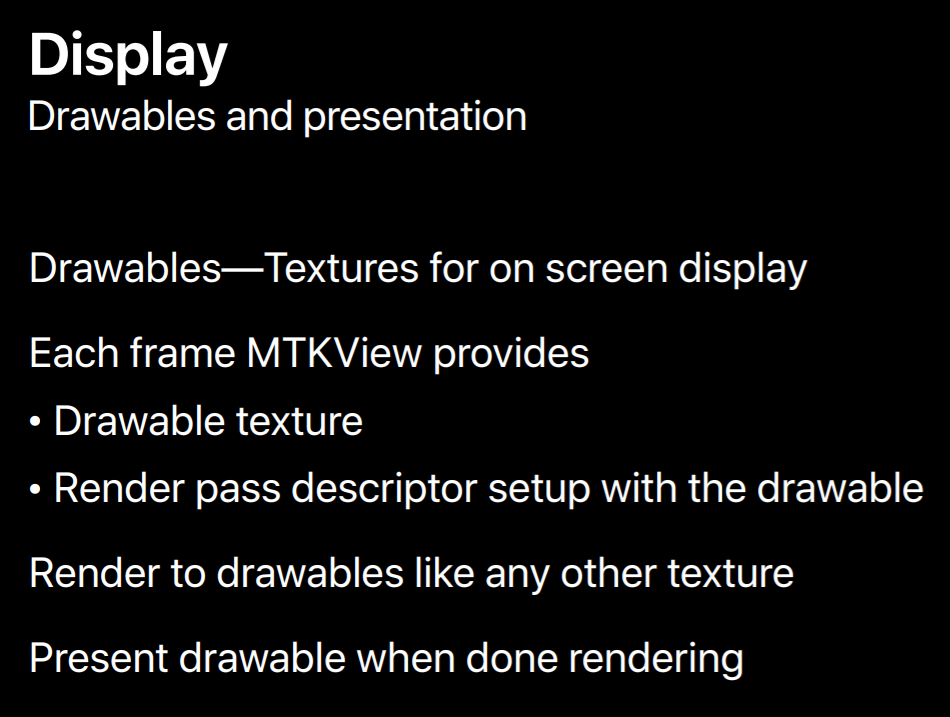
With OpenGL you present your rendered frame onto the screen but you don't explicitly manage the system's render buffers also known as drawables. But with Metal to get your content displayed on the screen first you need to obtain the special textures called drawables from the system. So you can use a MetalKit view which will provide you a drawable texture for each frame. And once you obtain this drawable you can encode render passes and render to these drawables just like you would render to any other texture. However, unlike other textures now you can present this drawable to your view.
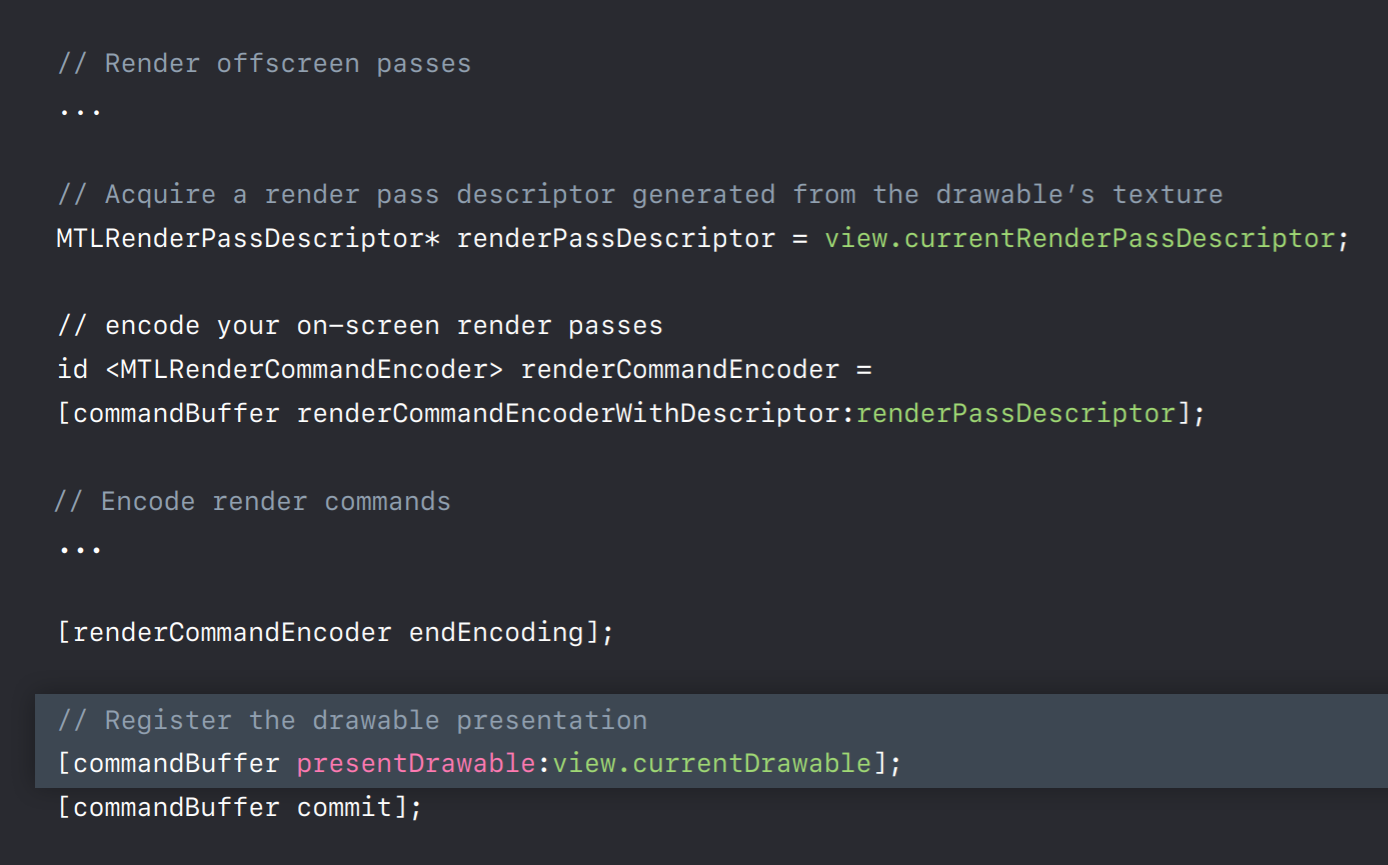
So let me show you a code sample. First, I want to mention that these drawables are limited shade system resources, so you should hold on to them as briefly as possible. This means that you should encode all your offscreen render passes before you acquire a drawable. Then you can create a MetalKit view for either a fully populated render pass descriptor which you can directly use to create encoders, which is what you see here or you can ask for a specific texture using view.currentDrawable property. And then you can build your own render pass descriptor around it. Once you are finished encoding your frame you can call the command buffer's presentDrawable method which puts your drawable onto the screen when GPU finishes executing this command buffer. So now once GPU is done executing this frame you should see your frame on the display. So that was our quick tour to get your renderings onto the display with Metal.
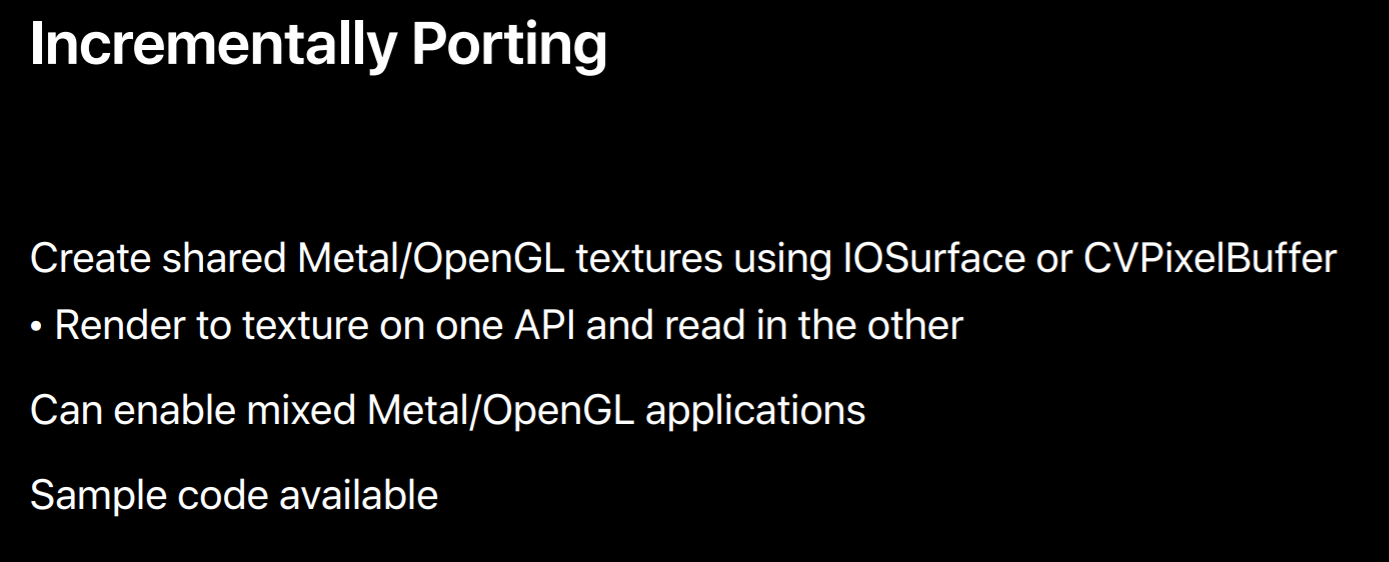
But I have a few more tips to share. It is possible to port one render pass at a time into Metal. The IOSurface and CVPixelBuffer APIs can be used to create a texture which can be shared between OpenGL and Metal. This will allow you to render to a texture in OpenGL and then read from it in Metal or vice versa. So some of the applications can leverage this to port incrementally, especially with plugin architectures which are built around OpenGL. So there is a sample code linked to this session showing exactly on how to do this.
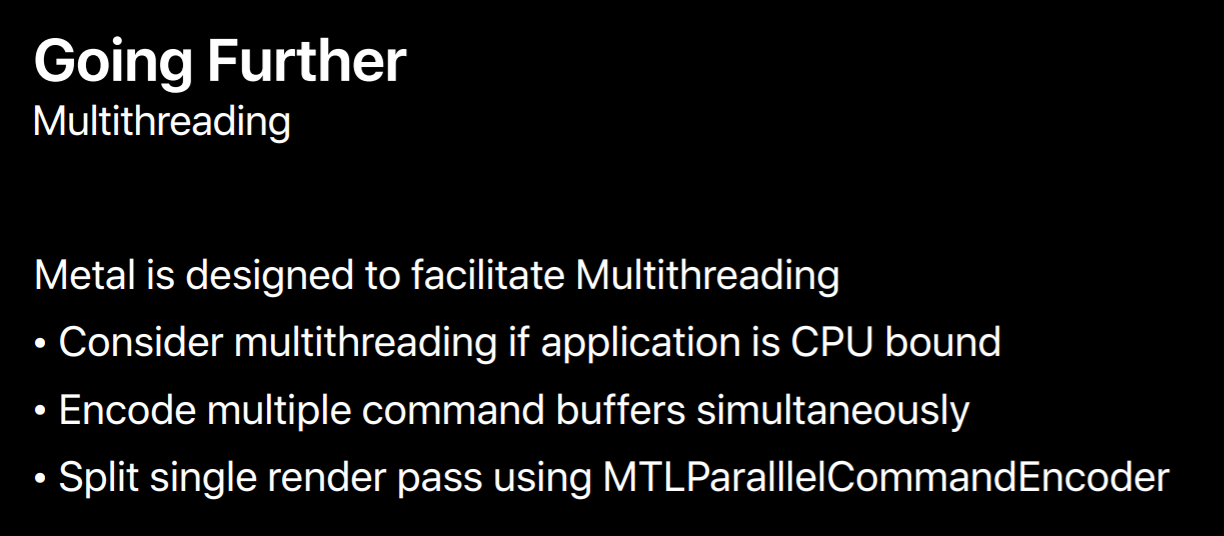
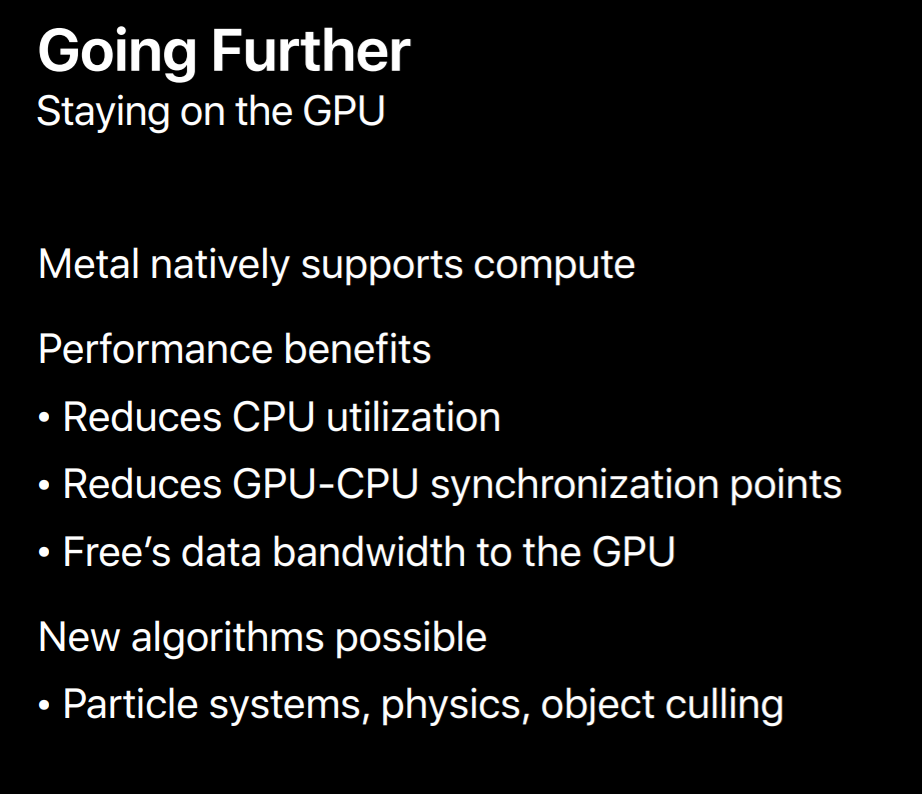
Now that you have a Metal application you can adopt all new Metal features. If your application is CPU bound then multithreading your CPU encoding work can help. You can encode multiple command buffers simultaneously on separate threads. You can even split single command buffer encoding across multiple threads using parallel render command encoder. Also, GPUs compute by planned processing APIs is built right into Metal. You can use GPU in whole new ways.
To start with instead of CPU you can leverage compute pipeline to generate graphics GPU data. By letting GPU to generate its own data you're not only reducing the CPU utilization and synchronization points now you are freeing up the data bandwidth to GPU. Now with this high bandwidth compute processor you can implement many more complex algorithms like these.
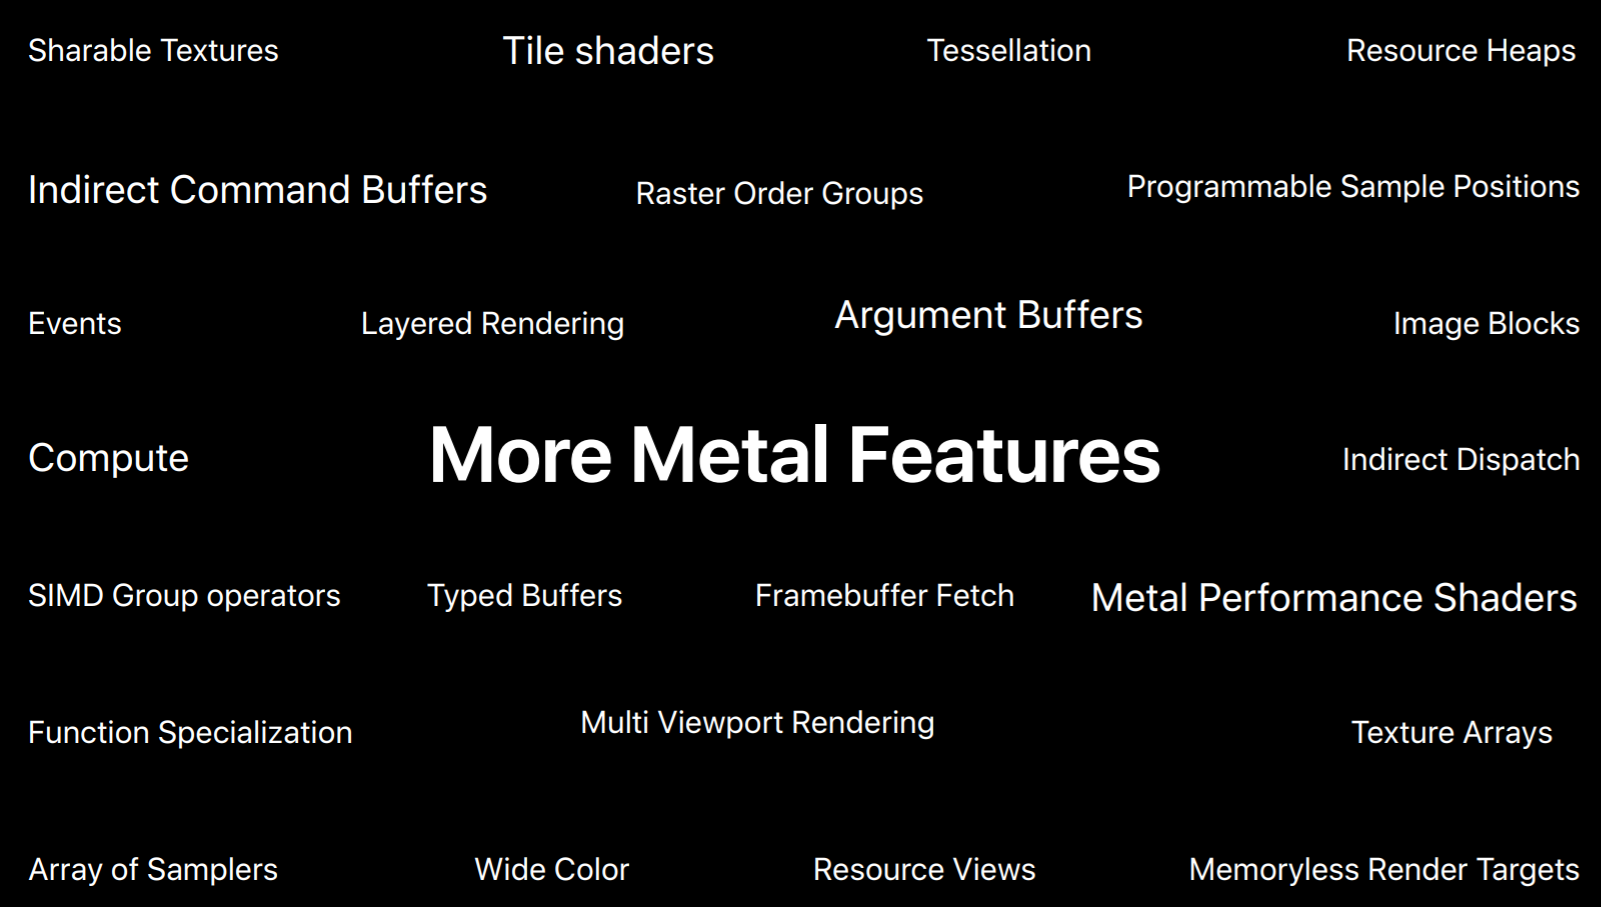
Metal supports many more great features which you can adopt in your application to improve its performance.
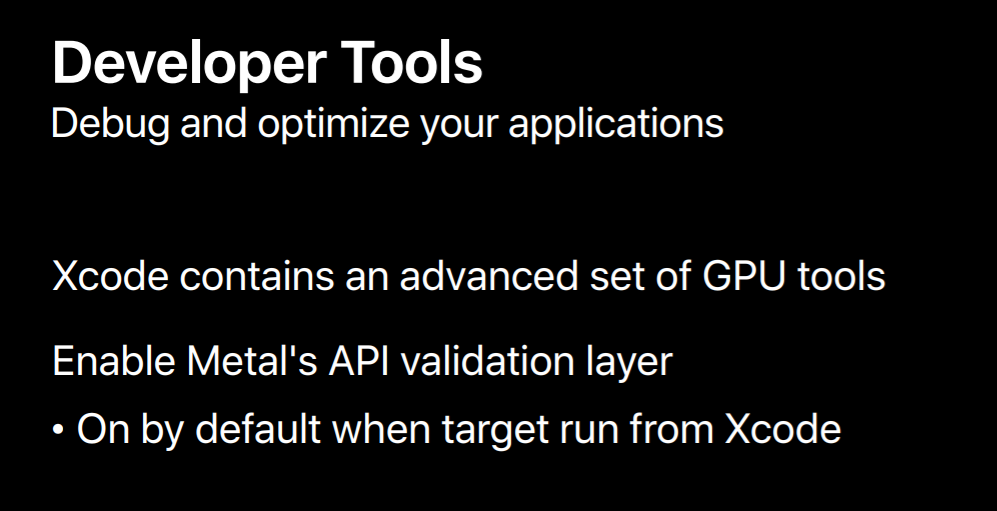
In addition, as part of your porting process we highly encourage to use our Metal powerful debugging and optimization tools which are integrated right into Xcode. So Metal has a great API validation layer that will print detailed information about any improper API usage and also suggests some potential fixes.
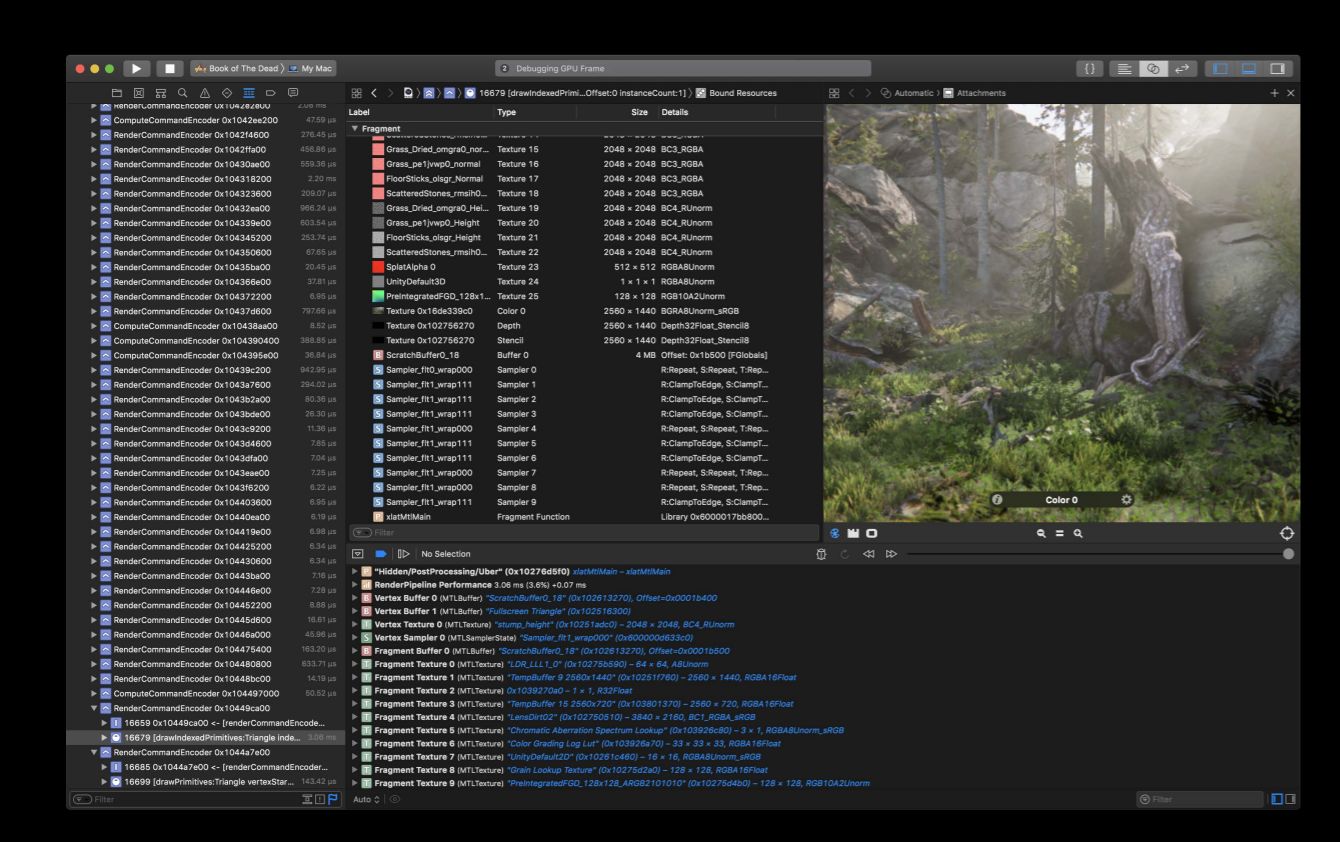
This is a GPU debugger which gives you a capability to step through your Metal calls and view how your frame is being rendered step-by-step. You can view all the resources associated with your frame. It also provides the GPU expert tips based on your resource usage.
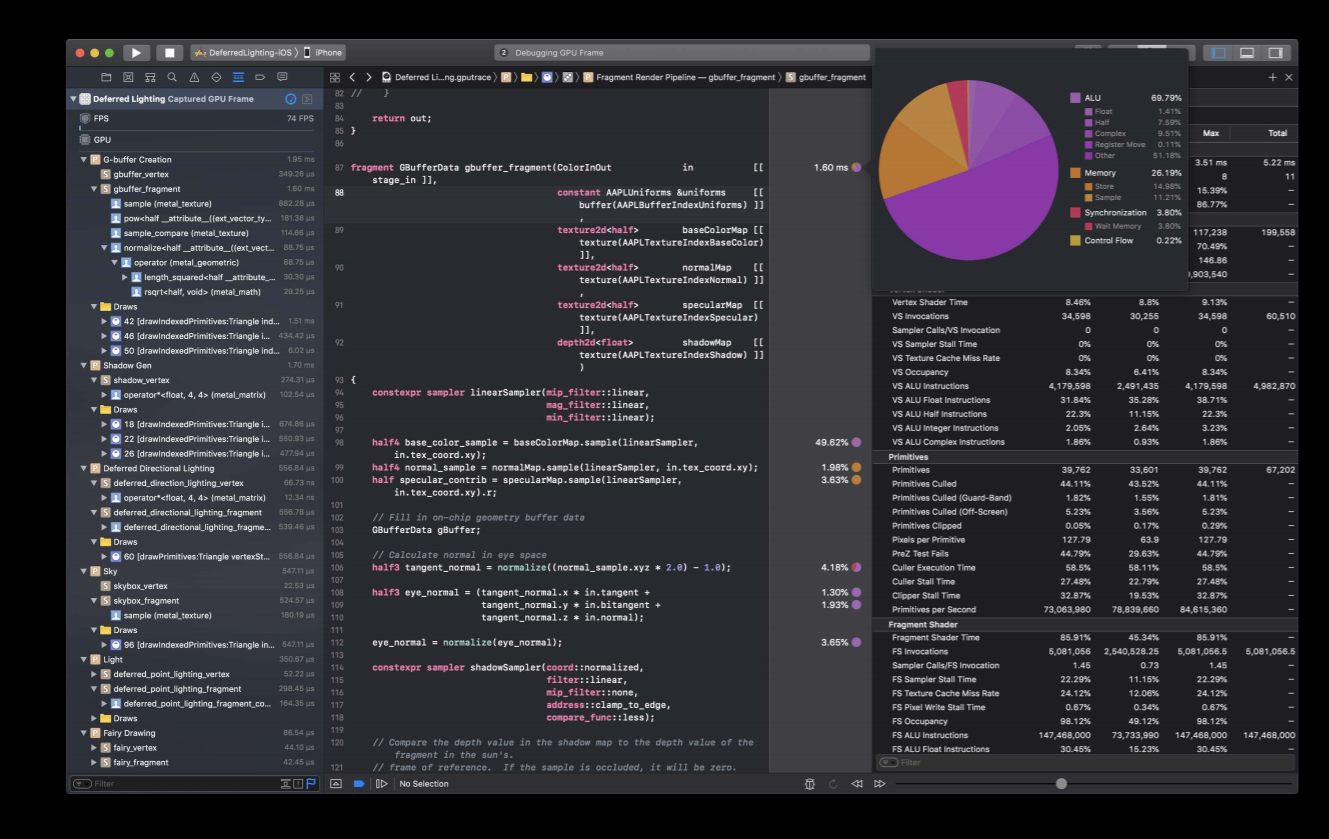
For this year we have also added shader debugging capability where you can debug your shader functions just like other functions.

We also added a shader profiler which showing a rich set of performance metrics related to your shaders.
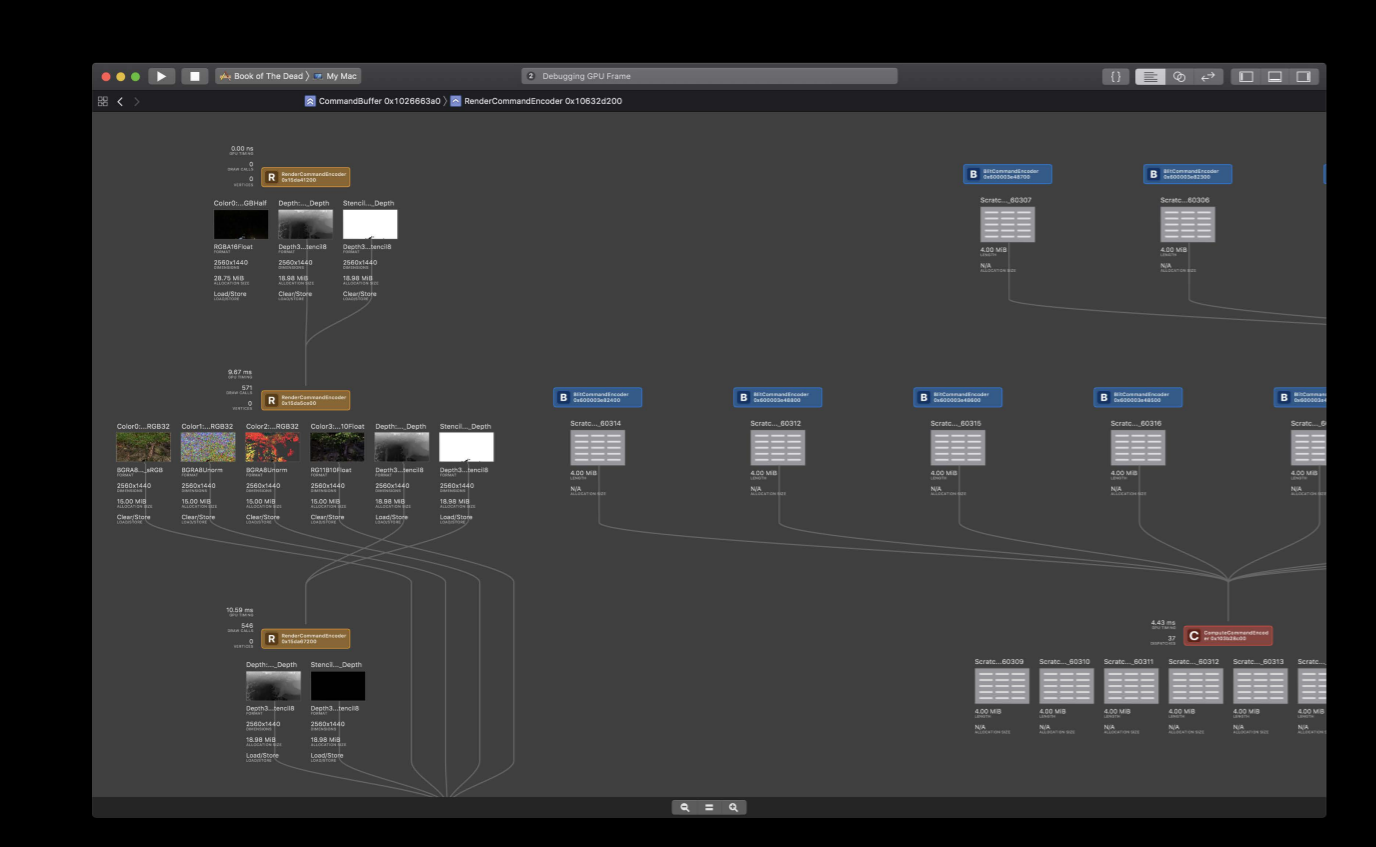
And also, a dependency viewer which allows you to evaluate dependencies between the render passes and you can potentially merge any redundant render passes to improve your application's performance.
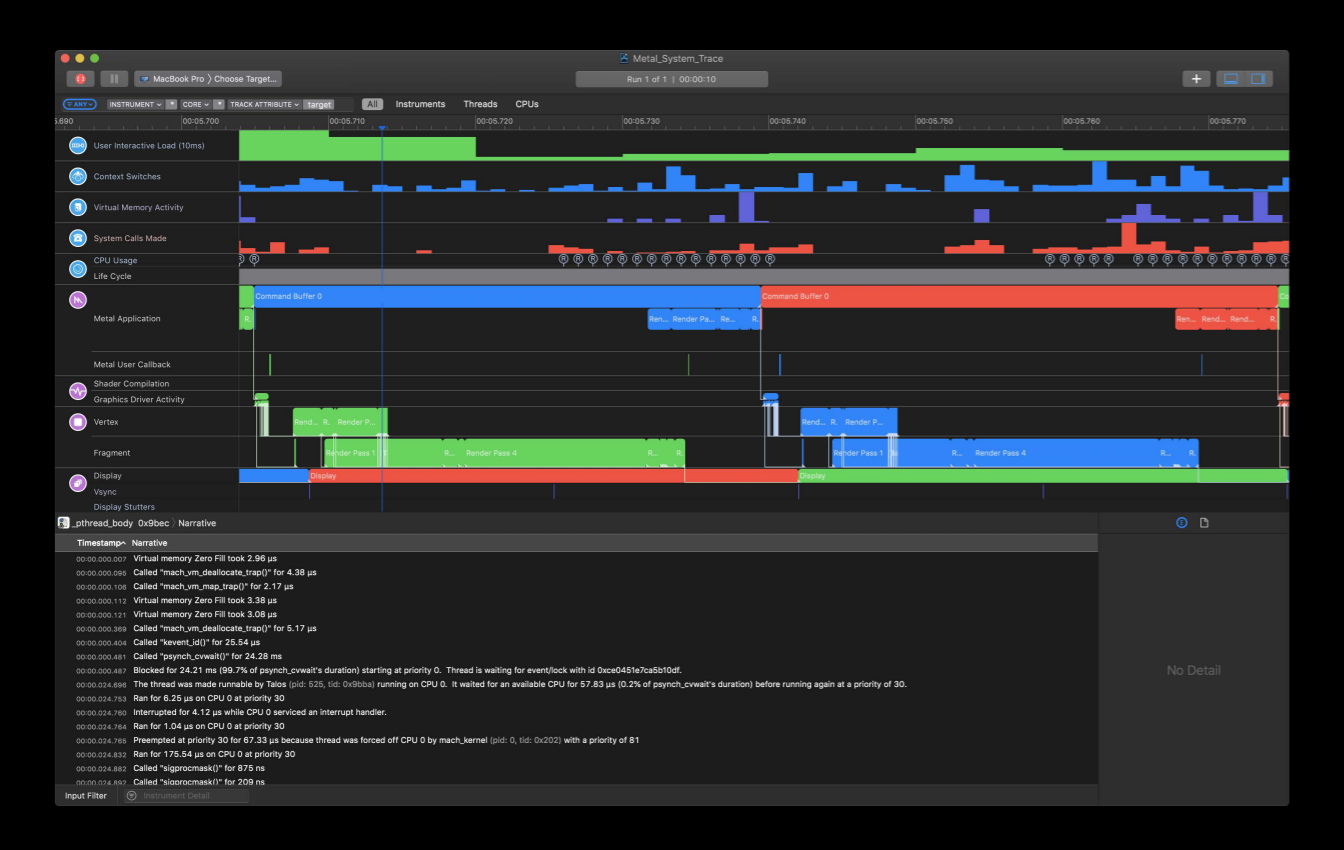
And finally, the Metal system trace tool in instruments will give you a complete view of your application's behavior and performance so we highly recommend using these tools to ease your porting effort.
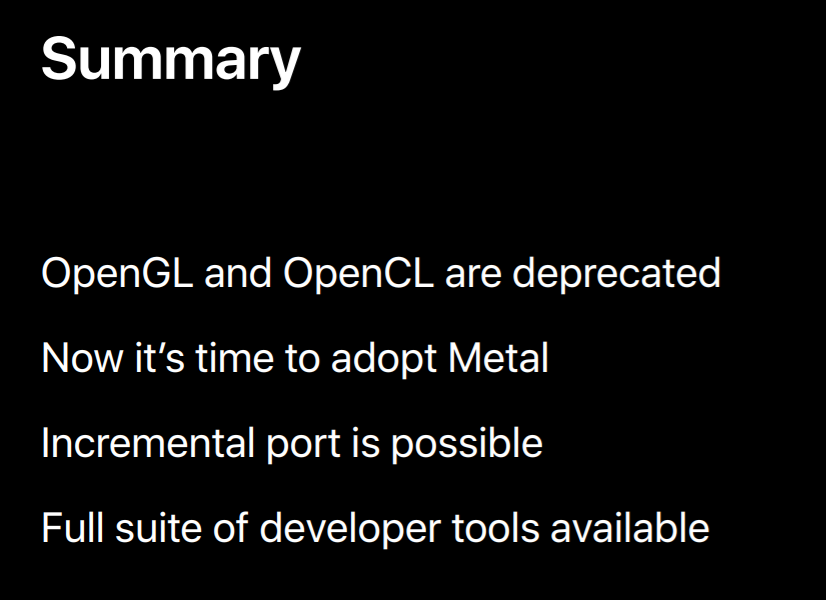
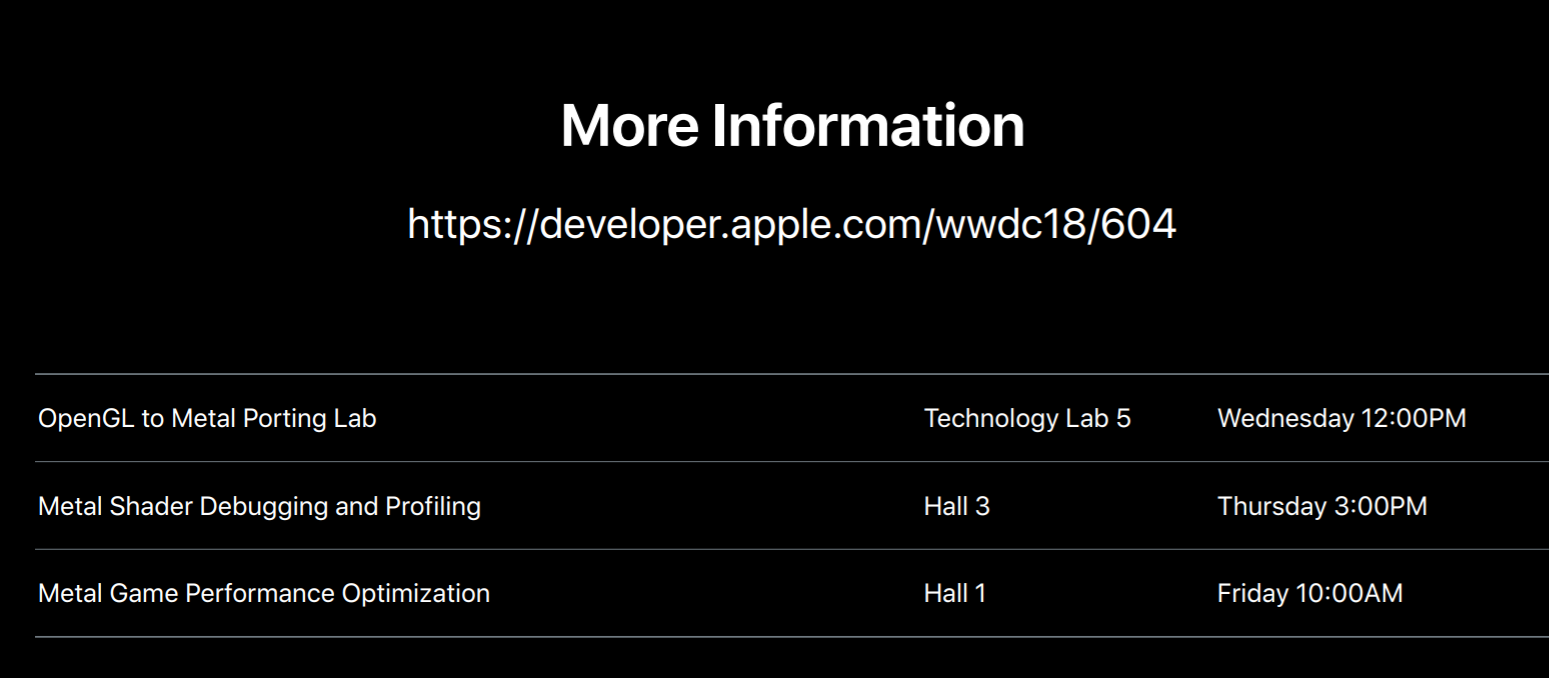
Wrapping it up, OpenGL and OpenCL are deprecated. They are still around but we are discouraging their future use. It is time to adopt Metal. We have full suite of developer tools, a lot of experience helping many teams successfully go through this effort and come out with substantially improved performance. I'm hoping the information we shared today will give you smooth porting experience. And we are very happy to talk to you about your applications and how to get them up and running with Metal. So we will be available tomorrow afternoon at OpenGL to Metal porting lab and there are many upcoming sessions on Metal. I recommend attending these sessions to learn more about how to debug and optimize your applications with Metal. With that I thank you all for attending and I hope you enjoy the rest of your week.
虽然并非全部原创,但还是希望转载请注明出处:电子设备中的画家|王烁 于 2021 年 10 月 29 日发表,原文链接(http://geekfaner.com/shineengine/WWDC2018_MetalforOpenGLDevelopers.html)